Crankshaft Rear Seal with Retainer Plate: Installation
WARNING: This page is about a different variant/trim than selected.
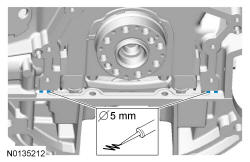
- 1.
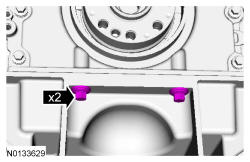
Apply 5 mm (0.196 in) beads of Motorcraft ® High Performance Engine RTV Silicone to the 2 cylinder block/oil pan joints.
NOTE:
The crankshaft rear seal retainer must be installed and the bolts tightened within 10 minutes of sealant application.
NOTE:
Failure to use Motorcraft ® High Performance Engine RTV Silicone may cause the engine oil to foam excessively and result in serious engine damage.
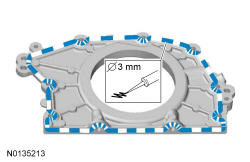
- 2.
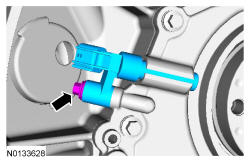
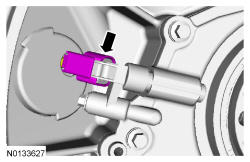
Apply a 3 mm (0.11 in) bead of Motorcraft ® High Performance Engine RTV Silicone to the sealing surface of the crankshaft rear seal retainer.
NOTE:
The crankshaft rear seal retainer must be installed and the bolts tightened within 10 minutes of sealant application.
NOTE:
Failure to use Motorcraft ® High Performance Engine RTV Silicone may cause the engine oil to foam excessively and result in serious engine damage.
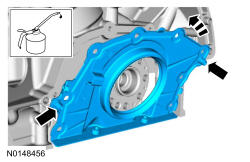
- 3.
Install the crankshaft rear seal retainer at an angle above the oil pan flange to avoid scraping off the sealer. Tilt the seal retainer up and onto the rear of the cylinder block.
NOTE:
Use the 2 oil pan bolts as handles during installation to avoid touching the sealant.
NOTE:
Lubricate the seal with clean engine oil prior to installation.
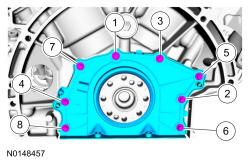
- 5.
Install the 2 oil pan to crankshaft rear seal retainer bolts.- Tighten to 10 Nm (89 lb-in) plus an additional 45 degrees.
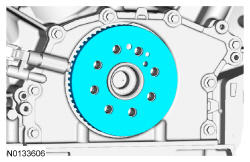
- 9.
Install the flexplate. Refer to Flexplate .