Engine Front Cover: Removal
WARNING: This page is about a different variant/trim than selected.
NOTE:
During engine repair procedures, cleanliness is extremely important. Any foreign material, including any material created while cleaning gasket surfaces that enters the oil passages, coolant passages or the oil pan, may cause engine failure.
- 1.
With the vehicle in NEUTRAL, position it on a hoist. REFER to Jacking and Lifting .
- 2.
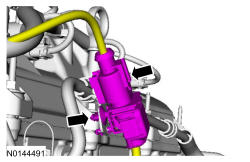
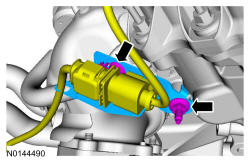
Disconnect the LH Heated Oxygen Sensor(HO2S) electrical connector.- Detach the HO2S connector retainer from the bracket.
- 3.
Remove the LH and RH valve cover. Refer to Valve Cover - LH and Valve Cover - RH .
- 5.
Remove the RH inner fender splash shield. REFER to Front End Body Panels .
- 6.
Remove the accessory drive belt and tensioner. REFER to Accessory Drive .
- 7.
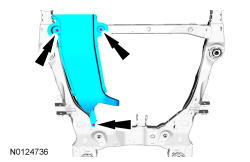
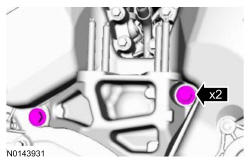
Loosen the rear roll restrictor.- 1.
Loosen the rear roll restrictor bolt.
- 2.
Remove the 2 bolts and the rear roll restrictor bracket.
- 1.

- 9.
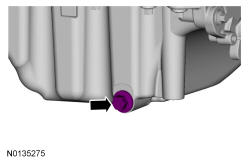
Remove the oil pan drain plug and drain the engine oil.- Install the drain plug and tighten to 27 Nm (20 lb-ft).
- 13.
Remove the engine mount. Refer to Engine Mount .
- 14.
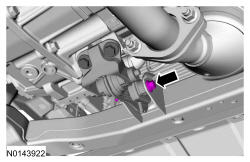
Detach the RH Heated Oxygen Sensor (HO2S) electrical connector from the bracket.- Remove the stud bolt and the bracket.
- 18.
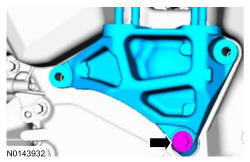
Loosen the lower engine mount bracket bolt and remove the engine mount bracket and bolt as an assembly.
- 20.
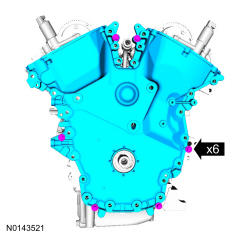
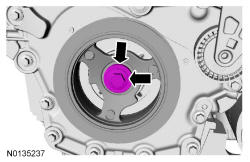
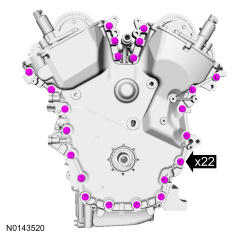
Install 6 of the engine front cover bolts (finger-tight) into the 6 threaded holes in the engine front cover.- Tighten the bolts one turn at a time in a crisscross pattern until the engine front cover-to-cylinder block seal is released.
- Remove the engine front cover.
- Tighten the bolts one turn at a time in a crisscross pattern until the engine front cover-to-cylinder block seal is released.