Air Conditioning (A/C) Compressor - 3.5L Ti-VCT: Removal
WARNING:
Before beginning any service procedure in this service information, refer to SAFETY WARNINGS
NOTE:
If installing a new A/C compressor due to an internal failure of the old unit, carry out the following procedures to remove contamination from the A/C system. Failure to remove contamination will result in poor A/C performance and/or damage to the A/C system components.
-
If A/C flushing equipment is available, carry out flushing of the A/C system prior to installing a new A/C compressor. Refer to Air Conditioning (A/C) System Flushing
- If A/C flushing equipment is not available, replace all contaminated components after a new A/C compressor has been installed.
- Install a new TXV, as directed by the A/C flushing procedure.
- Install a new receiver/drier desiccant cartridge as directed by the A/C flushing procedure.
NOTE:
Installation of a new receiver/drier desiccant cartridge is not required when installing a new A/C compressor, except when there is physical evidence of a failed A/C compressor, or damage to the receiver/drier desiccant cartridge.
- 1.
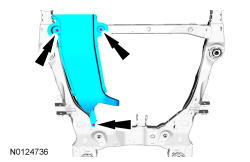
With the vehicle in NEUTRAL, position it on a hoist. REFER to Jacking and Lifting .
- 2.
If flushing of the A/C system has not been carried out, recover the refrigerant. Refer to Air Conditioning (A/C) System Recovery, Evacuation and Charging .
- 5.
Disconnect the field coil electrical connector and detach wiring harness from the A/C compressor and position aside.
- 7.
Remove the A/C compressor suction fitting nut and disconnect the fitting.- Discard the O-ring seal.