Receiver Drier - 2.0L GTDI, 3.5L GTDI: Removal
WARNING:
Before beginning any service procedure in this service information, refer to SAFETY WARNINGS
NOTE:
Care must be taken to minimize exposure of the inside of the receiver/drier to outside air. If multiple A/C system components are being removed and installed, the receiver/drier should be installed last. The receiver/drier shipping caps should not be removed until the fittings are ready to be connected. Evacuation of the A/C system must be started as soon as the receiver/drier is installed. Excessive exposure of the inside of the receiver/drier to outside air will result in moisture contamination of the receiver/drier desiccant.
NOTE:
Installation of a new receiver/drier is not required when repairing the A/C system, except when there is physical evidence of contamination from a failed A/C compressor or damage to the receiver/drier. Damage to the receiver/drier includes leaks in the receiver/drier, physical damage to the receiver/drier shell or desiccant, or moisture contamination. Moisture contamination results only from a complete loss of refrigerant and equalization of the refrigerant system pressure with atmospheric pressure for a period longer than one hour. If even a slight amount of positive refrigerant pressure is present in the system before repairs are carried out, the receiver/drier should not be replaced.
- 1.
Recover the refrigerant. REFER to Climate Control - DATC .
- 2.
With the vehicle in NEUTRAL, position it on a hoist. REFER to Jacking and Lifting , Lifting Points.
- 3.
Remove the front bumper cover. REFER to Bumpers .
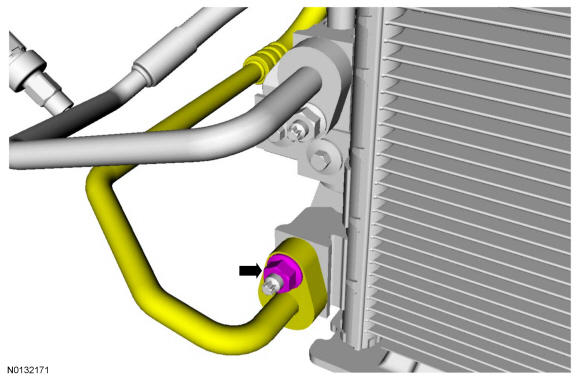
- 4.
Remove the condenser outlet fitting nut and disconnect the fitting.- Tighten to 15 Nm (133 lb-in).
- Discard the O-ring seal and gasket seal.
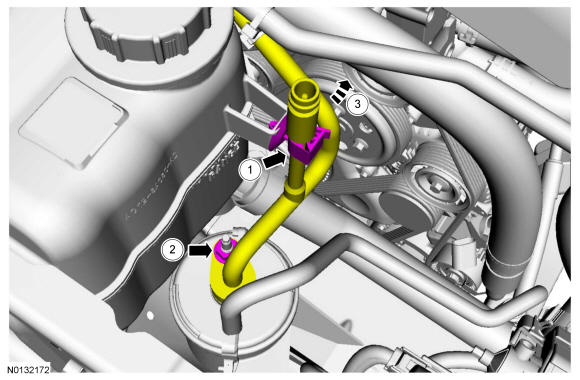
- 5.
Position aside the TXV manifold and tube assembly line.- Detach the receiver/drier outlet line clip.
- Remove the receiver/drier outlet fitting nut and disconnect the fitting.
- Tighten to 15 Nm (133 lb-in).
- Discard the O-ring seal and gasket seal.