Transmission Case Reseal
Special Tool(s)
| Slide Hammer 100-001 (T50T-100-A) | |
| Collet, 7/8 Inch to 1 Inch 303-D020 (D80L-100-R) | |
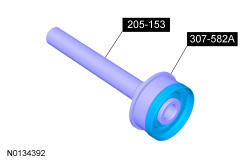
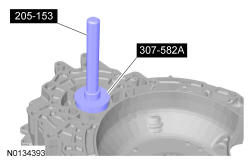
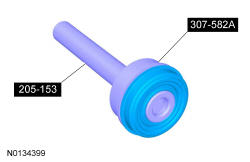
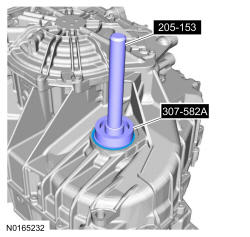
| Handle 205-153 (T80T-4000-W) | |
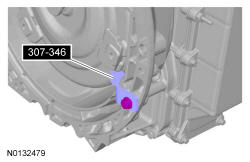
| Retainer, Torque Converter 307-346 | |
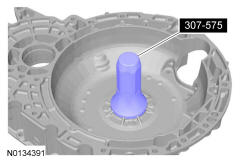
| Converter Seal Installer 307-575 | |
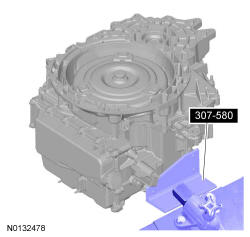
| Holding Fixture 307-580 | |
| Installer, Cover Axle Seal 307-582A | |
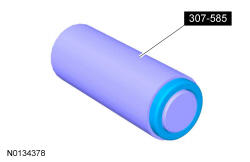
| Support Seal Installer 307-585 |


Material
| Item | Specification |
| Ultra Silicone Sealant TA-29 | - |
All Vehicles
- 1.
Remove the transmission. For AWD refer to Transmission - All Wheel Drive (AWD) . For FWD refer to Transmission - Front Wheel Drive (FWD) . For 3.5L GTDI refer to Transmission - 3.5L GTDI .
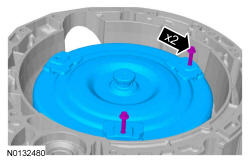
- 4.
Install two 10 mm x 1.50 bolts into the torque converter 6 to 8 turns to assist in handling the torque converter and remove the torque converter from the transmission.
NOTE:
Only thread the bolts 6 to 8 turns or do not exceed 12 mm (0.472 in) into the torque converter. If the bolts are threaded too far, damage to the torque converter clutch surface can occur causing torque converter failure.
NOTE:
The torque converter is heavy. Be careful not to drop it or damage will result.
FWD Vehicles
All Vehicles
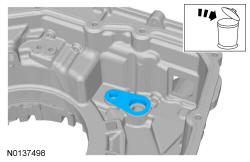
- 7.
Using a dent puller, remove and discard the torque converter hub seal from the torque converter housing.
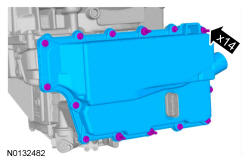
- 8.
Remove the bolts and the main control cover.
NOTE:
Note the location of the studbolts for assembly.
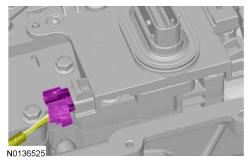
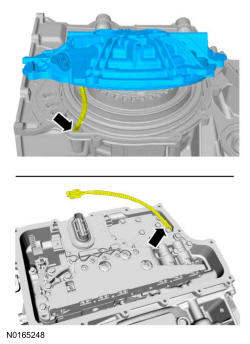
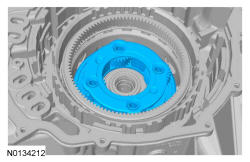
- 11.
Remove the cover assembly and carefully route the TSS sensor wiring harness and electrical connector out of the transmission case.
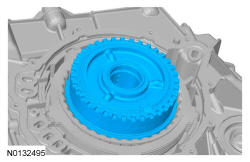
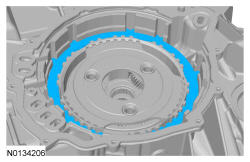
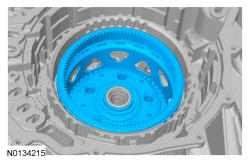
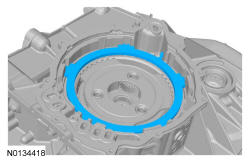
- 18.
Remove the low/reverse clutch assembly.
NOTE:
The location of the tab on the bottom pressure plate is aligned with the gap for the low OWC snap ring.
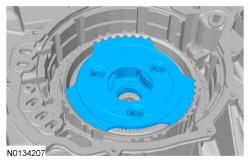
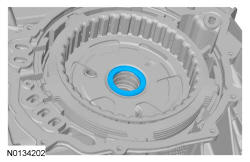
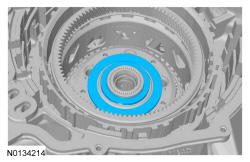
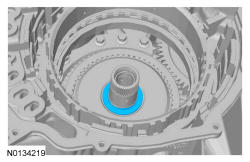
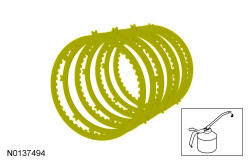
- 23.
Remove the No. 7 center sun gear and the No. 8 front/center planetary gear assembly thrust bearings.
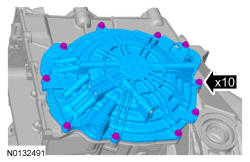
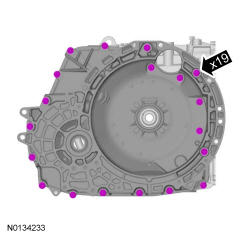
- 29.
Remove the torque converter housing bolts.
NOTE:
Note the location of the studbolts for assembly.
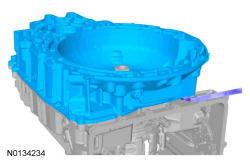
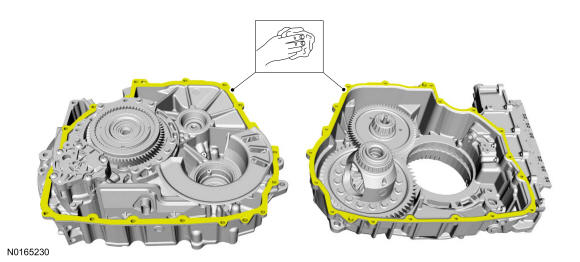
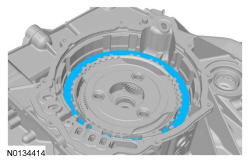
- 30.
Carefully pry the torque converter housing off the transmission case just enough to break the seal of the silicone and remove the torque converter housing from the transmission case.
NOTE:
Carefully pry on the transmission torque converter housing and the case to separate the torque converter housing from the case. Do not pry up on the silicone sealant mating surfaces, damage to the mating surfaces may occur. Carefully lift the torque converter housing off the dowel pins.
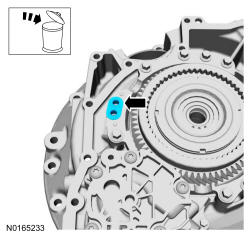
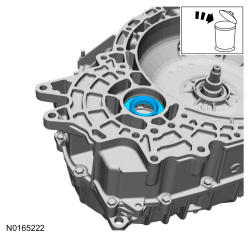
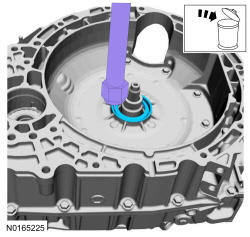
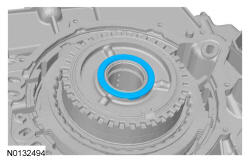
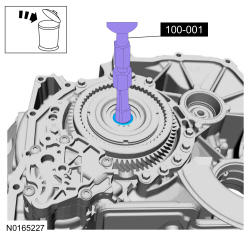
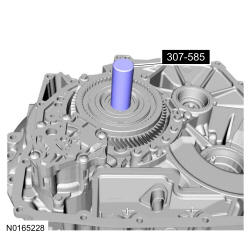
- 33.
Assemble the slide hammer, collet 7/8" to 1" and the actuating pin (Dia 3/16"). Using the tools, remove and discard the input shaft seal.
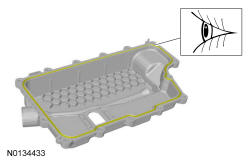
- 38.
Make sure that the mating faces are clean and free of foreign material. REFER to Engine System General Information .
NOTE:
Do not use metal scrapers, wire brushes, power abrasive discs, or other abrasive means to clean sealing surfaces. These tools cause scratches and gouges which make leak paths.
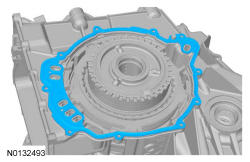
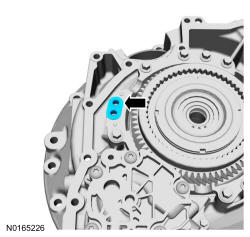
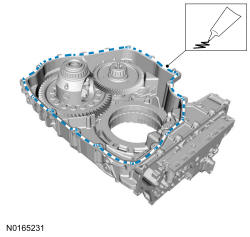
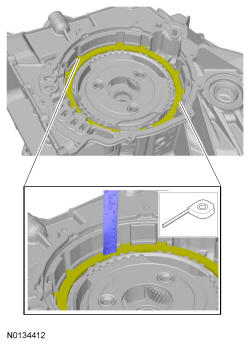
- 39.
Apply a bead of Ultra Silicone Sealant.
NOTE:
Be sure the sealing surfaces of the torque converter housing and the transmission housing are free of oil before applying silicone.
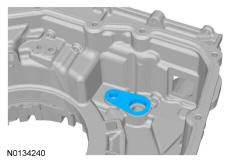
- 40.
Install the torque converter housing on top of the transmission case and install the bolts hand tight.
NOTE:
Install the 2 studbolts in the correct location as noted during disassembly.
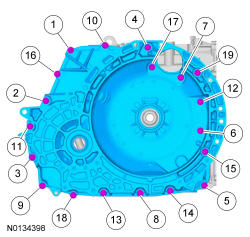
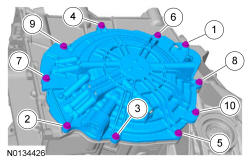
- 41.
Tighten the bolts in the sequence shown.- Tighten to 24 Nm (18 lb-ft).
NOTE:
The studbolts are 1 and 16 in the tightening sequence.
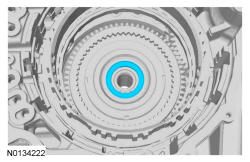
- 47.
Install the No. 8 front/center planetary gear assembly and the No. 7 center sun gear thrust bearings.
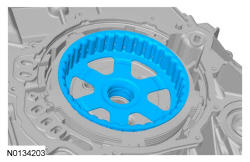
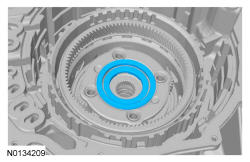
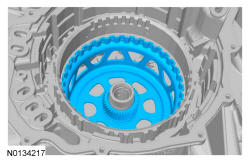
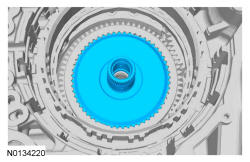
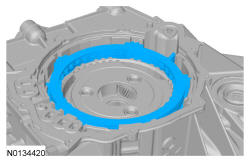
- 49.
Install the center planetary sun gear.
NOTE:
The groove on the center sun gear is installed facing up.
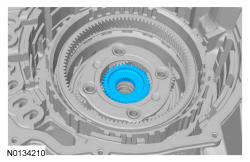
- 52.
Install the low/reverse clutch pressure plate.- 1.
Make sure the tab on the bottom of the pressure plate fits in the gap of the low OWC snap ring.
- 2.
Install the low/reverse clutch pressure plate.
- 1.
NOTE:
Failure to align the tab on the bottom of the low/reverse pressure plate with the gap in the low OWC snap ring may result in damage to the transmission.
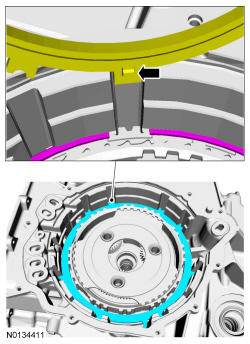
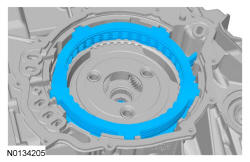
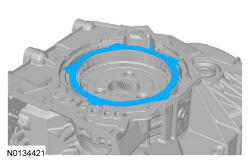
- 53.
Measure the depth of the low/reverse clutch pressure plate where the tab fits into the gap of the low OWC snap ring and directly across from it. If the pressure plate is seated correctly, the depth should be the same. If the depths are different, rotate the snap ring so that the gap fits around the tab on the pressure plate.
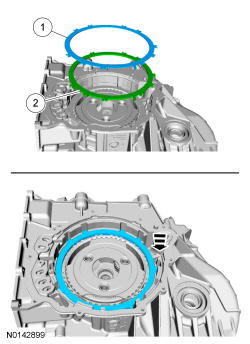
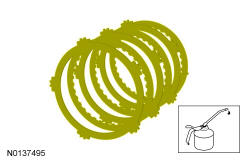
- 56.
Correctly install the low/reverse clutch wave spring and pressure plate.- 1.
Wave spring
- 2.
Pressure plate
- 1.
NOTE:
When the low/reverse clutch is correctly installed, the wave spring is on top.
- 66.
Route the TSS sensor harness through the transmission case to the valve body area and install the cover assembly.
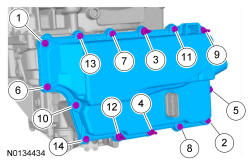
- 67.
Install the cover assembly bolts and tighten the bolts in the sequence shown.- Tighten to 12 Nm (106 lb-in).
- 70.
Install the transmission main control cover and loosely install the bolts.
NOTE:
Install the studbolts in the correct locations as noted during disassembly.
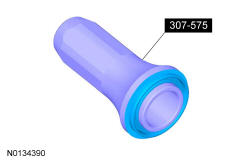
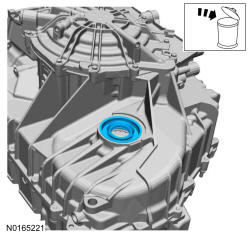
- 73.
Using the special tool and a dead blow hammer, install the torque converter hub seal in the torque converter housing.
NOTE:
Support the torque converter housing using blocks of wood, or damage to the torque converter housing may occur.
FWD Vehicles
- 75.
Using the special tools, install the new RH halfshaft seal in the torque converter housing.
NOTE:
Support the torque converter housing using blocks of wood or damage to the torque converter housing may occur.
All Vehicles
- 78.
Install two 10 mm x 1.50 bolts into the torque converter 6 to 8 turns to assist in handling the torque converter and install the torque converter in the transmission.
NOTE:
Only thread the bolts 6 to 8 turns or do not exceed 12 mm (0.472 in) in the torque converter. If the bolts are threaded too far, damage to the torque converter clutch surface can occur, causing torque converter failure.
- 80.
Install the transmission. For AWD refer to Transmission - All Wheel Drive (AWD) . For FWD refer to Transmission - Front Wheel Drive (FWD) . For 3.5L GTDI refer to Transmission - 3.5L GTDI .