Removal And Installation: Solenoids: Installation
WARNING: This page is about a different variant/trim than selected.
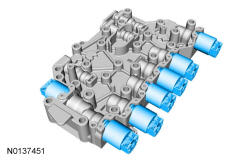
- 1.
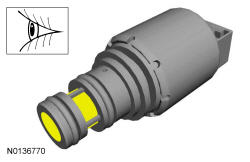
Inspect the solenoid(s) for damage. Inspect the solenoid screens for debris that may restrict fluid flow through the screen.
- 2.
If a new solenoid is not being installed, install the solenoid(s) into the bore from which it was removed.
NOTE:
The solenoids are calibrated from the factory and are not all the same. Failure to install the solenoids in the ports they were originally in can result in damage to the transmission or a harsh shift.
- 3.
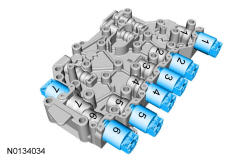
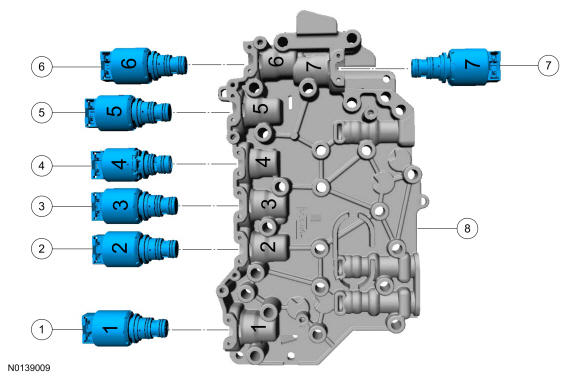
If installing a new VFS, determine the base part number of the solenoid(s). The TCC solenoid, SSA and SSC are all normally low pressure solenoids. The LPC solenoid, SSB and SSD are all normally high pressure solenoids. The SSE is not a VFS, it is an ON/OFF solenoid.Item Part Number Description 1 7G383 LPC solenoid (normally high) 2 7G136 SSC solenoid (normally low) 3 7G136 TCC (normally low) 4 7G484 SSE (normally closed [OFF]) 5 7G136 SSA (normally low) 6 7G383 SSB (normally high) 7 7G383 SSD solenoid (normally high) 8 7G391 Solenoid body
- 4.
If installing new solenoids, note the color of the plastic nozzle and the large O-ring. High pressure solenoids, such as the LPC solenoid, SSB and SSD, have black plastic nozzles and orange O-rings. Low pressure solenoids, such as the TCC solenoid, SSA and SSC, have brown plastic nozzles and green O-rings. The solenoids can only be replaced with the same color solenoid.
- 5.
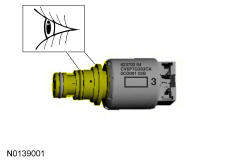
Determine the part number suffix by checking the solenoid service band number etched on the side of the solenoid. The band number is next to the two-dimensional matrix barcode on the side of the solenoid and will be a 1, 2, 3, 4 or 5. Determine the part number suffix and match the new solenoid base part number and suffix with the old solenoid.Solenoid Band Number Part Number Suffix 1 B 2 C 3 D 4 E 5 F


- 8.
Install the solenoid body leadframe. Refer to Solenoid Body Leadframe .