Halfshaft - LH: Installation
Vehicles equipped with 6F35
- 1.
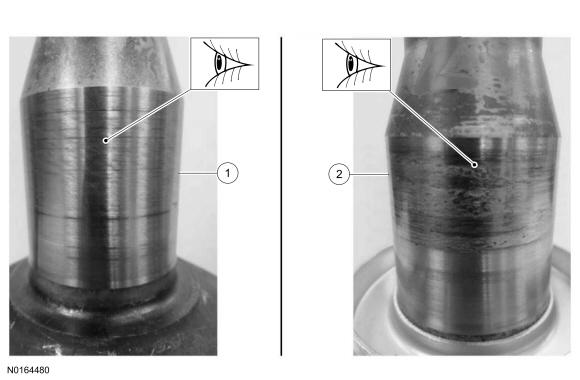
Inspect the LH halfshaft journal. If there is metal transfer on the journal from the transmission case bushing, replace the LH halfshaft.Item Part Number Description 1 - Halfshaft journal with normal wear. 2 - Halfshaft journal with metal transfer.
- 2.
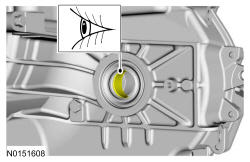
Inspect the LH transaxle case bushing. If the surface shows signs of excessive wear or damage, replace the transaxle case bushing. Refer to REFER to Automatic Transmission - 6F50/6F55 .
All
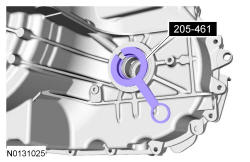
- 3.
Install a new LH halfshaft seal. If equipped with a 6F35 transmission refer to REFER to Automatic Transmission - 6F35 , If equipped with a 6F50/6F55 transmission REFER to Automatic Transmission - 6F50/6F55 .
- 4.
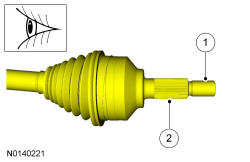
Inspect the inboard halfshaft hub surfaces for wear or damage and install a new halfshaft, if necessary.
- 5.
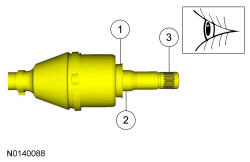
Inspect the outboard halfshaft hub surfaces for wear or damage and install a new halfshaft, if necessary.
- 6.NOTE: The circlips are unique in size and shape for each shaft. Make sure to use the specified circlip for the application or vehicle damage may occur.
Install the correct new circlip from the side on the inboard stub shaft.

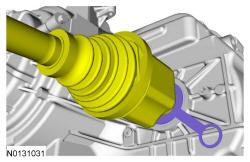
- 8.NOTE: The sharp edges on the halfshaft splines can slice or puncture the oil seal. Use care when inserting the halfshaft into the transaxle or damage to the seal may occur.
Push the halfshaft into the transaxle so the splines go through the seal protector. Remove the seal protector.
- 9.NOTE: After insertion, pull the halfshaft inner end to make sure the circlip is locked.
Push the stub shaft into the transmission so the circlip locks into the differential side gear.
- 12.
Position the lower ball joint into the wheel knuckle and install the new nut.- Tighten to 200 Nm (148 lb-ft).
- 13.NOTE: Do not tighten the wheel hub nut with the vehicle on the ground. The nut must be tightened to specification before the vehicle is lowered onto the wheels. Wheel bearing damage will occur if the wheel bearing is loaded with the weight of the vehicle applied.NOTE: Apply the brake to keep the halfshaft from rotating.
Using the previously removed wheel hub nut, seat the halfshaft.
- Tighten to 350 Nm (258 lb-ft).
- Remove and discard the wheel hub nut.
- 14.NOTE: The wheel hub nut contains a one time locking chemical that is activated by the heat created when it is tightened. Install and tighten the new wheel hub nut to specification within 5 minutes of starting it on the threads. Always install a new wheel hub nut after loosening or when not tightened within the specified time or damage to the components can occur.NOTE: Apply the brake to keep the halfshaft from rotating.
Install a new wheel hub nut.
- Tighten to 350 Nm (258 lb-ft).
- 15.
Install the front wheel and tire. REFER to Wheels and Tires .
- 16.
Check the transmission fluid level and add clean transmission fluid as necessary. REFER to Automatic Transmission - 6F35 .