Engine Front Cover: Removal
WARNING:
Before beginning any service procedure in this article, refer to Safety Warnings in SERVICE INFORMATION
.
NOTE:
Place clean, lint-free shop towels over exposed engine cavities. Carefully remove the towels so foreign material is not dropped into the engine. Any foreign material (including any material created while cleaning gasket surfaces) that enters the oil passages or the oil pan, may cause engine failure.
- 1.
With the vehicle in NEUTRAL, position it on a hoist. REFER to Jacking and Lifting .
- 2.
Recover the A/C system. REFER to Climate Control EMTC .
- 3.
Release the fuel system pressure. REFER to Fuel System General Information .
- 4.
Disconnect the battery ground cable. REFER to Battery, Mounting and Cables .
- 5.
Remove the RH fender splash shield. REFER to Front End Body Panels .
- 7.
Drain the cooling system. REFER to Engine Cooling .
- 8.
Remove the crankshaft front seal. Refer to Crankshaft Front Seal .
- 9.
Remove the accessory drive belt tensioner. REFER to Accessory Drive .
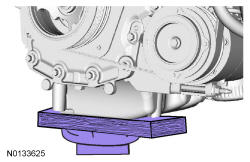
- 10.
Remove the drain plug and drain the engine oil.- Install the oil drain plug and tighten to 27 Nm (20 lb-ft).
- 11.
Remove degas bottle. REFER to Engine Cooling .

- 14.
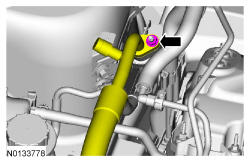
Disconnect the fuel supply tube from the fuel rail supply tube. REFER to Fuel System General Information .- Remove the fuel tube-to-engine front cover bolt.
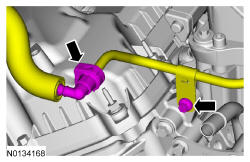
- 15.
Remove the LH and RH valve covers. Refer to Valve Cover - LH and Refer to Valve Cover - RH .

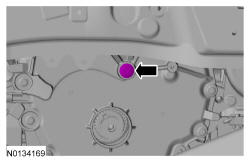
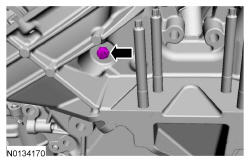
- 19.
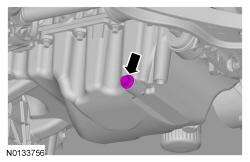
Remove the lower M10 engine front cover bolt.
NOTE:
It may be necessary to use the floor jack and lower the engine slightly to gain enough access to remove the bolt.
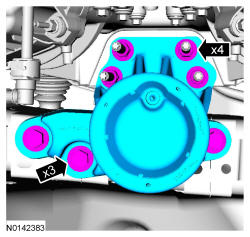
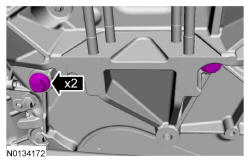
- 21.
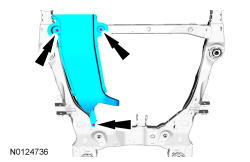
Remove the 2 M10 engine front cover bolts.
NOTE:
It may be necessary to use the floor jack and raise the engine slightly to gain enough access to remove the bolts.
- 24.
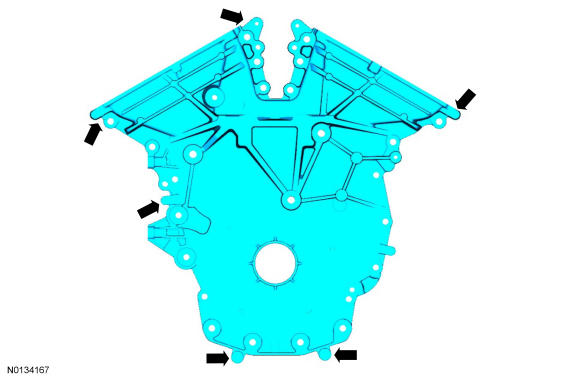
Using a suitable pry tool, locate the 7 pry pads shown and pry the engine front cover loose and remove.