Oil Pump: Installation
NOTE:
During engine repair procedures, cleanliness is extremely important. Any foreign material, including any material created while cleaning gasket surfaces, that enters the oil passages, coolant passages or the oil pan may cause engine failure.
- 2.
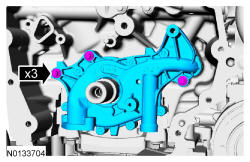
Using a new O-ring seal, install the oil pump screen and pickup tube and the 2 bolts.- Tighten to 10 Nm (89 lb-in).
- 4.
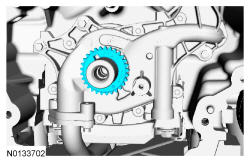
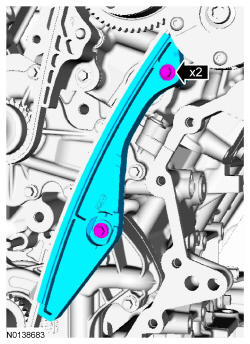
Position the primary timing chain with the colored links aligned with the timing marks on the VCT assemblies and the crankshaft sprocket.
NOTE:
It may be necessary to rotate the camshafts slightly, to align the timing marks.
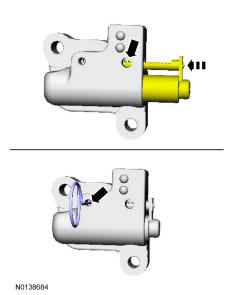
- 7.
Reset the primary timing chain tensioner.- Release the ratchet detent.
- Using a soft-jawed vise, compress the ratchet plunger.
- Align the hole in the ratchet plunger with the hole in the tensioner housing.
- Install a suitable lockpin.
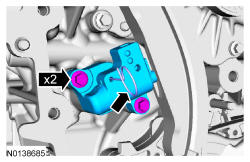
- 8.
Install the primary tensioner and the 2 bolts.- Tighten to 10 Nm (89 lb-in).
- Remove the lockpin.
NOTE:
It may be necessary to rotate the camshafts slightly to remove slack from the timing chain to install the tensioner.
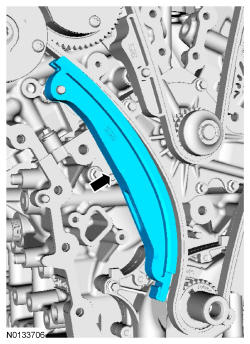
- 9.
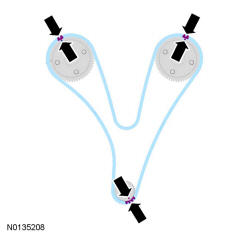
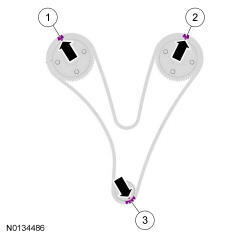
As a post-check, verify correct alignment of all timing marks.- There are 48 links in between the RH intake VCT assembly colored link (1) and the LH intake VCT assembly colored link (2).
- There are 35 links in between LH intake VCT assembly colored link (2) and the 2 crankshaft sprocket links (3).
- 11.
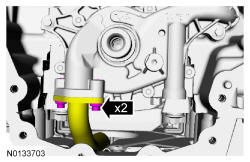
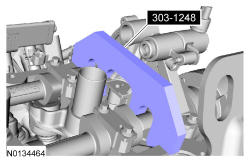
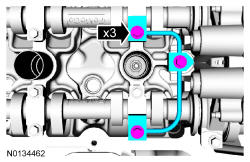
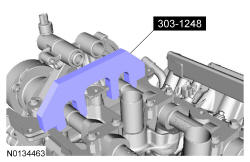
Install the RH valve train oil tube and the 3 bolts and tighten in 2 stages.- Stage 1: Tighten to 8 Nm (71 lb-in).
- Stage 2: Tighten an additional 45 degrees.
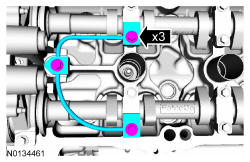
- 13.
Install the Left Hand (LH) valve train oil tube and the 3 bolts and tighten in 2 stages.- Stage 1: Tighten to 8 Nm (71 lb-in).
- Stage 2: Tighten an additional 45 degrees.
- 14.
Install the engine front cover. Refer to Engine Front Cover .