Timing Drive Components: Removal
NOTE:
During engine repair procedures, cleanliness is extremely important. Any foreign material, including any material created while cleaning gasket surfaces that enters the oil passages, coolant passages or the oil pan, can cause engine failure.
- 1.
Remove the engine front cover. Refer to Engine Front Cover .

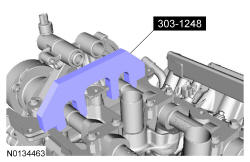
- 4.
Install the Camshaft Holding Tool onto the flats of the LH camshafts.
NOTE:
The Camshaft Holding Tool will hold the camshafts in the TDC position.
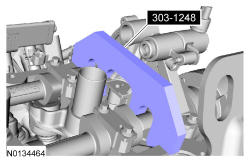
- 6.
Install the Camshaft Holding Tool onto the flats of the RH camshafts.
NOTE:
The Camshaft Holding Tool will hold the camshafts in the TDC position.
- 7.
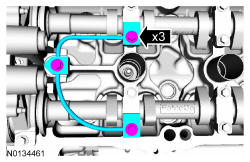
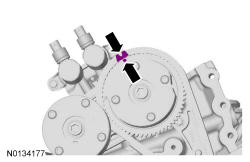
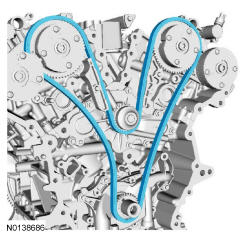
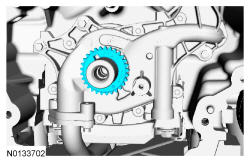
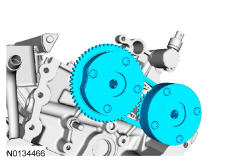
Mark the timing chain link that aligns with the timing mark on the LH intake VCT assembly as shown.
NOTE:
The following 3 steps are for primary timing chains that the colored links are not visible.
- 8.
Mark the timing chain link that aligns with the timing mark on the RH intake VCT assembly as shown.
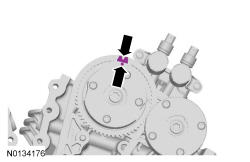
- 9.
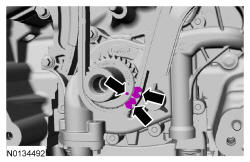
Mark the 2 timing chain links that align with the timing mark on the crankshaft sprocket as shown.
NOTE:
The crankshaft sprocket timing mark should be between the 2 colored links.
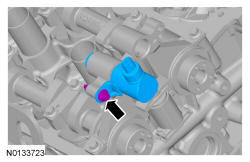
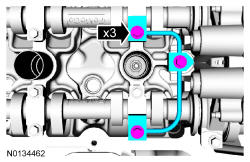
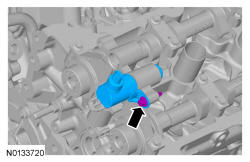
- 13.
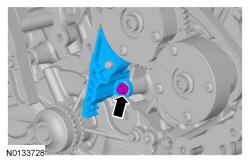
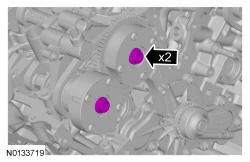
Remove the bolt and the LH intake VCT oil control solenoid.
NOTE:
Keep the VCT oil control solenoid clean of dirt and debris.
NOTE:
A slight twisting motion will aid in the removal of the VCT oil control solenoid.
NOTE:
Removal of the VCT oil control solenoid will aid in the removal of the primary timing chain.
- 14.
Remove the bolt and the RH intake VCT oil control solenoid.
NOTE:
Keep the VCT oil control solenoid clean of dirt and debris.
NOTE:
A slight twisting motion will aid in the removal of the VCT oil control solenoid.
NOTE:
Removal of the VCT oil control solenoid will aid in the removal of the primary timing chain.
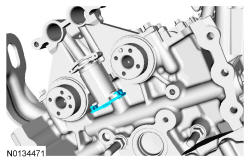
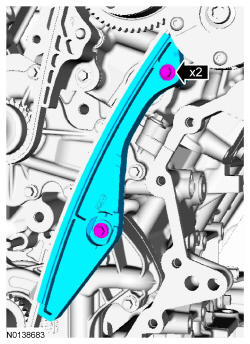
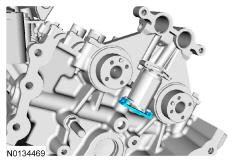
- 17.
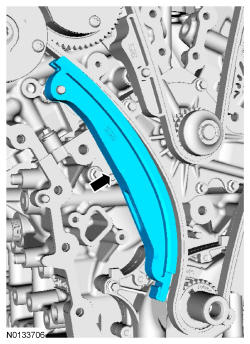
Remove the bolt and the upper LH primary timing chain guide
NOTE:
Do not use power tools to remove the bolt or damage to the LH primary timing chain guide may occur.
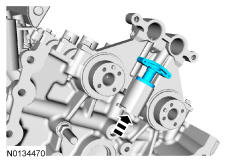
- 18.
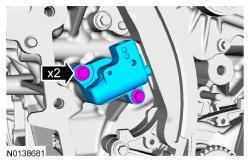
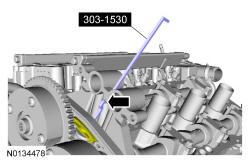
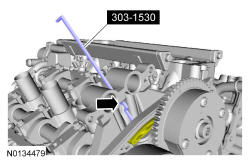
Compress the LH secondary timing chain tensioner and install the Secondary Chain Hold Down in the hole on the rear of the secondary timing chain tensioner guide and let it hold against the mega cap to retain the tensioner in the collapsed position.
NOTE:
The Secondary Chain Hold Down is inserted through a hole in the top of the mega cap.
NOTE:
The 2 VCT oil control solenoids are removed for clarity.
- 21.
Compress the RH secondary timing chain tensioner and install the Secondary Chain Hold Down in the hole on the rear of the secondary timing chain tensioner guide and let it hold against the mega cap to retain the tensioner in the collapsed position.
NOTE:
The Secondary Chain Hold Down is inserted through a hole in the top of the mega cap.
NOTE:
The 2 VCT oil control solenoids are removed for clarity.

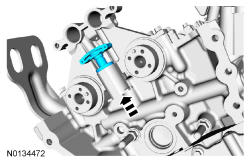
- 24.
Remove the bolt and the RH primary timing chain guide.
NOTE:
Do not use power tools to remove the bolt or damage to the RH primary timing chain guide may occur.
- 25.
For replacement of the secondary timing chain tensioner, perform the following 6 steps.
NOTE:
The following steps are only for the replacement of the secondary timing chain tensioners. Do not reuse the secondary timing chain tensioners if removed, or damage to the engine may occur.
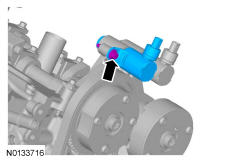
- 26.
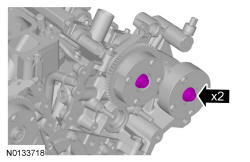
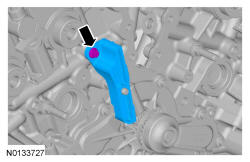
Remove the LH exhaust VCT oil control solenoid.
NOTE:
Keep the VCT oil control solenoid clean of dirt and debris.
NOTE:
A slight twisting motion will aid in the removal of the VCT oil control solenoid.
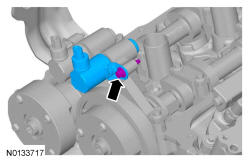
- 29.
Remove the RH exhaust VCT oil control solenoid.
NOTE:
Keep the VCT oil control solenoid clean of dirt and debris.
NOTE:
A slight twisting motion will aid in the removal of the VCT oil control solenoid.