Removal And Installation: Camshafts: Installation
WARNING: This page is about a different variant/trim than selected.
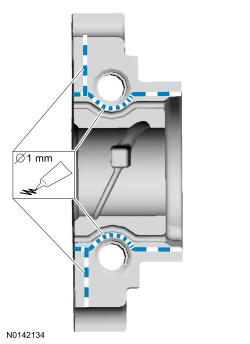
- 1.
Apply 1 mm (0.039 in) beads of Gasket Maker to the exhaust rear camshaft bearing cap as shown.
NOTE:
Do not allow Gasket Maker to enter the camshaft bearing journal. If Gasket Maker is applied to the camshaft bearing journal, the journal and sealing area must be cleaned with Motorcraft ® Metal Surface Prep.
NOTE:
The exhaust camshaft rear bearing cap must be secured within 10 minutes of Gasket Maker application. If the bearing cap is not secured within 10 minutes, the sealant must be removed and the sealing area cleaned with Motorcraft ® Metal Surface Prep.
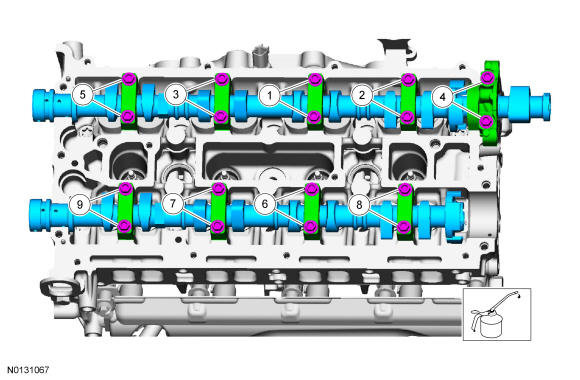
- 2.
Install the camshafts and bearing caps in their original location and orientation.- Tighten the camshaft bearing caps 2 turns at a time in the sequence shown in 2 stages:
- Stage 1: Tighten to 7 Nm (62 lb-in).
- Stage 2: Tighten to 16 Nm (142 lb-in).
- Tighten the camshaft bearing caps 2 turns at a time in the sequence shown in 2 stages:
NOTE:
Lubricate the camshaft journals and camshaft bearing caps with clean engine oil.
NOTE:
Wipe off any excess sealer from the fuel injection pump housing sealing surface of the cylinder head and rear camshaft cap.
NOTE:
Failure to follow the camshaft tightening procedure can result in damage to the camshafts.
NOTE:
Install the camshafts with the alignment slots in the camshafts lined up so the 303-465 T94P-6256-CH can be installed without rotating the camshafts. Make sure the lobes on the No. 1 cylinder are in the same position as noted in the removal procedure. Rotating the camshafts when the timing chain is removed, or installing the camshafts 180 degrees out of position can cause severe damage to the valves and pistons.
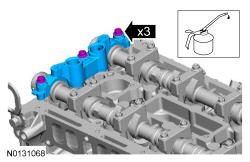
- 3.
Install the front camshaft bearing cap and the 3 bolts.- Tighten in the sequence shown in 2 stages:
- Stage 1: Tighten to 7 Nm (62 lb-in).
- Stage 2: Tighten to 16 Nm (142 lb-in).
- Tighten in the sequence shown in 2 stages:
NOTE:
Lubricate the camshaft journals and the front camshaft bearing cap with clean engine oil.
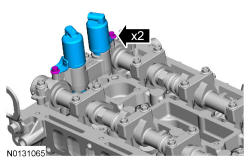
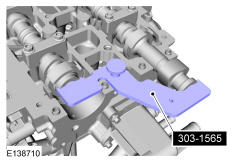
- 5.
Install the 303-1565 into the rear of both of the camshaft slots as shown.- Tighten the retainer.
NOTE:
The 303-1565 is for camshaft alignment only. Using this tool to prevent engine rotation can result in engine damage.
- 6.
Install the camshaft phaser and sprockets. Refer to Camshaft Phaser and Sprocket .