Catalytic Converter - RH Manifold: Installation
NOTE:
Do not excessively bend, twist or allow the exhaust to hang from the flexible joint or damage to the exhaust system may occur.
NOTE:
Exhaust fasteners are of a torque prevailing design. Use only new fasteners with the same part number as the original. Torque values must be used as specified during reassembly to make sure of correct retention of exhaust components.
All vehicles
- 1.
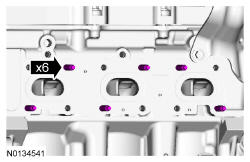
Install 6 new RH catalytic converter manifold-to-cylinder head studs.- 1.
Tighten to 12 Nm (106 lb-in).
- 1.
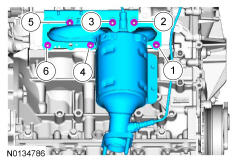
- 2.NOTE: Failure to tighten the RH catalytic converter manifold-to-cylinder head nuts to specification a second time will cause the RH catalytic converter manifold to develop an exhaust leak.
Using a new gasket, install the RH catalytic converter manifold and 6 new nuts. Tighten in 2 stages in the sequence shown in illustration.
- 1.
Stage 1: Tighten to 25 Nm (18 lb-ft).
- 2.
Stage 2: Tighten to 25 Nm (18 lb-ft).
- 1.
All vehicles
- 4.
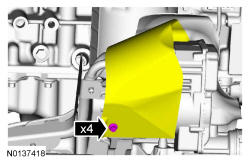
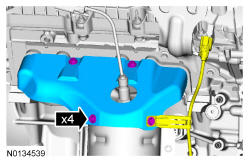
Install the RH catalytic converter manifold heat shield, CMS wiring harness bracket and the 4 bolts.- 1.
Tighten to 10 Nm (89 lb-in).
- 1.
- 5.
Install the exhaust Y-pipe. Refer to Exhaust Y-Pipe - 3.5L Ti-VCT .
- 7.
Install the RH HO2S sensor. REFER to Electronic Engine Controls - 3.5L Ti-VCT