Center Console Rear Cup Holder Detached And/Or Center Console Rear Cup Holder Cover Panel Detached (19-2002)
WARNING: This page is about the Explorer Base, 2.0L Eng VIN 9, which is a different variant/trim than selected.
Publication date: 2019-02-15Reference number: 19-2002
CENTER CONSOLE REAR CUP HOLDER DETACHED AND/OR CENTER CONSOLE REAR CUP HOLDER COVER PANEL DETACHED
TECHNICAL SERVICE BULLETIN
Reference Number(s): 19-2002, Date of Issue:
February 15, 2019
Superceded Bulletin(s): 17-2249, Date of Issue:
February 15, 2019
| FORD: | 2011-2019 Explorer; 2013-2019 Police Interceptor Utility |
SUMMARY
This article supersedes TSB 17-2249 to update the Parts List and Service Procedure.
ISSUE
Some 2011-2019 Explorer and 2013-2019 Police Interceptor Utility vehicles may exhibit a detached center console rear cup holder and/or the cover panel detached from the rear cup holder.
ACTION
Follow the Service Procedure steps to correct the condition.
PARTS
PARTS INFORMATION
| Part Number | Description | Quantity |
|---|---|---|
| BB5Z-7813562-BA | Cup Holder (2011-2015) | 1 |
| GB5Z-7813562-BA | Cup Holder (2016-2019) | 1 |
| JB5Z-78060A98-A | Cup Holder Spring | 1 |
Warranty Status: Eligible Under Provisions Of New Vehicle Limited Warranty Coverage Warranty/ESP coverage limits/policies/prior approvals are not altered by a TSB. Warranty/ESP coverage limits are determined by the identified causal part and verified using the OASIS part coverage tool.
LABOR TIMES
LABOR TIMES
| Description | Operation No. | Time |
|---|---|---|
| 2011-2019 Explorer: Inspect And Repair Or Replace The Rear Center Cup Holder Assembly (Do Not Use With Any Other Labor Operations) | 192002A | 0.3 Hrs. |
REPAIR/CLAIM CODING
REPAIR/CLAIM CODING
| Causal Part: | 7813562 |
| Condition Code: | 33 |
TOOL LIST
TOOL LIST
| Drive | Tool Name |
|---|---|
| 1/4" | Ratchet |
| 1/4" | 4" Extension |
| 1/4" | T-15 Torx® |
| Small Trim Tool | |
| Flashlight |
SERVICE PROCEDURE
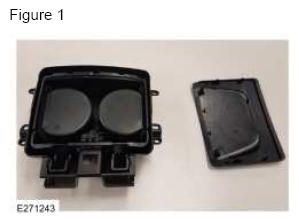
- Is the cup holder cover panel detached from the cup holder? (Figure 1)
- Yes - proceed to Step 2.
- No - proceed to Step 5.
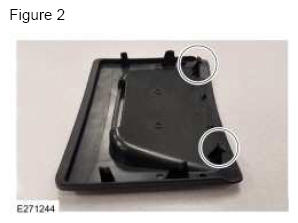
- Inspect the mounting tabs on the cup holder cover panel for damage. Is damage present? (Figure 2)
- Yes - replace the cup holder assembly. Refer to Workshop Manual (WSM), Section 412-02, Removal and Installation > Rear Heating, Ventilation and Air Conditioning (RHVAC) Control Module.
- No - proceed to Step 3.
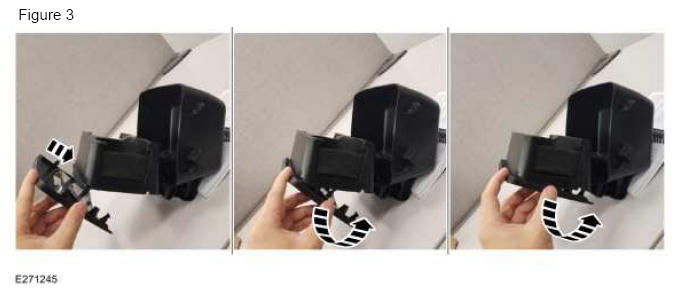
- Slide the rear portion of the door outer edge onto the lip of the cup holder and rotate the door until the mounting tabs snap into place. (Figure 3)
- Is the cup holder detached from the center console?
- Yes - proceed to Step 5.
- No - repair is complete.
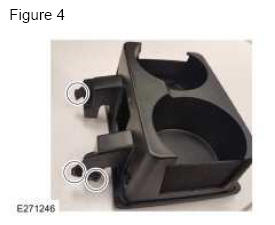
- Inspect the cup holder pivot posts and pivot stops for damage. Is any damage present? (Figure 4)
- Yes - replace the cup holder assembly. Refer to WSM, Section 412-02. Repair is complete.
- No - proceed to Step 6.
- Inspect the cup holder pivot posts and stops for a missing spring. Is the spring missing?
- Yes - replace the spring. Proceed to Step 7.
- No - proceed to Step 7.
- Replace the missing cup holder spring.
- Remove the console rear trim panel and the 4 retaining screws to remove the cup holder bin from the trim panel. Refer to WSM, Section 412-02, Removal and Installation > Rear Heating, Ventilation and Air Conditioning (RHVAC) Control Module.
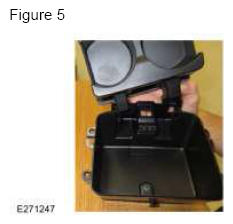
- Insert one side of the cup holder pivot post into the pivot hole in the cup holder bin. (Figure 5)
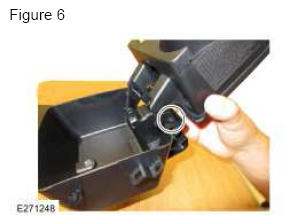
- Gently apply outward pressure on the opposite side of the bin and slide the other pivot post into the pivot hole. (Figure 6)
- Verify the cup holder rotates but the pivot stops are not in the guide. (Figure 7)
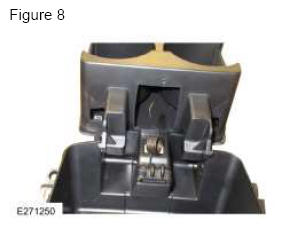
- Install the cup holder bin side of the spring. (Figure 8)
- Insert the hook on the other side of the spring into the hole in the cup holder. (Figure 9)
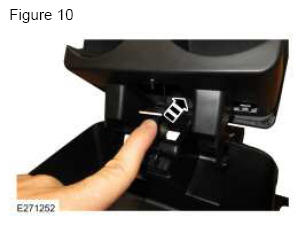
- Push the coil of the spring inward while rotating the cup holder to the closed position until the pivot stop snaps into the guide. (Figure 10)
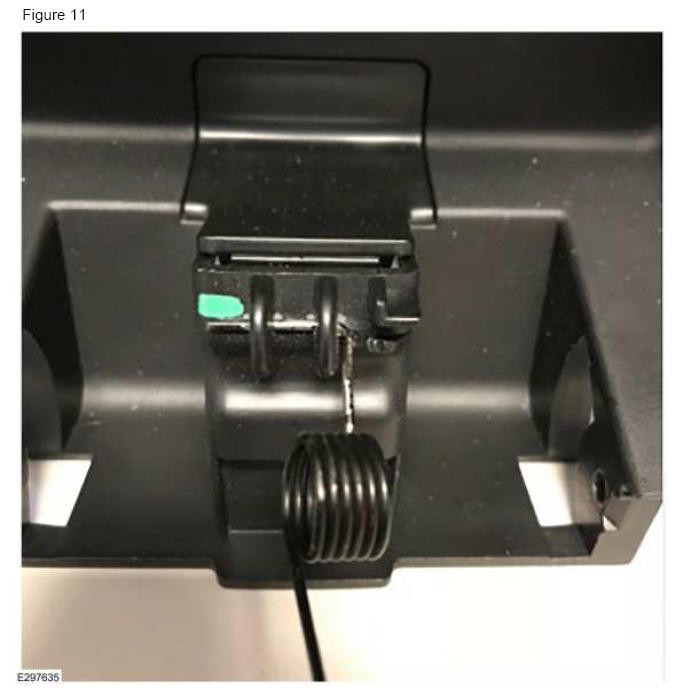
- Verify the operation of the cup holder and the spring is still engaged. (Figure 11)
- To install, reverse the removal procedure. Refer to WSM, Section 412-02, Removal and Installation > Rear Heating, Ventilation and Air Conditioning (RHVAC) Control Module.