Fuel Tank: Removal
All Vehicles
WARNING:
Do not smoke, carry lighted tobacco or have an open flame of any type when working on or near any fuel-related component. Highly flammable mixtures are always present and may be ignited. Failure to follow these instructions may result in serious personal injury.
WARNING:
Do not carry personal electronic devices such as cell phones, pagers or audio equipment of any type when working on or near any fuel-related component. Highly flammable mixtures are always present and may be ignited. Failure to follow these instructions may result in serious personal injury.
WARNING:
Before working on or disconnecting any of the fuel tubes or fuel system components, relieve the fuel system pressure to prevent accidental spraying of fuel. Fuel in the fuel system remains under high pressure, even when the engine is not running. Failure to follow this instruction may result in serious personal injury.
WARNING:
When handling fuel, always observe fuel handling precautions and be prepared in the event of fuel spillage. Spilled fuel may be ignited by hot vehicle components or other ignition sources. Failure to follow these instructions may result in serious personal injury.
WARNING:
Always disconnect the battery ground cable at the battery when working on an evaporative emission (EVAP) system or fuel-related component. Highly flammable mixtures are always present and may be ignited. Failure to follow these instructions may result in serious personal injury.
- 1.
With the vehicle in NEUTRAL, position it on a hoist. REFER to Jacking and Lifting .
- 2.
Release the fuel system pressure. REFER to Fuel System - General Information .
- 3.
Remove the muffler and tailpipe. REFER to Exhaust System - 2.0L GTDI, 3.5L Ti-VCT or REFER to Exhaust System - 3.5L GTDI.
- 4.
Drain the fuel tank. REFER to Fuel System - General Information .
All-Wheel Drive (AWD) Vehicles
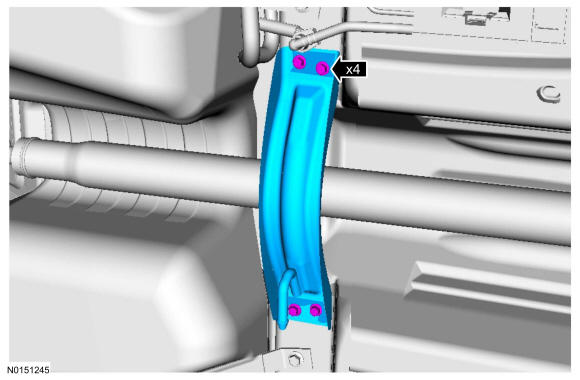
- 5.NOTE: Support the driveshaft.
Remove the 4 exhaust support brace bolts and the exhaust brace.
- To Install, tighten to 30 Nm (22 lb-ft).
- 6.NOTE: Do not reuse the bolt and washer assemblies for the rear Constant Velocity (CV) joint flange. Install new assemblies or damage to the vehicle may occur.NOTE: Index mark the rear driveshaft flange.
Remove and discard the 3 Rear Drive Unit (RDU) pinion flange bolt and washer assemblies.
- To Install, tighten to 25 Nm (18 lb-ft).

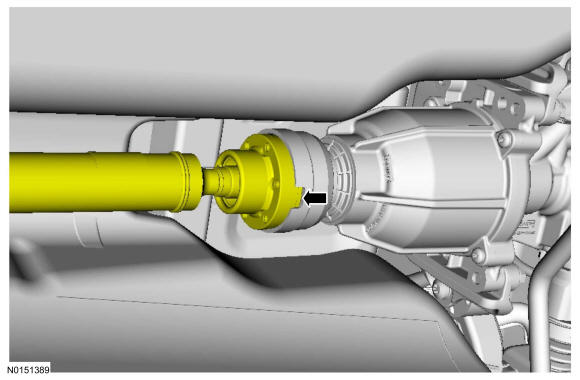
- 7.
Separate the driveshaft CV flange from the RDU flange using a flat-blade screwdriver in the area shown in illustration. Position rear of driveshaft aside and support with mechanics wire.
All Vehicles
- 8.
Remove the EVAP canister. REFER to Evaporative Emissions .
- 9.
Disconnect the fuel vapor tube assembly-to-fuel tank filler pipe recirculation quick connect coupling. REFER to Fuel System - General Information .
- 10.
Disconnect the fuel tank jumper tube-to-Fuel Pump (FP) assembly quick connect coupling. REFER to Fuel System - General Information .
- 14.
Partially lower the fuel tank enough to allow access to the fuel tank wire to the main body wiring harness electrical connector.