Windshield Glass: Removal
WARNING:
Before beginning any service procedure in this article, refer to SERVICE INFORMATION
.
- 1.
Remove the windshield applique bracket. REFER to Exterior Trim and Ornamentation .
- 2.
Remove the cowl panel grille. REFER to Front End Body Panels .
- 3.
Remove the interior A-pillar trim panels. REFER to Interior Trim and Ornamentation .
- 4.
Remove the interior rear view mirror. REFER to Rear View Mirrors .
- 5.
Remove the overhead console. REFER to Instrument Panel and Console .
- 6.
Remove the RH and LH sun visors and clips.- Remove sun visor screw cover.
- Remove both sun visor screws.
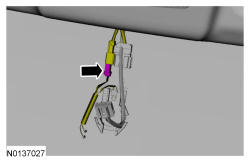
- Disconnect sun visor electrical connector and remove the sun visor.
NOTE: The sun visor electrical connector is glued to the top of the headliner. Position the front of the headliner down to access the sun visor electrical connector.- Remove both sun visor clip retaining screws and remove both sun visor clips.
- 9.
Working from inside the vehicle, cut the urethane adhesive using the 300-AST1770 from the windshield glass starting at the top center and working toward the bottom corners.
NOTE:
Insert the blade into the 300-AST1770 so that the flat side is against the glass.
NOTE:
Lubricate the existing urethane adhesive with water to aid the 300-AST1770 while cutting.
NOTE:
To avoid rust formation, use extreme care not to scratch the paint or primer, or otherwise damage the pinch weld during glass removal.
WARNING:
Wear eye and ear protection when servicing a vehicle. Failure to follow this instruction may result in serious personal injury.
WARNING:
Wear protective gloves when handling components or parts that have pointed or sharp edges. Failure to follow this instruction may result in serious personal injury.