Removal And Installation: Headliner: Removal
NOTE:
To avoid damaging the headliner when folding the headliner wings, fold the headliner wings so that the backing is ONLY touching the backing of the headliner. Never fold the headliner cloth-to-cloth or cloth-to-backing.
NOTE:
The headliner is made of new material that will allow for specific folding, flexing and rolling during removal through the liftgate opening.
- 1.
Remove both A-pillar trim panels. Refer to A-Pillar Trim Panel or Refer to A-Pillar Trim Panel - Police Package .
- 2.
Remove both B-pillar trim panels. Refer to B-Pillar Trim Panel .
- 3.
Remove both D-pillar trim panels. Refer to D-Pillar Trim Panel .
- 4.
Position both C-pillar trim panels aside.- 1.
Position the rear door weatherstrip from around the C-pillar trim panel.
- 2.
Remove the C-pillar trim panel bolt.
- 3.
Disconnect the C-pillar clips and position the C-pillar trim panel aside.
- 1.
- 6.
Remove the overhead console. REFER to Instrument Panel and Console .
- 8.
Vehicles with a roof opening panel, remove the second row interior lamp. REFER to Interior Lighting .
- 10.
Remove both sun visor assemblies.- 1.
Remove sun visor screw cover.
- 2.
Remove both sun visor screws.
- 3.NOTE: The sun visor electrical connector is glued to the top of the headliner. Position the front of the headliner down to access the sun visor electrical connector.
Disconnect sun visor electrical connector and remove the sun visor.
- 1.
- 11.
Disconnect and position aside the headliner wiring harness electrical connector on the LH A-pillar.- 1.
Disconnect the headliner wiring harness electrical connector.
- 2.
Remove the 3 headliner wiring harness pin-type retainers and position the wiring harness aside.
- 1.
- 12.
Disconnect and plug the rear washer hose from the RH A-pillar and disconnect the 2 pin-type retainers holding the hose to the RH Safety Canopy® module.
- 13.
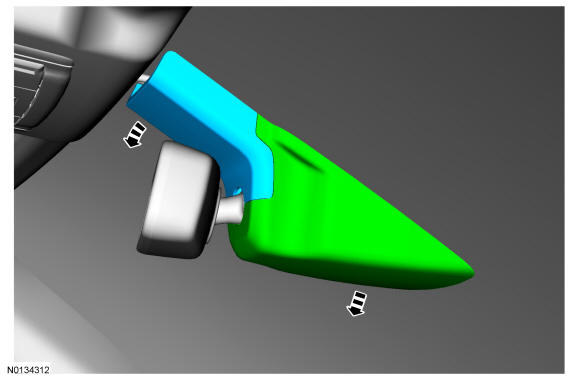
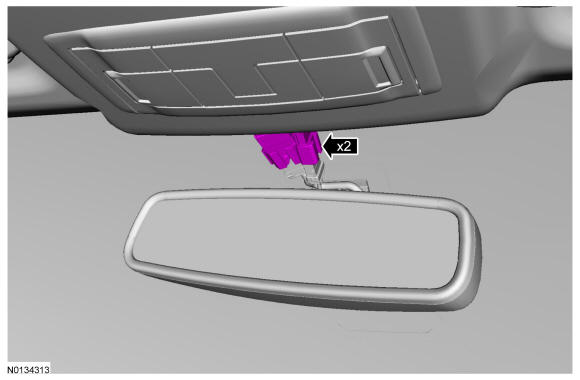
Vehicles with auto dimming rear view mirror, disconnect the rear view mirror electrical connector.
- 16.
Vehicles equipped with a roof opening panel, position the front of the headliner down and disconnect the roof opening panel electrical connector located in the center windshield area.
- 18.NOTE: To avoid damaging the headliner, use an assistant for this step.NOTE: To avoid damaging the headliner when folding the headliner wings, fold the headliner wings so that the backing is ONLY touching the backing of the headliner. Never fold the headliner cloth-to-cloth or cloth-to-backing.
Release the clips and magnets holding the headliner to the roof and remove through the liftgate assembly, folding the headliner wings toward the headliner backing to get headliner out through the liftgate.