Removal And Installation: Headliner: Installation
NOTE:
To avoid damaging the headliner when folding the headliner wings, fold the headliner wings so that the backing is ONLY touching the backing of the headliner. Never fold the headliner cloth-to-cloth or cloth-to-backing.
NOTE:
The headliner is made of new material that will allow for specific folding, flexing and rolling during installation.
- 1.NOTE: The 3M™Duramix™ 4747 Super Fast Adhesive is commercially available. This adhesive is a 2-part adhesive in a 50 ml dual-tube applicator. Depending on the size of the headliner and optional wire harness(es), purchasing of two to five 50 ml tubes is recommended.
When installing a new headliner, transfer the wire harness in the following sequence:
- 1.
Using suitable tape, mark the wire at the exit points for proper length from headliner-to-body/roof connectors.
- 2.
Carefully remove the wire harness from the original headliner.
- 3.
Using a suitable marking tool, mark the new headliner with the routing and exit points of the wire harness from the original headliner.
- 4.NOTE: Do not damage the wire harness when cutting the excess adhesive from the wire harness.
Cut and remove any excess adhesive from the wire harness.
- 5.
Position the wire harness onto the new headliner and make sure the wire harness has enough length to connect to the body/roof connectors using the tape indicator applied in Step 1. Apply tape to temporarily hold the wire harness in that position on the headliner.
- 6.NOTE: The 3M™Duramix™ 4747 Super Fast Adhesive sets in 20 seconds. Continually make sure the wire harness is routed correctly when applying the adhesive.
Apply the 3M™Duramix™ 4747 Super Fast Adhesive in the same location as the factory installed adhesive along the full length of the wire harness to the headliner to avoid any NVH concern(s).
- 7.
Transfer all necessary components.
- 1.
- 2.NOTE: To avoid damaging the headliner, use an assistant for this step.NOTE: To avoid damaging the headliner when folding the headliner wings, fold the headliner wings so that the backing is ONLY touching the backing of the headliner. Never fold the headliner cloth-to-cloth or cloth-to-backing.
Fold the headliner wings towards the backing and install the headliner through the liftgate assembly.
- 5.
Vehicles equipped with a roof opening panel, connect the roof opening panel electrical connector located in the center windshield area.
- 8.
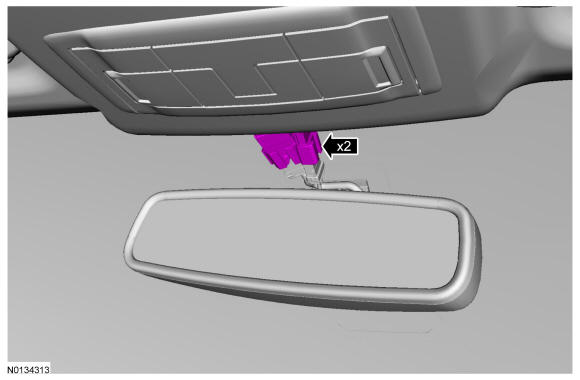
Vehicles equipped with auto dimming rear view mirror, connect the rear view mirror electrical connector.
- 9.
Unplug and connect the rear washer hose at the RH A-pillar and connect the 2 pin-type retainers to the RH Safety Canopy® module.
- 10.
Position back and connect the headliner wiring harness electrical connector on the LH A-pillar.- 1.
Position the wiring harness back and install the 3 headliner wiring harness pin-type retainers.
- 2.
Connect the headliner wiring harness electrical connector.
- 1.
- 11.
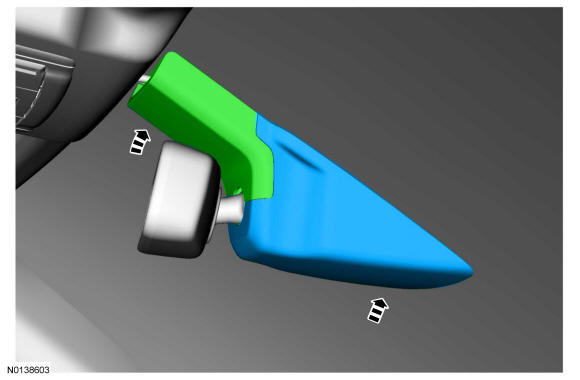
Install both sun visor assemblies.- 1.
Connect the sun visor electrical connector.
- 2.
Install the sun visor assembly and install the 2 sun visor screws.
- 3.
Install the sun visor screw cover.
- 1.
- 15.
Vehicles with a roof opening panel, install the second row interior lamp. REFER to Interior Lighting .
- 16.
Install the overhead console. REFER to Instrument Panel and Console .
- 17.
Position both C-pillar trim panels back.- 1.
Connect the C-pillar clips and position the C-pillar trim panel back.
- 2.
Install the C-pillar trim panel bolt.
- 3.
Position back the rear door weatherstrip around the C-pillar trim panel.
- 1.
- 18.
Install both D-pillar trim panels. Refer to D-Pillar Trim Panel .
- 19.
Install both B-pillar trim panels. Refer to B-Pillar Trim Panel .
- 20.
Install both A-pillar trim panels. Refer to A-Pillar Trim Panel or Refer to A-Pillar Trim Panel - Police Package .