Quarter Trim Panel - With Inflatable Safety Belts: Installation
- 2.NOTE: To avoid damage to the quarter trim panel, remove any retaining clips from the body and attach them to the quarter trim panel before installing.
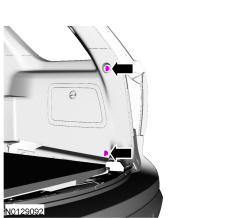
Connect the quarter trim panel electrical connectors and install the quarter trim panel and connect the trim panel clips.
- 1.
Feed the 2nd row outboard lap belt through the front lower corner of the quarter trim panel.
- 1.
- 7.NOTE: Before installation, make sure the safety belt webbing is not twisted and the safety belts and buckles are accessible to the occupants.
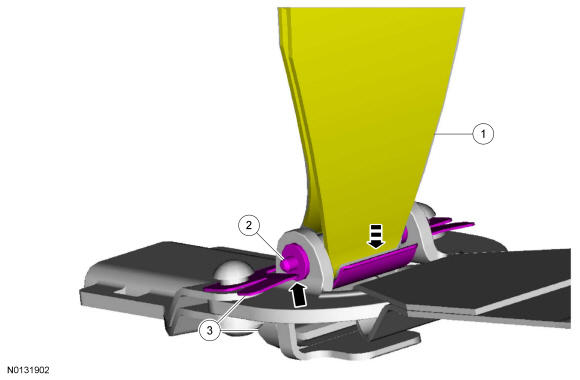
Prepare the lap safety belt for assembly.
- 1.
Position the lower safety belt tongue cover onto the safety belt.
- 2.
Position the bushing into the safety belt web loop.
- 3.
The secondary safety belt web loop must be positioned down.
- 1.

- 8.
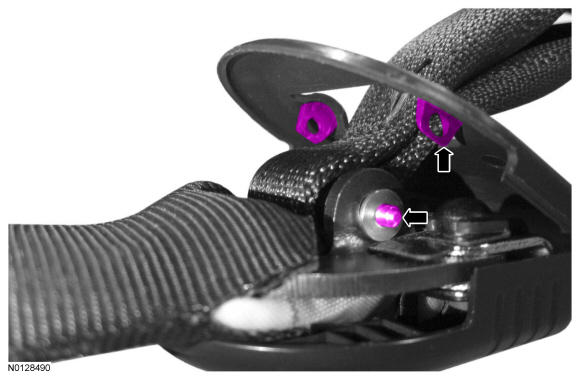
Assemble the lap belt to the safety belt tongue.- 1.
Position the safety belt web loop and bushing to the safety belt tongue and push down on the lap belt and spring clip.
- 2.
Insert the pin.
- 3.
Make sure the pin is pushed all the way in and the spring clip is allowed to ride up on the shoulder of the pin.
- 1.
- 9.NOTE: If the pin is not pushed all the way in the lower safety belt tongue cover will not close correctly.
Push the lower safety belt tongue cover to each side and engage the retainers.
- 12.NOTE: To avoid damage to the scuff plate trim panel, remove any retaining clips from the body and attach them to the scuff plate trim panel before installing.
Install the rear door scuff plate trim panel. Refer to Scuff Plate Trim Panel .
- 13.NOTE: To avoid damage to the levitate scuff plate trim panel, remove any retaining clips from the body and attach them to the levitate scuff plate trim panel before installing.
Install the levitate scuff plate trim panel.
- 1.
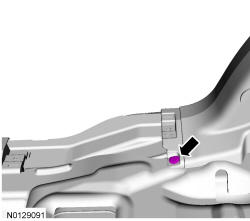
If equipped, connect the rear passive start antenna electrical connector and install the levitate scuff plate trim panel.
- 2.
Push downward to engage the retaining clips.
- 1.
