Removal And Installation
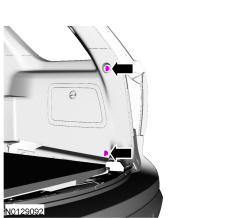
- 2.
Remove the liftgate scuff plate trim panel.- Pull upward to release the retaining clips.
NOTE:
To avoid damage to the liftgate scuff plate trim panel, remove any retaining clips from the body and attach them to the liftgate scuff plate trim panel before installing.
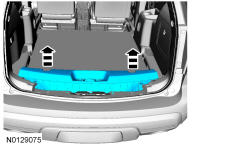
- 3.
Remove the rear RH door scuff plate trim panel.- Pull upward on the scuff plate trim panel to release the retaining clips.
NOTE:
To avoid damage to the scuff plate trim panel, remove any retaining clips from the body and attach them to the scuff plate trim panel before installing.

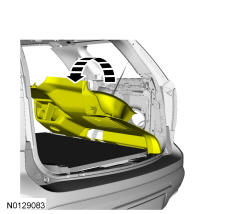
- 8.
Position the RH quarter trim panel aside.- Pull the RH quarter trim panel toward the inside of the vehicle to release the retaining clips.
NOTE:
To avoid damage to the quarter trim panel, remove any retaining clips from the body and attach them to the quarter trim panel before installing.