Stuck High Voltage Charge Cord Information Sheet (G0000127)
Reference number: G0000127
STUCK HIGH VOLTAGE CHARGE CORD INFORMATION SHEET
TECHNICAL SERVICE BULLETIN
| FORD: | All Models |
SERVICE INFORMATION
GSB Overview:
This bulletin provides information that will only be needed in the unlikely event that a High Voltage (HV) charge cord latch fails to release from the vehicle.
When using a Level 3 DC charging station, the vehicle will engage a safety latch that positively locks the charge cord to the vehicle charge port until the latch is released. If this latch fails to release, the cord cannot be removed without special action.
The primary Ford approved process is for Roadside Assistance to attempt these actions.
In the event Customers have not contacted Roadside Assistance or attempts to free the cord are unsuccessful, dealers may complete this process.
ACTIONS CUSTOMER CAN TRY
If a Customer experiences this issue and contacts Roadside Assistance (US: 1-800-241-3673; Canada: 1-800-525-2006) the Roadside Assistance team will attempt to help the customer with the following actions:
Stage 1
- First the customer will be asked to stop the charging using the procedure for the charge station the vehicle is connected to.
- Next customer will be asked to attempt to unlock the charger using the following steps:
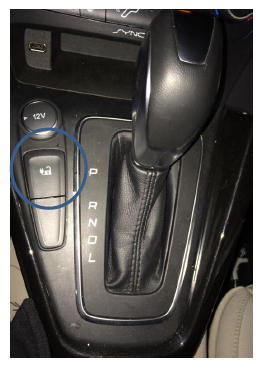
- Use the center console switch to unlock charge cord.
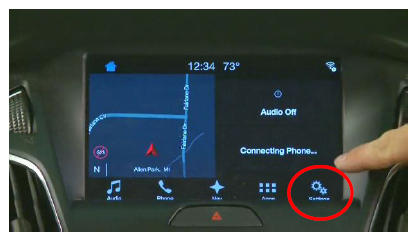
- Using the touchscreen, attempt to command a charge cord unlock. Steps for completing this are shown below.
Starting at home, slide the screen and touch the "settings" icon in bottom right.
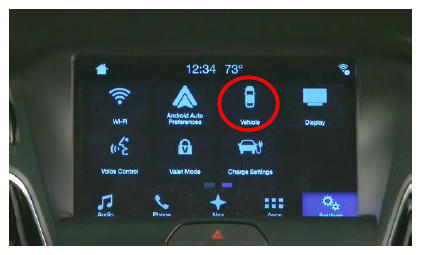
On the settings screen, select the "vehicle" icon.
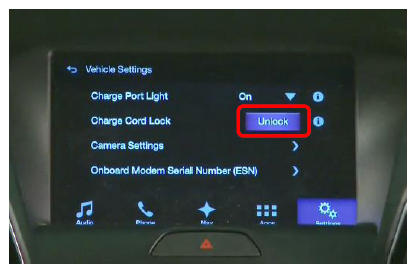
In the vehicle settings, tap "unlock".
After section "a" and again after section "b" above, attempt to remove the charge cord. Wiggle charge cord handle side to side and up and down several time times, which may allow a malfunctioning cord latch to release. If this fails to work, go to stage 2.
- Use the center console switch to unlock charge cord.
Stage 2
- Try the following "Manual Override" Steps:
- Press unlock button on console, followed by unlock button on center screen, followed by unlock button on console. (hard button-soft button-hard button) This process must be carried out within 10 seconds.
- Again, attempt to remove the charge cord. Wiggle charge cord handle side to side and up and down several time times, which may allow a malfunctioning cord latch to release. If this fails to work, go to stage 3.
ACTIONS PERFORMED BY A SERVICE PROFESSIONAL
Stage 3
A service provider performs the following steps:
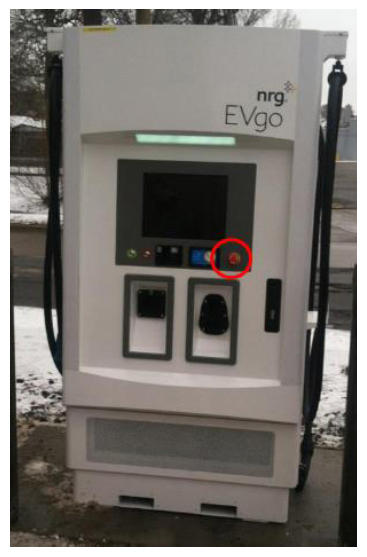
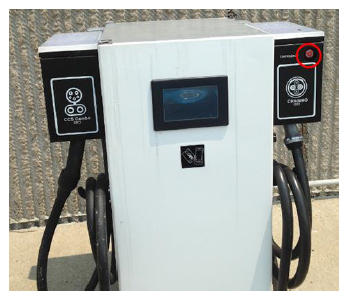
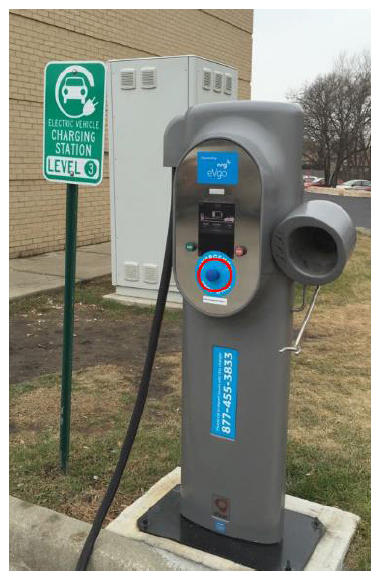
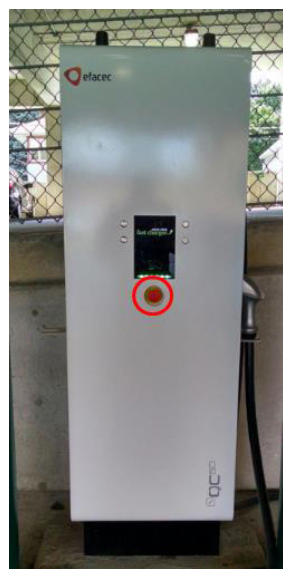
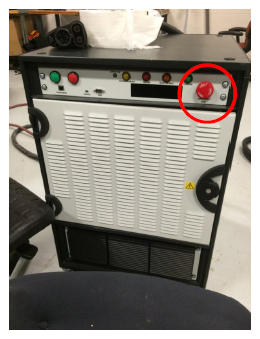
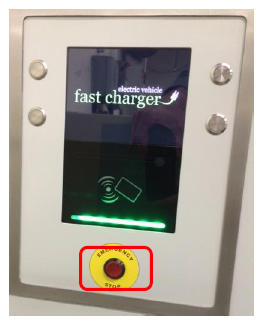
- Activate the charger reset button. Location and appearance may vary based on manufacturer. See additional charger examples at end of this bulletin.
- Disconnect 12V ground cable under hood and insulate from chassis.
- Remove HV service disconnect from the HV battery. Refer to Workshop Manual (WSM) for additional information.
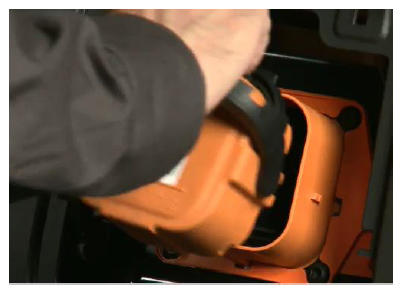
- Using a flathead screwdriver and hammer (if necessary), disassemble charge port housing cover as described below.
- Put tape only on sheet metal (not over black plastic) around charge port opening to avoid paint damage.
- Remove charge port outer door cover by lifting the tab behind the cover and slide outer cover off.
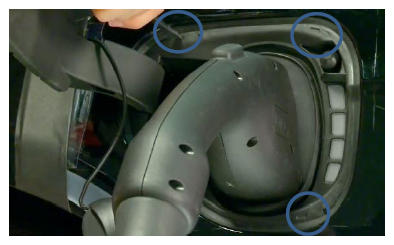
- Insert a flathead screwdriver into the slots at each of the 4 corners. Begin by gently hammering out the knock-outs in the slots. Then, using the screwdriver, pry the retaining tabs away from the sheet metal and pull the charge port housing out at each corner.
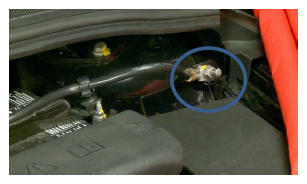
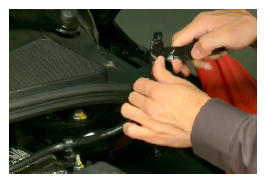
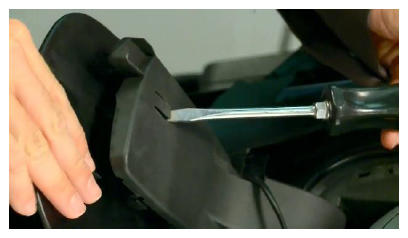
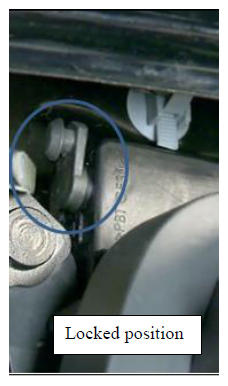
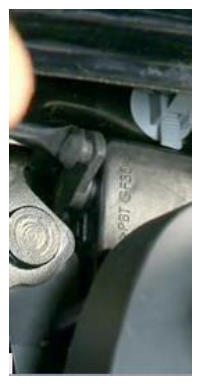
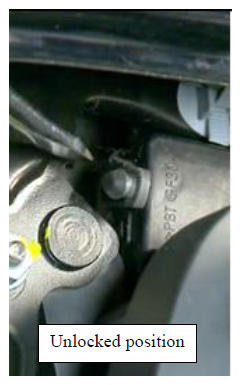
- Locate the manual lock release lever inside charge port opening as shown. Using the flathead screwdriver, access the manual lock release lever and pull the lever towards the outside of the vehicle.
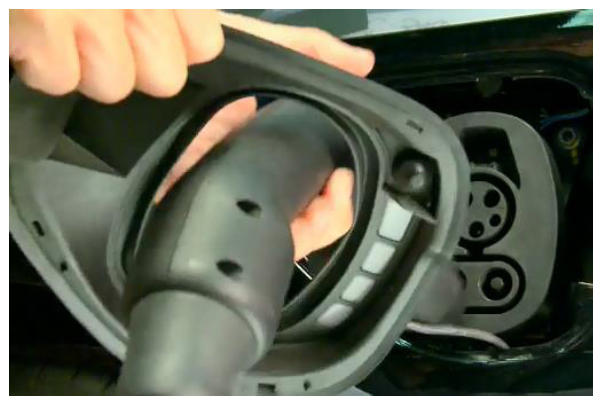
- Remove the plug from the port
- At this point towing vehicle would be possible, if required. Normal diagnosis and repair for the concern can now be performed. Refer to WSM for diagnosis and repair.
- If upon reassembly the housing cover clips do not properly retain the cover it should be replaced under warranty.
VIDEO LINK
http://www.fordservicecontent.com/Ford_Content/videos/WorkShopManual/StuckChargePlug.mp4
Stuck High Voltage Charge Cord Information Sheet