Exhaust Odor In Vehicle (14-0130)
WARNING: This page is about the Explorer Base, 2.0L Eng VIN 9, which is a different variant/trim than selected.
Publication date: 2014-07-22Reference number: 14-0130
Supersedes refnos: 12-12-4
EXHAUST ODOR IN VEHICLE
TECHNICAL SERVICE BULLETIN
Reference Number(s): 14-0130, Date of Issue:
July 22, 2014
Superceded Bulletin(s): 12-12-4, Date of Issue:
December 10, 2012
| FORD: | 2011-2015 Explorer |
This article supersedes TSB 12-12-4 to update the vehicle model years and Service Procedure.
ISSUE
Some 2011-2015 Explorer vehicles may exhibit an exhaust odor in the vehicle with the auxiliary climate control system on. Customers may indicate the odor smells like sulfur.
ACTION
Follow the Service Procedure steps to correct the condition.
SERVICE PROCEDURE
- Reprogram the Heating Ventilation Air Conditioning (HVAC) module to the latest calibration using IDS release 91.02 or higher. Calibration files may also be obtained at www.motorcraftservice.com.
- When reprogramming the HVAC, IDS will have additional questions that require a yes response to reprogram the module.
- Remove the rear bumper cover. Refer to Workshop Manual (WSM), Section 501-19.
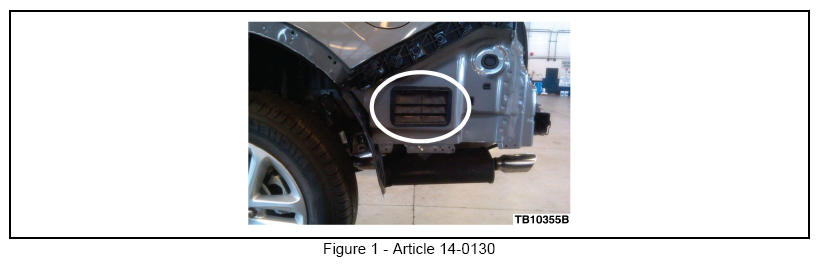
- Replace the left side rear air extractor. (Figure 1)
- Install the rear bumper cover. Refer to WSM, Section 501-19.
- Apply masking tape around the outer edge of the rear fender moldings to protect the vehicle from damage.
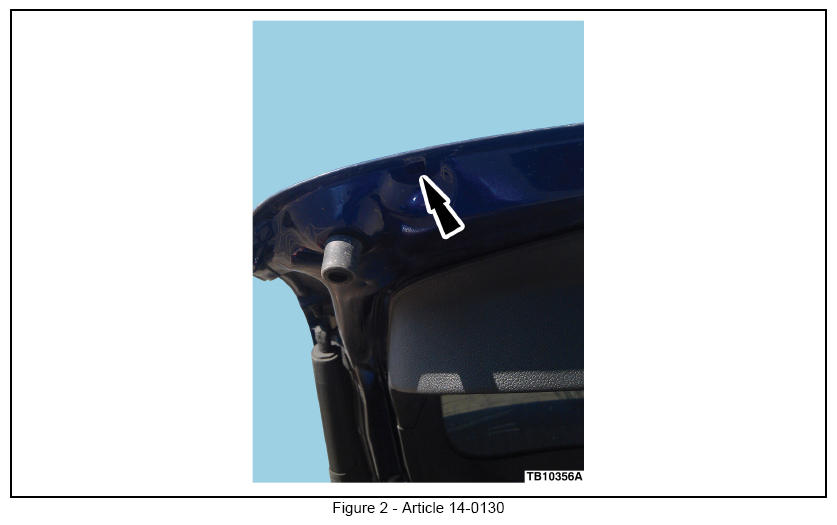
- Open the liftgate and inspect for the presence of drain valves in the two (2) drain holes on the left and right side of the liftgate. Are the drain valves present? (Figure 2)
- Yes - no further action is required. Repair is complete.
- No - proceed to Step 6.
- Install a new drain valve in each of the two (2) drain holes on the left and right side of the liftgate. (Figure 2)
- Raise the vehicle on hoist. Refer to WSM, Section 100-02.
- Lower and support the rear section of the exhaust system.
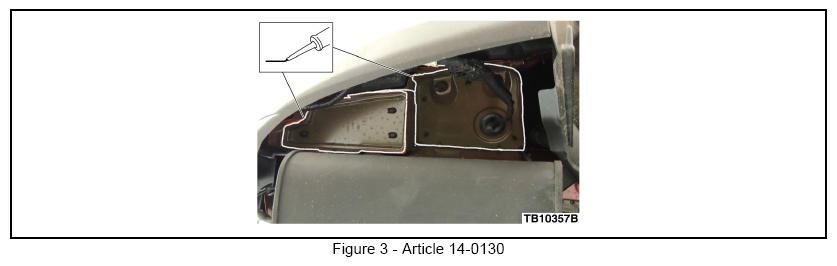
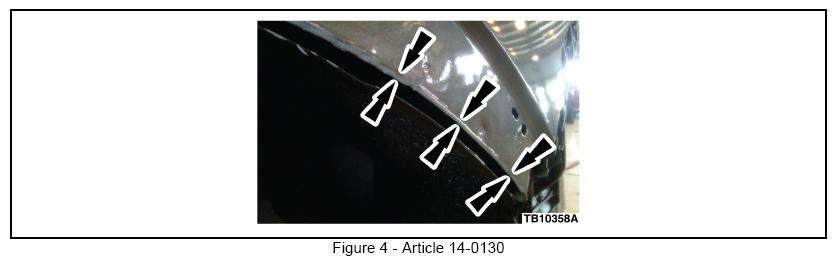
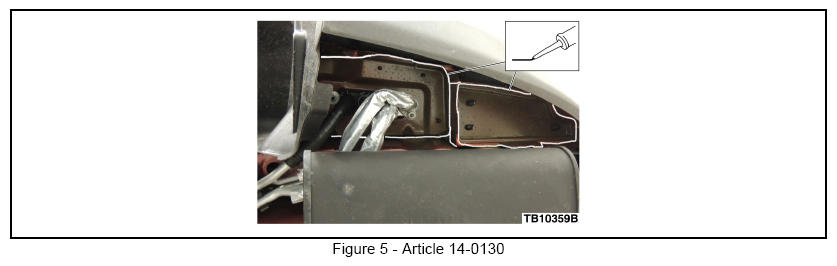
- Clean the areas on the underside of the vehicle where the seam sealer will be applied. (Figures 3-5)
- Cover the exhaust system and auxiliary climate control drain.
- Apply a generous amount of Motorcraft® Seam Sealer to rear horizontal sheet metal lap joints on left and right sides of the vehicle, and the rear sheet metal overlap flange across the rear of the vehicle. (Figures 3-5)
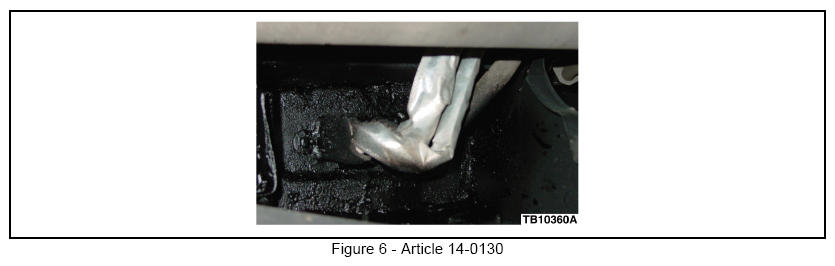
- Spray a generous amount of 3M™ Rubberized Undercoating around the auxiliary air conditioning lines and seam sealer areas. (Figure 6)
- Install the rear exhaust system.
PART INFORMATION
OBTAIN PARTS LOCALLY
| Part Number | Part Description |
|---|---|
| 08882 | 3M™ Rubberized Undercoating |
PARTS INFORMATION
| PART NUMBER | PART NAME |
|---|---|
| BB5Z-61280B62-B | Dual Rate Air Extractor |
| BB5Z-7829164-AA | Wheel Lip Molding Right Hand |
| BB5Z-7829165-AA | Wheel lip Molding Left Hand |
| 4M8Z-54280B62-A | Valve Assembly Auto Drain |
| TA-2 | Motorcraft® Seam Sealer |
WARRANTY INFORMATION
WARRANTY INFORMATION
| OPERATION | DESCRIPTION | TIME |
|---|---|---|
| 140130A | 2011-2015 Explorer: Reprogram The HVAC Module, Replace Air Extractors And Both Rear Fender Moldings (Do Not Use With Any Other Labor Operations) | 1.3 Hrs. |
| 140130B | 2011-2015 Explorer: Reprogram The HVAC Module, Replace Air Extractors Both Rear Fender Moldings, Seal The Body And Install Liftgate Drain Valves (Do Not Use With Any Other Labor Operations) | 2.0 Hrs. |
WARRANTY STATUS:
Eligible Under Provisions Of New Vehicle Limited Warranty Coverage.
Warranty/ESP coverage limits/policies/prior approvals are not altered by a TSB. Warranty/ESP coverage limits are determined by the identified causal part and verified using the OASIS part coverage tool.
DEALER CODING
| BASIC PART NO. | CONDITION CODE |
|---|---|
| 61280B62 | 07 |