FACTORY KEYLESS ENTRY KEYPAD - DRIVER SIDE B-PILLAR FRONT DOOR UPPER MOULDING LOOSE
FACTORY KEYLESS ENTRY KEYPAD - DRIVER SIDE B-PILLAR FRONT DOOR UPPER MOULDING LOOSE
TECHNICAL SERVICE BULLETIN
Reference Number(s): 19-2150, Date of Issue:
July 03, 2019
ISSUE
Some 2011-2019 Explorer vehicles equipped with a factory keyless entry keypad may exhibit a loose driver side B-pillar front door upper moulding. This may be caused by a lack of adhesion of the front door upper moulding to the door. To resolve the condition, follow the Service Procedure steps to reapply adhesive tape to the front door upper moulding.
ACTION
Follow the Service Procedure steps to correct the condition on vehicles that meet all of the following criteria:
- 2011-2019 Explorer
- Equipped with factory keyless entry keypad
- Driver side front door upper moulding is loose
PARTS
PARTS INFORMATION
| Part Number |
Description |
Quantity |
| W790514-S900 |
Front Door Upper Moulding Retaining Clips |
2 |
| Obtain Locally |
3M™ 38583 Adhesive Tape |
1 |
| Obtain Locally |
Isopropyl Alcohol |
1 |
Warranty Status:
Eligible Under Provisions Of New Vehicle Limited Warranty Coverage Warranty/ESP coverage limits/policies/prior approvals are not altered by a TSB. Warranty/ESP coverage limits are determined by the identified causal part and verified using the OASIS part coverage tool.
LABOR TIMES
LABOR TIMES
| Description |
Operation No. |
Time |
| 2011-2019 Explorer: Remove Clean And Reinstall The Front Door Upper Moulding Following The Service Procedure (Do Not Use With Any Other Labor Operations) |
192150A |
0.7 Hrs. |
REPAIR/CLAIM CODING
REPAIR/CLAIM CODING
| Causal Part: |
7820555 |
| Condition Code: |
07 |
TOOL LIST
TOOLS INFORMATION
| Drive |
Tool Name |
| 1/4" |
Power tool |
| 1/4" |
Ratchet |
| 1/4" |
Torque wrench |
| 1/4" |
7 mm deep socket |
| 1/4" |
10 mm deep socket |
| 1/4" |
Torx® T20 |
| |
Trim tool |
| |
Angled pick |
| |
Razor blade |
SERVICE PROCEDURE
CAUTION:
Do not use adhesive solvent for this procedure as it will degrade the front door upper molding.
- Remove the front door upper moulding. Refer to Workshop Manual (WSM) Section, 501-08.
- Place the front door upper moulding on a non-marring surface and remove the two-sided adhesive tape with a razor blade or knife. Be careful not to damage the wiring for the keyless entry keypad.
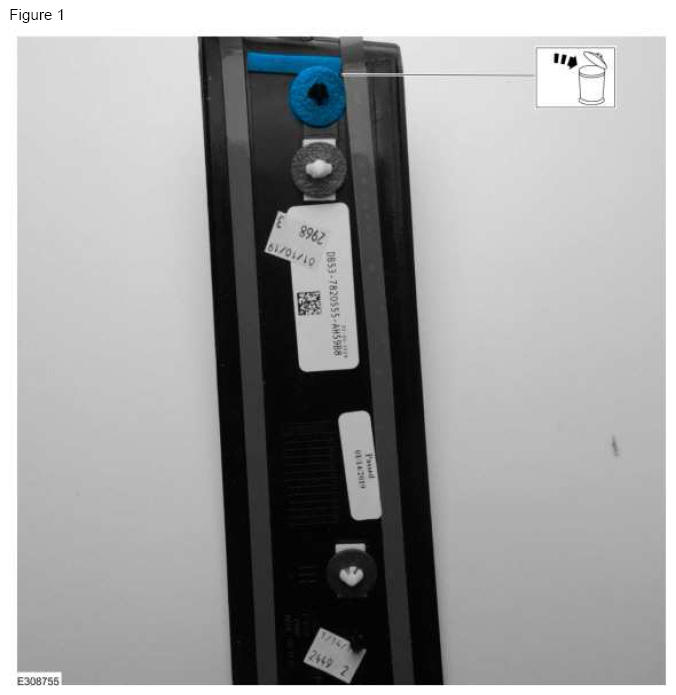
- Remove and discard the foam ring on the locator tab and the foam strip at the top of the front door upper moulding. (Figure 1)
CAUTION:
Using any type of alcohol or solvent will damage the front door upper moulding surface.
- Using a clean damp cotton cloth, remove any dust or dirt from the front door upper moulding.
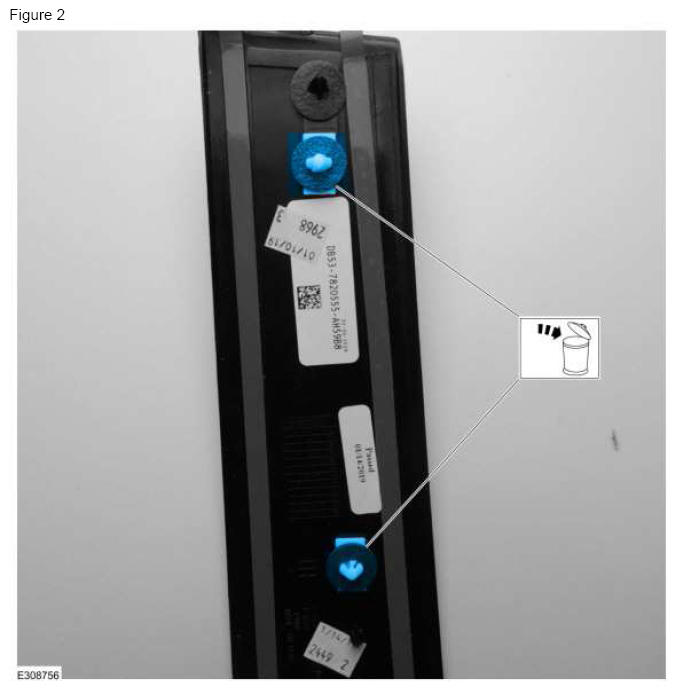
- Remove and discard the 2 retaining clips. (Figure 2)
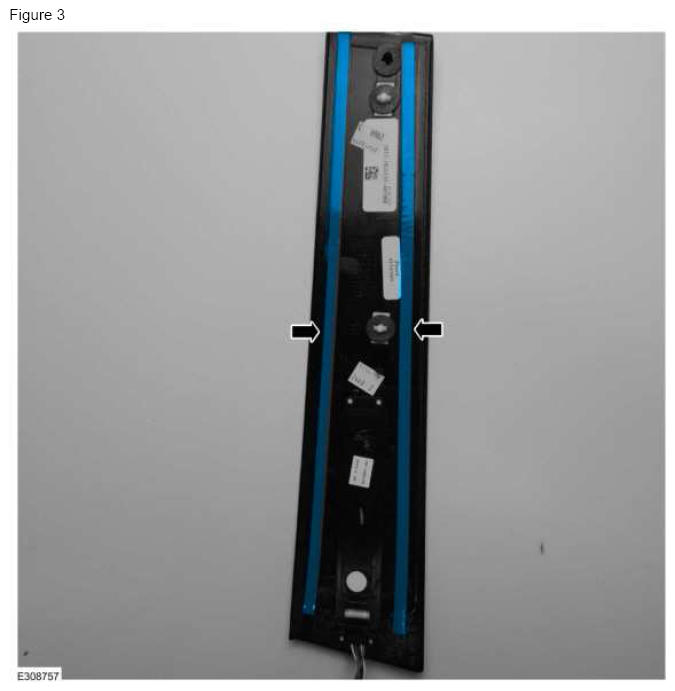
- Install the adhesive tape to the front door upper moulding.
- Cut four 406 mm (15.98 in) strips of 3M 38583 adhesive tape.
- Apply one strip on each side of the front door upper moulding in the scribed boxes. (Figure 3)
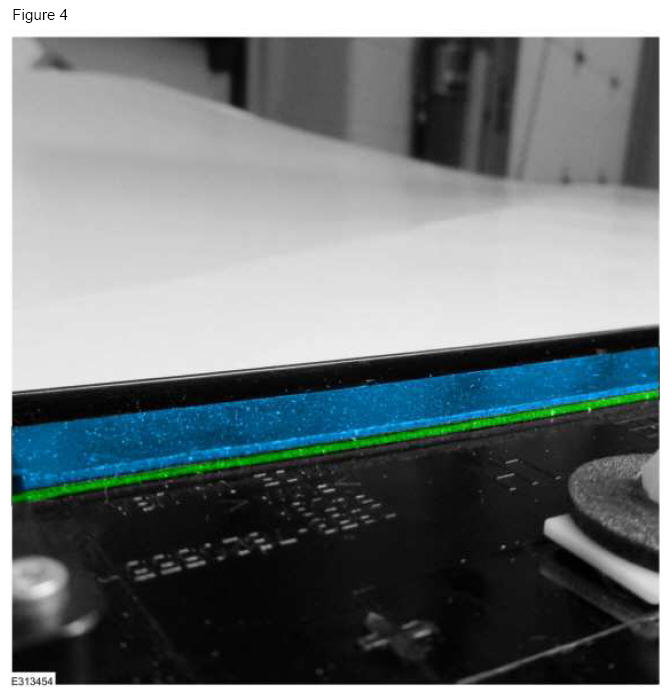
- Place a second layer of adhesive tape overtop of the first layer. (Figure 4)
- Apply firm pressure to each layer to confirm proper adhesion.
CAUTION:
Do not allow isopropyl alcohol to contact the keyless entry keypad or rear door upper moulding to avoid damaging the plastic.
- Clean the door sheet metal with a 50% water/isopropyl alcohol solution.
- Install the front door upper moulding. Refer to WSM Section, 501-08.