Screen Method Aiming
All headlamp types
- 1.
Before starting headlamp adjustment:- vehicle must be on level ground.
- tires must be correctly inflated.
- vehicle must be normally loaded.
- headlamps must be clean.
- air suspension switch must be on (if equipped).
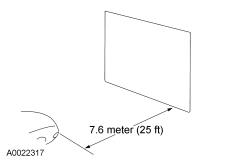
- 2.
Park the vehicle on a level surface with the low beam headlamp lens surface approximately 7.6 m (25 ft) from the vertical wall or screen directly in front of it.
NOTE:
This procedure should be done in a dark environment to effectively see the headlamp beam pattern.
NOTE:
The vertical wall or screen must be a minimum of 2.4 m (8 ft) wide.
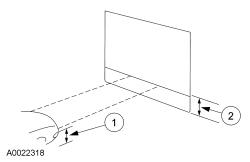
- 3.
Mark a horizontal reference line on the vertical wall or screen.- 1.
Measure the distance between the center of the low beam headlamp bulb and ground. Record the measurement.
- 2.
Make a 2.4 m (8 ft) horizontal mark (using masking tape) on the vertical wall or screen at the height as follows:Headlamp bulb center height Horizontal reference line height below 95 cm (37.5 inches) same as bulb center height 95 cm - 105 cm (37.5 inches - 41.5 inches) bulb center height minus 1.3 cm (.5 inch) above 105 cm (41.5 inches) bulb center height minus 2.5 cm (1.0 inch)
- 1.
NOTE:
The bulb center of the low beam bulb is sometimes marked on the lens (circle, crosshair or other mark) or is the center of the low beam reflector, bulb shield or the low beam projector inner lens.
- 5.
On the wall or screen, locate the cut off of the beam pattern.
NOTE:
The cut off of the beam pattern is the horizontal line of the beam pattern where there is MAXIMUM change between light & dark
VOR type headlamps
NOTE:
Procedure applies to both left and right headlamps with "VOR" molded on lens.
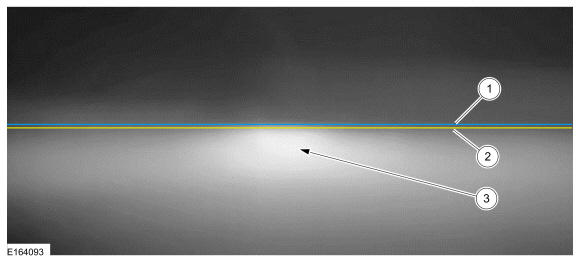
- 6.
There is a distinct cutoff in the right portion of the beam pattern.- 1.
Horizontal reference line
- 2.
Cut off
- 3.
High intensity zone
- 1.
NOTE:
The appearance of the VOR beam pattern may vary between vehicles.
- 7.
Align the headlamps to the horizontal reference line- Adjust the headlamp as necessary using the headlamp adjusting screw.
- Repeat this step for the remaining headlamp.
NOTE:
Align one headlamp while covering the other headlamp.
VOL type headlamps
NOTE:
Procedure applies to both left and right headlamps with "VOL" molded on lens.
- 8.
There is a distinct cutoff in the left portion of the beam pattern. The edge of this cutoff should be positioned 5 cm (2 in) below the horizontal reference line.- 1.
Horizontal reference line
- 2.
Cut off
- 3.
High intensity zone
- 1.
NOTE:
The appearance of the VOL beam pattern may vary between vehicles.
