Removal And Installation
REMOVAL
- Disconnect and isolate the negative battery cable. If equipped with an Intelligent Battery Sensor (IBS), disconnect the IBS connector first before disconnecting the negative battery cable.
- Recover the refrigerant from the refrigerant system. Refer to PLUMBING, FRONT, STANDARD PROCEDURE .
- Remove the air cleaner resonator. Refer to RESONATOR, AIR CLEANER, REMOVAL AND INSTALLATION .
- Remove the coolant recovery bottle fasteners and position aside with hoses still connected. Refer to BOTTLE, PRESSURIZED COOLANT, REMOVAL AND INSTALLATION
.
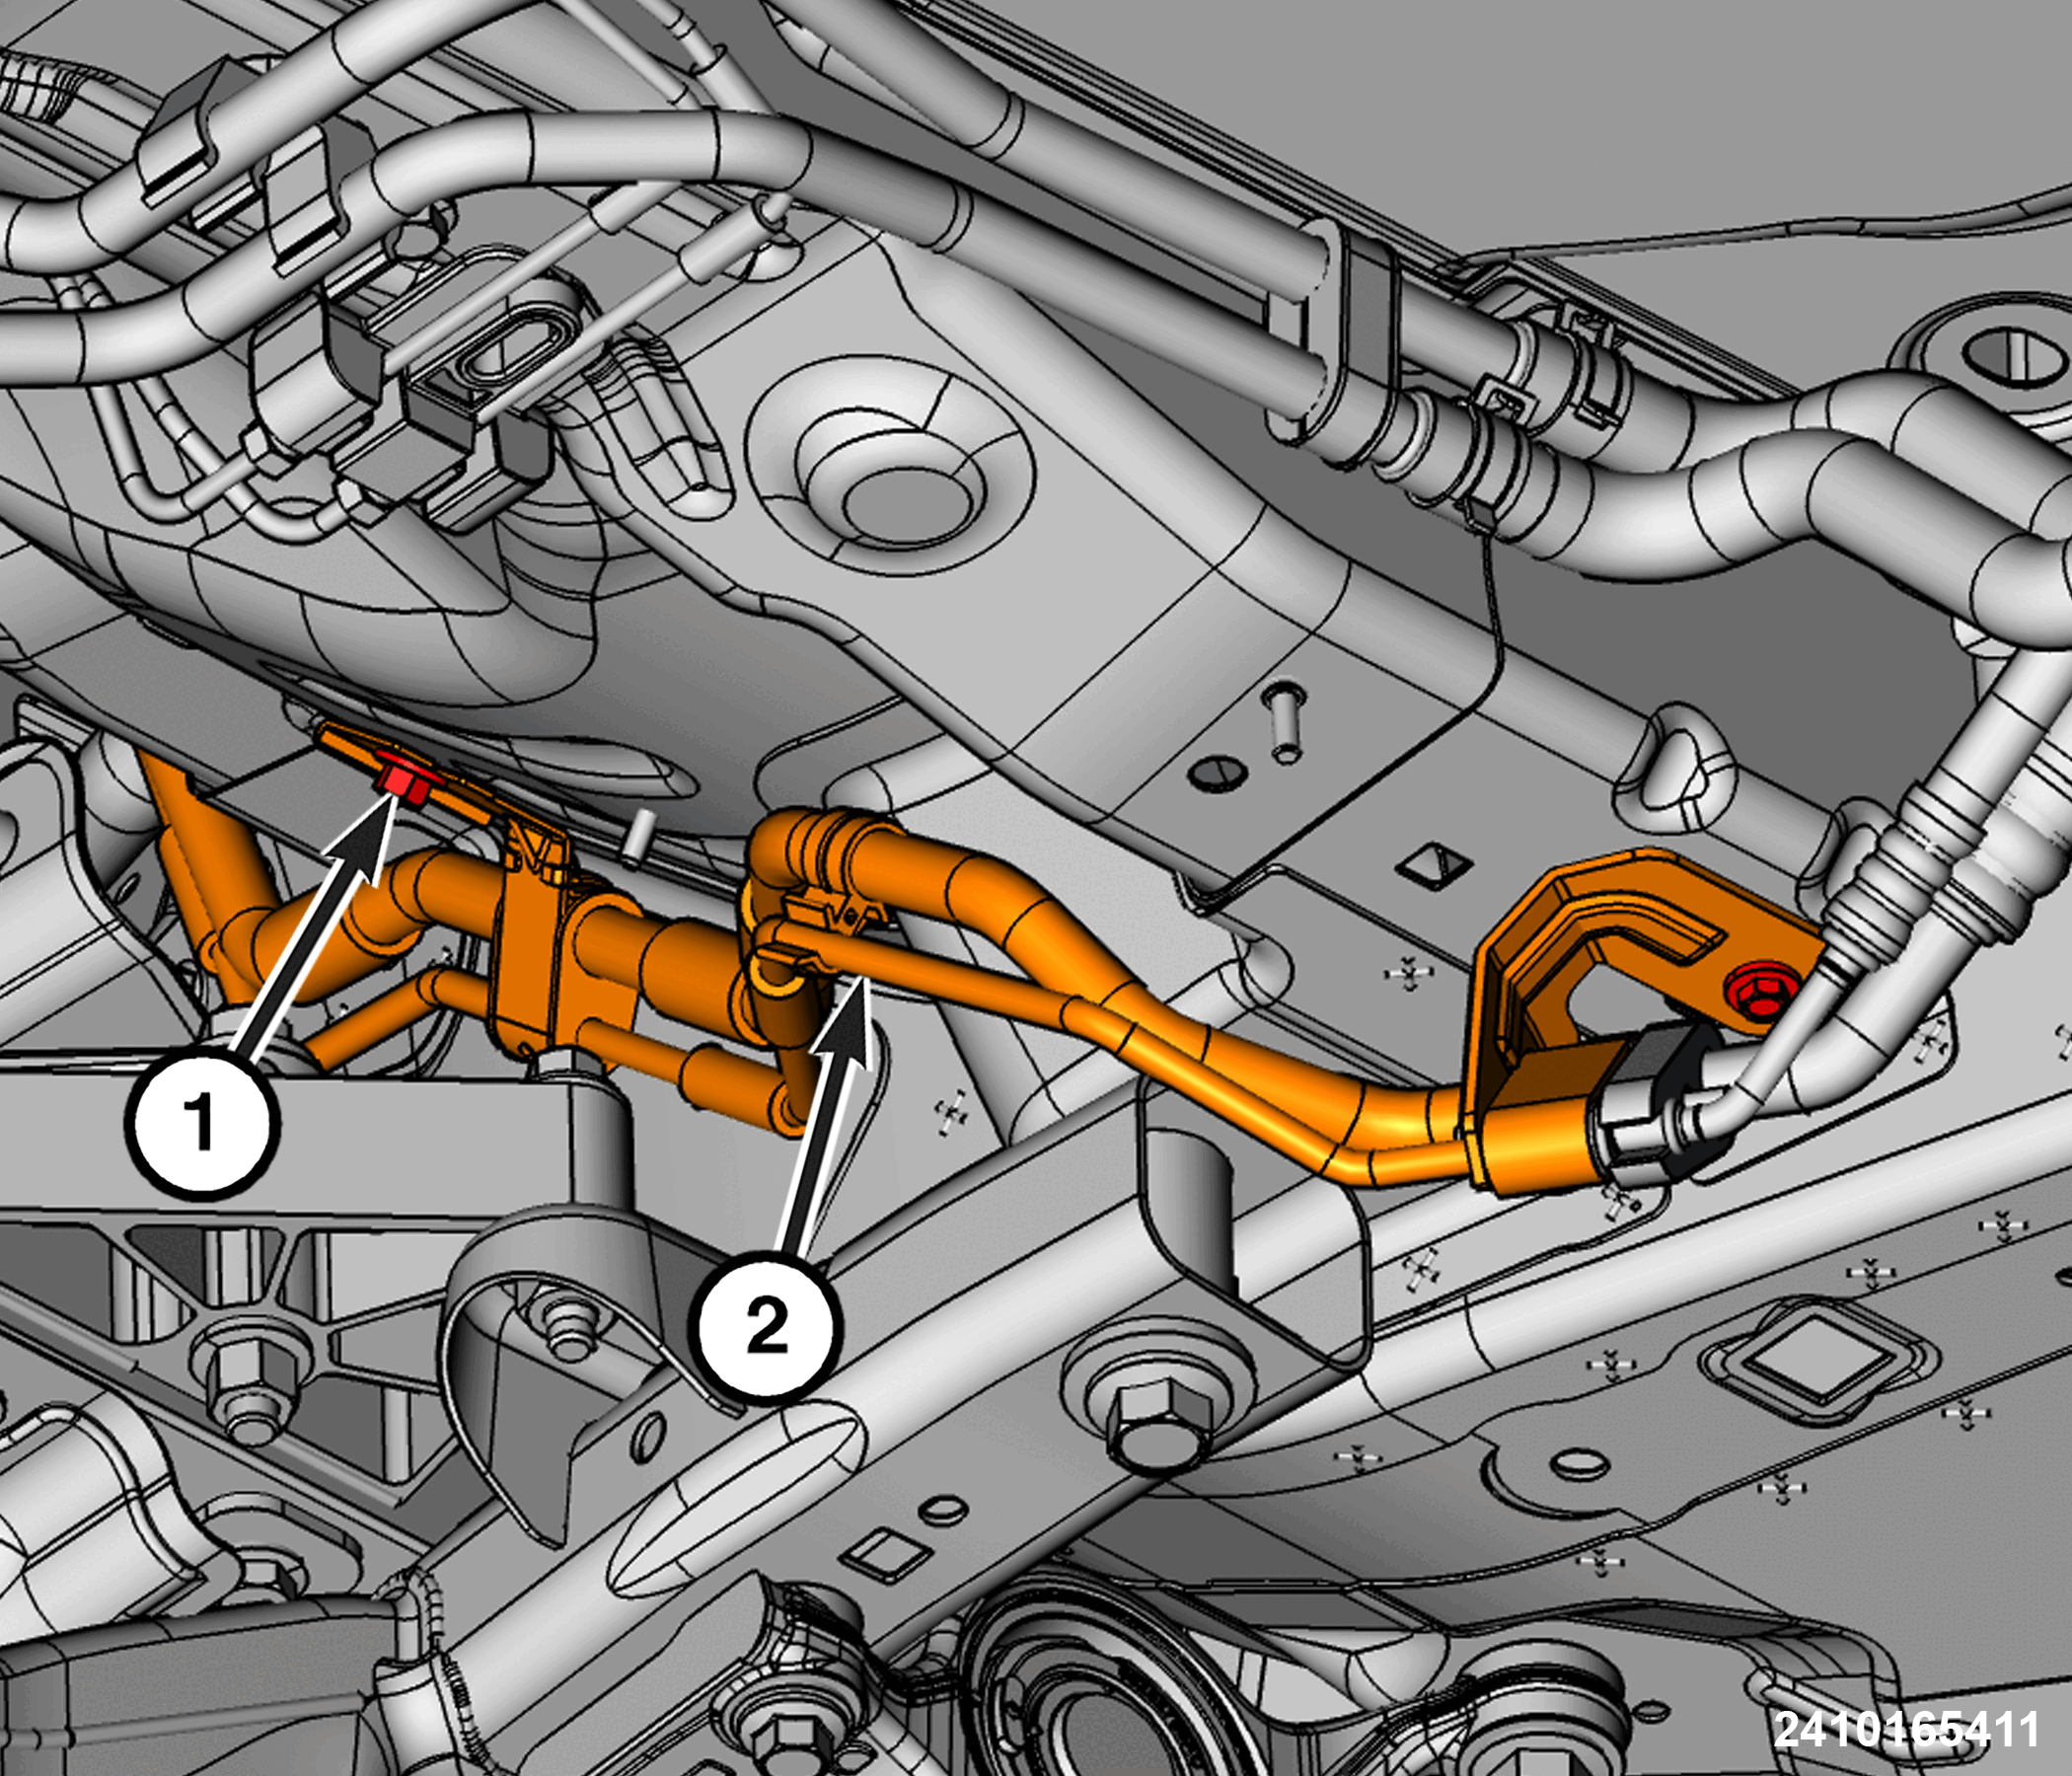
- Loosen the extension line fitting nuts (1), disconnect the A/C suction and liquid extension line (2) from the assembly.
- Remove the right rear wheelhouse splash shield. Refer to SHIELD, SPLASH, REAR WHEELHOUSE, REMOVAL AND INSTALLATION .
- Remove the exhaust muffler and pipe. Refer to MUFFLER, EXHAUST, REMOVAL AND INSTALLATION
.
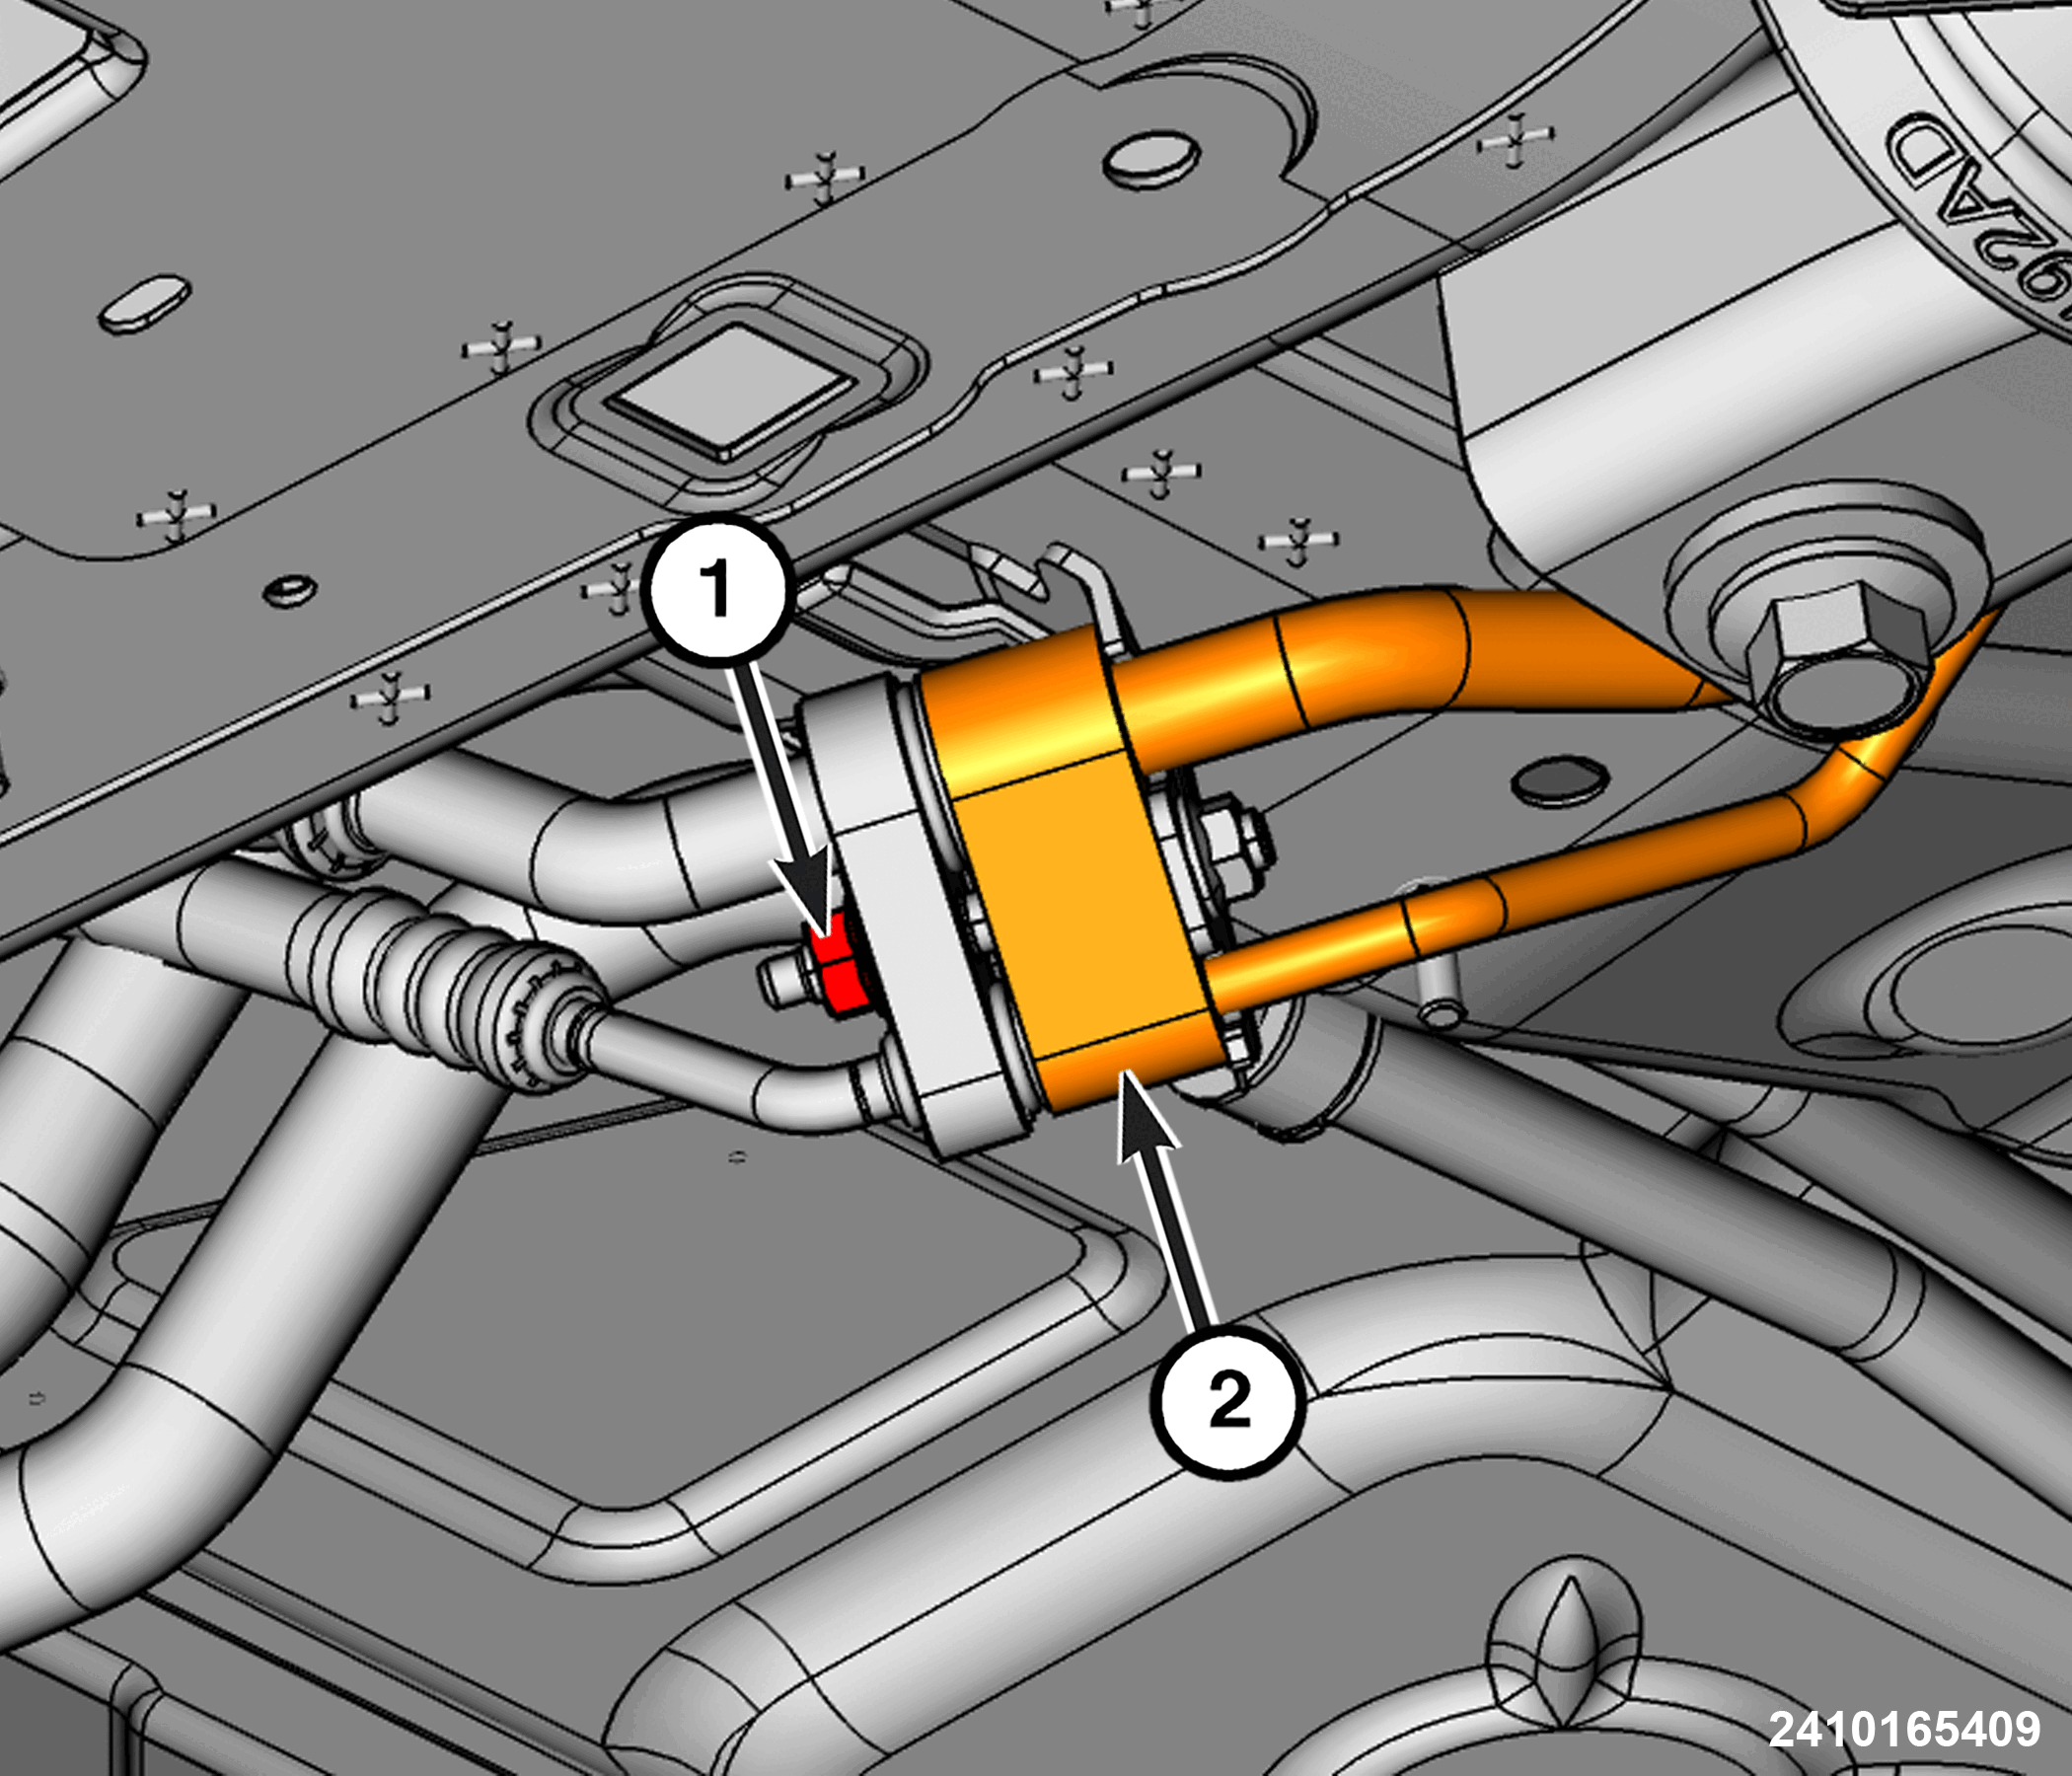
- Remove the nut (1) securing the A/C suction and liquid extension line (2) to the underbody refrigerant lines.
- Remove the bolts (1) and remove the A/C suction and liquid extension line (2) from the vehicle.
- Remove and DISCARD the O-ring seals.
- Install tape or plugs to all the opened refrigerant line fittings.

INSTALLATION
- Remove the tape or plugs from all the opened refrigerant line fittings.
- Lubricate NEW
rubber O-ring seals with clean refrigerant oil and install them on all the underbody refrigerant line fittings. Use only the specified O-rings as they are made of a special material for the R-1234yf refrigerant system. Use only refrigerant oil of the type recommended for the A/C compressor in the vehicle.
- Install the A/C suction and liquid extension line (2) to the vehicle.
- Install the bolts (1) securing the A/C suction and liquid extension line (2) to the vehicle and tighten to the proper torque specifications. Refer to TECHNICAL SPECIFICATIONS .
- Install the nut (1) securing the A/C suction and liquid extension line (2) to the underbody refrigerant lines and tighten to the proper torque specifications. Refer to TECHNICAL SPECIFICATIONS .
- Install the right rear wheelhouse splash shield. Refer to SHIELD, SPLASH, REAR WHEELHOUSE, REMOVAL AND INSTALLATION .
- Install the exhaust muffler and pipe. Refer to MUFFLER, EXHAUST, REMOVAL AND INSTALLATION
.
- Tighten the extension line fitting nuts (1) securing the A/C suction and liquid extension line (2) to the assembly to the proper. Refer to TECHNICAL SPECIFICATIONS .
- Install the coolant recovery bottle fasteners and position aside with hoses still connected. Refer to BOTTLE, PRESSURIZED COOLANT, REMOVAL AND INSTALLATION .
- Install the air cleaner resonator. Refer to RESONATOR, AIR CLEANER, REMOVAL AND INSTALLATION .
- Connect the negative battery cable. If equipped with an Intelligent Battery Sensor (IBS), connect the IBS connector.
- Evacuate the refrigerant system. Refer to PLUMBING, FRONT, STANDARD PROCEDURE .
- Charge the refrigerant system. Refer to PLUMBING, FRONT, STANDARD PROCEDURE .