Removal And Installation: Removal
- Raise and support the vehicle. Refer to HOISTING, STANDARD PROCEDURE .
- Remove the tire and wheel assembly. Refer to REMOVAL AND INSTALLATION .
- Remove the front belly pan. Refer to BELLY PAN, FRONT, REMOVAL AND INSTALLATION .
- Remove the side belly pan. Refer to BELLY PAN, SIDE, REMOVAL AND INSTALLATION .
- Remove the front wheelhouse splash shield. Refer to SHIELD, SPLASH, FRONT WHEELHOUSE, REMOVAL AND INSTALLATION
.
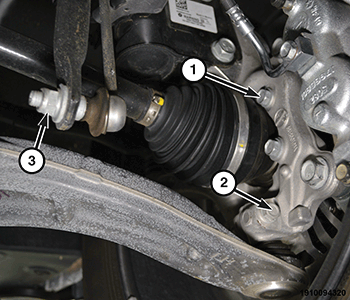
- While holding the nut, remove and DISCARD
the ball joint stud pinch fastener (2).NOTE:
Use care when separating the ball joint stud from the knuckle so the ball joint boot does not get cut.
- Pry down on the control arm until the ball joint stud is clear of the knuckle. Position the knuckle assembly to the side until it is clear of the ball joint stud. Slowly release the control arm.
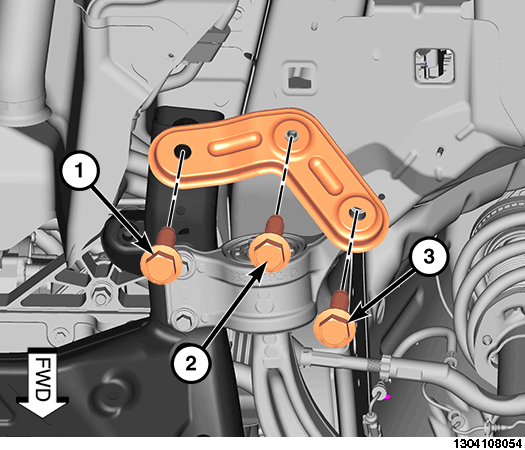
- Remove and DISCARD
the three shear bracket fasteners (1, 2, 3) then remove the shear bracket.
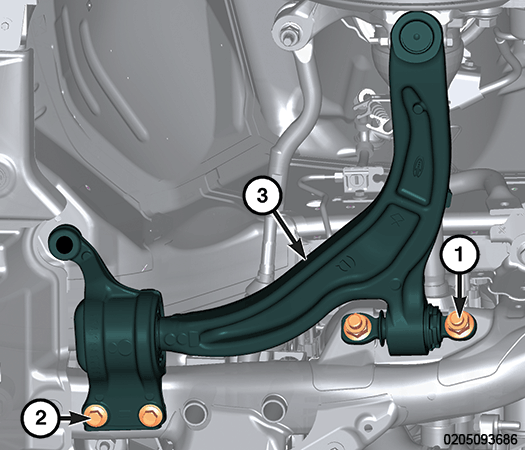
- Remove and DISCARD the front lower control arm to front subframe mounting fasteners (1).
- Remove and DISCARD the front lower control arm to rear subframe mounting fasteners (2).
- Remove the lower control arm (3) from the vehicle.