Removal And Installation: Fwd: Installation
NOTE:
Torque all fasteners with the vehicle on the ground at ride height.
- Position knuckle on vehicle.
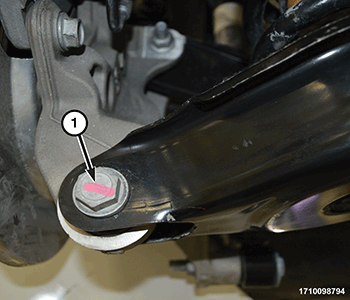
- Install spring link to knuckle fastener (4) Do not tighten at this time.
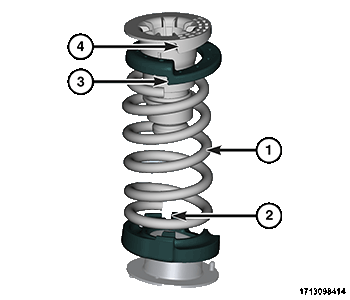
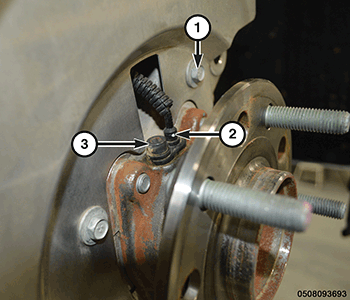
- Install the spring (1), jounce bumper (4), and upper isolator (3) to the spring link by aligning the end of the spring with the notch in the lower isolator (2).
Remove shock absorber. Refer to SHOCK ABSORBER, SUSPENSION, REMOVAL AND INSTALLATION .
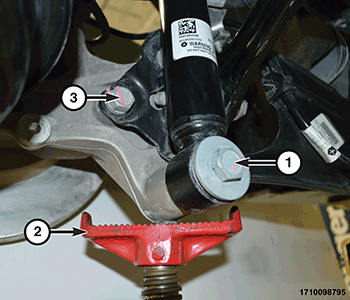
- Position a suitable jack (2) under the knuckle.
- Install camber link to knuckle fastener (3) Do not tighten at this time.
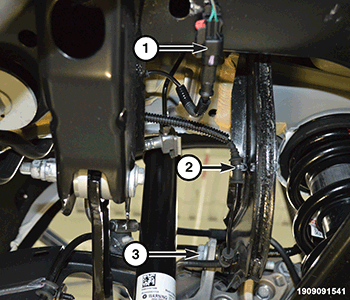
- Install the trailing arm to knuckle fasteners (3) Do not tighten at this time.
- Install the shock absorber. Refer to SHOCK ABSORBER, SUSPENSION, REMOVAL AND INSTALLATION .
- Install the toe link. Refer to LINK, TOE, REMOVAL AND INSTALLATION .
- Remove the jack from under the knuckle.
- Install the splash shield to knuckle mounting fasteners (1) and tighten to the proper torque specifications. Refer to TORQUE SPECIFICATIONS .
- Install hub and bearing assembly. Refer to HUB AND BEARING, REMOVAL AND INSTALLATION .
- Place vehicle on an alignment rack. Raise vehicle as necessary to access mounting fasteners.
- Tighten the spring link to knuckle mounting fastener to the proper torque specification. Refer to TECHNICAL SPECIFICATIONS .
- Tighten the camber link to knuckle mounting fastener to the proper torque specification. Refer to TECHNICAL SPECIFICATIONS .
- Tighten the trailing arm to knuckle mounting fasteners to the proper torque specification. Refer to TECHNICAL SPECIFICATIONS .
- Perform a four wheel alignment. Refer to WHEEL ALIGNMENT, STANDARD PROCEDURE .