Removal And Installation: Installation
- Install the shock absorbers. Refer to SHOCK ABSORBER, SUSPENSION, REMOVAL AND INSTALLATION .
- Install the camber, spring and toe links. Refer to LINK, CAMBER, REMOVAL AND INSTALLATION or LINK, SPRING, REMOVAL AND INSTALLATION or LINK, TOE, REMOVAL AND INSTALLATION .
- Install the rear knuckles. Refer to KNUCKLE, REAR, REMOVAL AND INSTALLATION .
- Install the trailing arms. Refer to LINK, TRAILING, REAR, REMOVAL AND INSTALLATION .
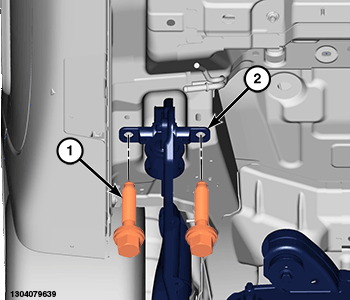
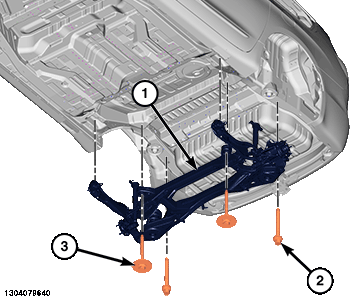
- Position the crossmember assembly (1) on a suitable lifting device and install onto the vehicle.NOTE:
Do not reuse fastener. If removed, a NEW fastener must be installed and tightened to specifications.
- Install the NEW
front (2) and rear (3) bolts.
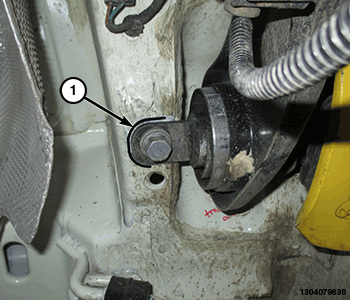
- Install the trailing link bushing bolts (1).
- Position the trailing arm link bushings back using the marks (1) made during removal and tighten the bolts to the proper torque specification. Refer to TECHNICAL SPECIFICATIONS
.
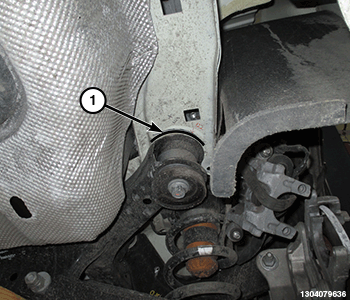
- Line up the rear crossmember assembly with the marks (1) made during removal.
- Tighten the front bolts (3) to the proper torque specification. Refer to TECHNICAL SPECIFICATIONS .
- Tighten the rear bolts (2) to the proper torque specification. Refer to TECHNICAL SPECIFICATIONS .
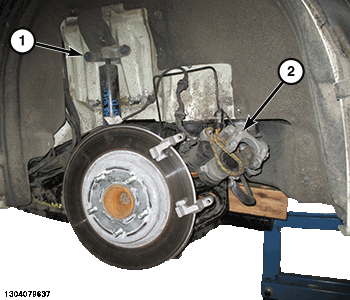
- Using a suitable lifting device, support the lower control arms and install the upper shock mounts. Tighten the upper shock mount bolts (1) to the proper torque specification. Refer to TECHNICAL SPECIFICATIONS .
- Install the rear brake calipers (2). Refer to CALIPER, DISC BRAKE, REAR, REMOVAL AND INSTALLATION
.
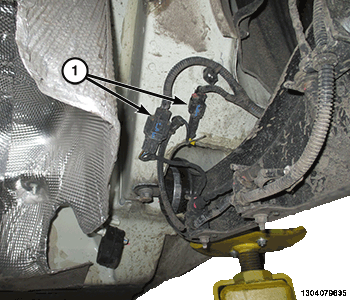
- Connect the electrical connectors (1).
- Install the exhaust as necessary. Refer to MUFFLER, EXHAUST, REMOVAL AND INSTALLATION .
- Install the rear belly pan. Refer to BELLY PAN, REAR, REMOVAL AND INSTALLATION .
- Connect the negative battery cable. If equipped with an Intelligent Battery Sensor (IBS), connect the IBS connector.