Removal And Installation - Fwd: Installation
Engine assembly requires the use of a unique sealant that is compatible with engine oil. Using a sealant other than Mopar® Threebond Engine RTV Sealant may result in engine fluid leakage.
Clean the oil pan, timing chain cover, rear seal retainer and engine block mating surfaces thoroughly with isopropyl alcohol in preparation for sealant application. All surfaces that seal with RTV must be oil and contamination free to ensure proper adhesion of the RTV to the mating surface to prevent leaks.
Following the application of Mopar® Threebond Engine RTV Sealant to the gasket surfaces, the components must be assembled within 10 minutes and the attaching fasteners must be tightened to specification within 45 minutes. Prolonged exposure to the air prior to assembly may result in engine fluid leakage.
- Clean the oil pan, timing chain cover, rear seal retainer and engine block mating surfaces with isopropyl alcohol in preparation for sealant application. Refer to PAN, OIL, CLEANING .
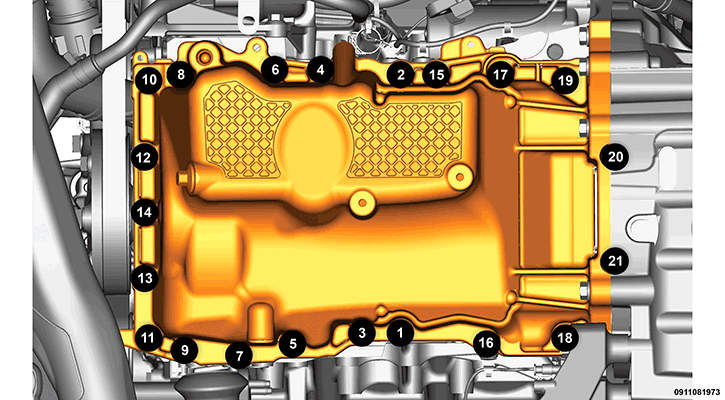
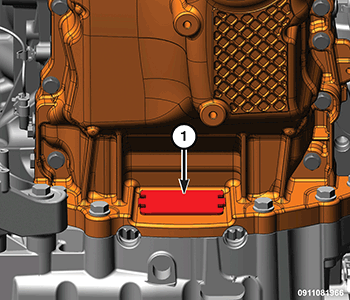
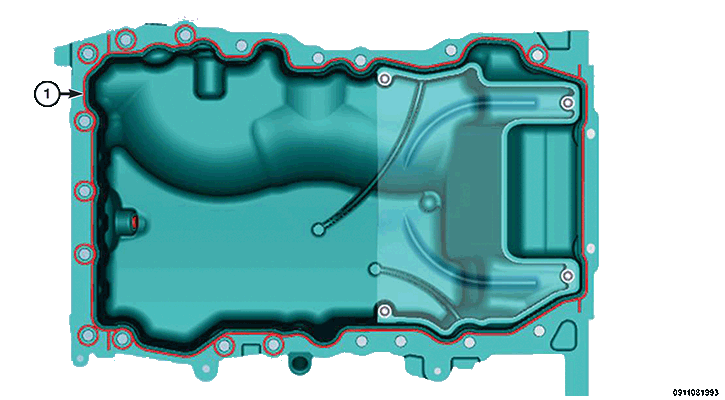
- Apply a 3 to 4 mm wide bead of Mopar® Threebond Engine RTV Sealant next to the chamfer of the oil pan (1) as shown in the following locations:
- Oil pan to engine block flange
- Two timing cover to engine block T-joints
- Two rear seal retainer to engine block T-joints
CAUTION:Make sure that the rear face of the oil pan is flush to the transmission bell housing before tightening any of the oil pan mounting bolts. A gap between the oil pan and the transmission could crack the oil pan or transmission casting.
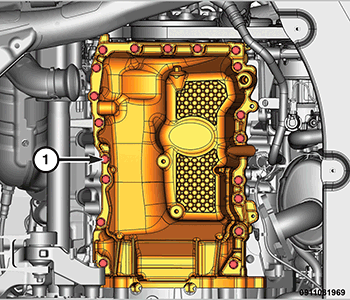
- Install the oil pan to the engine block and flush to the transmission bell housing. Secure the oil pan to the engine block with nineteen M8 oil pan mounting bolts (1) finger tight.
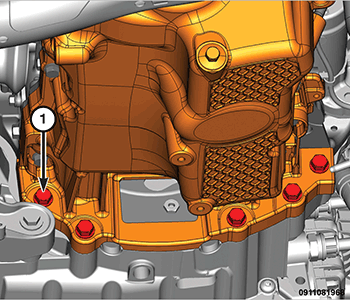
- Install the five oil pan to transmission bolts (1) and tighten to the proper torque specification. Refer to TECHNICAL SPECIFICATIONS .
- Tighten the nineteen previously installed M8 oil pan mounting bolts to the proper torque specification. Refer to TECHNICAL SPECIFICATIONS .
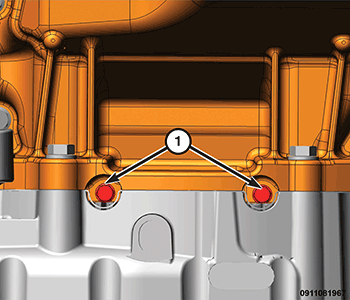
- Install the two M6 bolts (1) to the rear oil seal retainer flange and tighten to the proper torque specification. Refer to TECHNICAL SPECIFICATIONS .
- Install the two rubber plugs (1) covering the rear oil seal retainer flange bolts.
- Install the torque converter bolt access cover (1).
- Install the bolt (1) securing the coolant tube to oil pan and tighten to the proper torque specification. Refer to TECHNICAL SPECIFICATIONS .
- Install the crossunder pipe. Refer to PIPE, EXHAUST CROSSUNDER, REMOVAL AND INSTALLATION
.
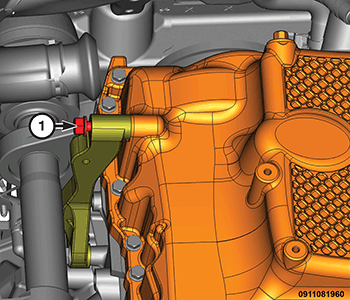
- Install the lower bolt (1) to the intermediate shaft support bracket and tighten to the proper torque specification. Refer to TORQUE SPECIFICATIONS
.
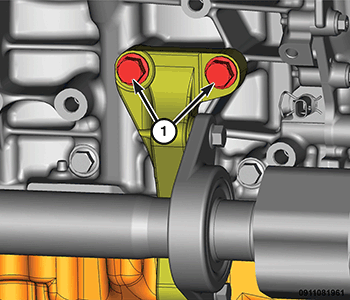
- Install the upper bolts (1) to the intermediate shaft support bracket and tighten to the proper torque specification. Refer to TORQUE SPECIFICATIONS .
- Install the belly pan. Refer to BELLY PAN, ENGINE, REMOVAL AND INSTALLATION or BELLY PAN, FRONT, REMOVAL AND INSTALLATION .
- Lower the vehicle.
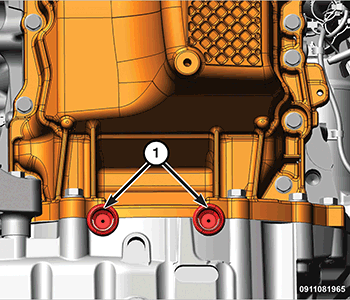
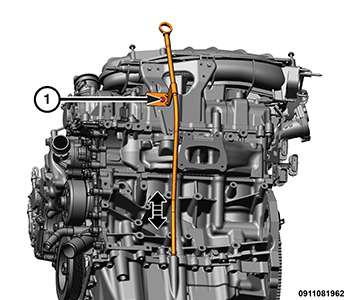
- Install the oil level indicator tube and tighten the bolt (1) to the proper torque specification. Refer to TECHNICAL SPECIFICATIONS .
- If removed, install the oil filter and fill the engine crankcase with the proper oil to the correct level. Refer to OIL, STANDARD PROCEDURE .
- Connect the negative battery cable.
- Run the engine until it reaches normal operating temperature.