Removal And Installation
REMOVAL
- Disconnect and isolate the negative battery cable. If equipped with an Intelligent Battery Sensor (IBS), disconnect the IBS connector first before disconnecting the negative battery cable.
- Raise and support vehicle. Refer to HOISTING, STANDARD PROCEDURE .
- Remove the rear halfshaft. Refer to
REMOVAL AND INSTALLATION
.
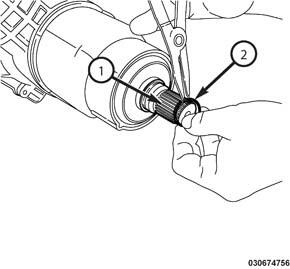
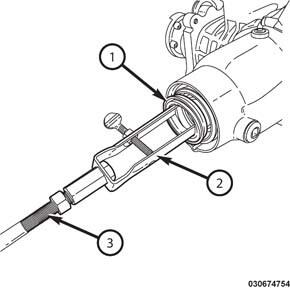
- Remove the circlip (2) from the output shaft (1).
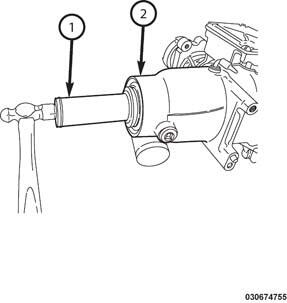
- Using (special tool #8420B, Remover, Shaft) (2) and (special tool #C-637, Slide Hammer, Universal) (3) remove the output shaft (1).
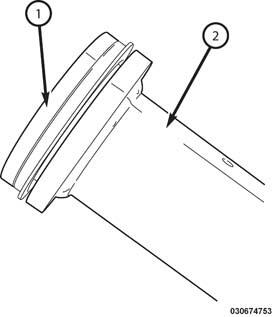
- Remove the output shaft seal (1) using (special tool #7794-A, Remover, Seal) (2) and (special tool #C-637, Slide Hammer, Universal) (3).
- Clean and inspect the sealing surface on the output shaft:
- if the seal surface is damaged, install a NEW output shaft.
- if the seal bore is damaged it will be necessary to replace the RDU.
INSTALLATION
- Clean and inspect the sealing surface on the output shaft:
- If the seal surface is damaged, install a NEW output shaft.
- If the seal bore is damaged it will be necessary to replace the RDU.
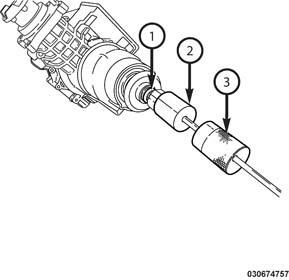
- Install the output seal (1) onto the (special tool #10117, Installer, Seal) (2).
- Install the output seal using (special tool #10117, Installer, Seal) (1).
- Install the output shaft into the RDM (2).
- Install a new circlip (2) onto the output shaft (1).
- Install the rear halfshaft. Refer to REMOVAL AND INSTALLATION .
- Fill the differential fluid. Refer to FLUID, DIFFERENTIAL, STANDARD PROCEDURE .
- Connect the negative battery cable. If equipped with an Intelligent Battery Sensor (IBS), connect the IBS connector.