Removal And Installation
REMOVAL
- With the scan tool, run the Rear Driveline Module (RDM) Bleed to park the RDM. The RDM is in the parked position when the message "The rear differential fluid level can now be topped off, press Continue after filling fluid level" is displayed.
- Raise and support the vehicle. Refer to HOISTING, STANDARD PROCEDURE
.
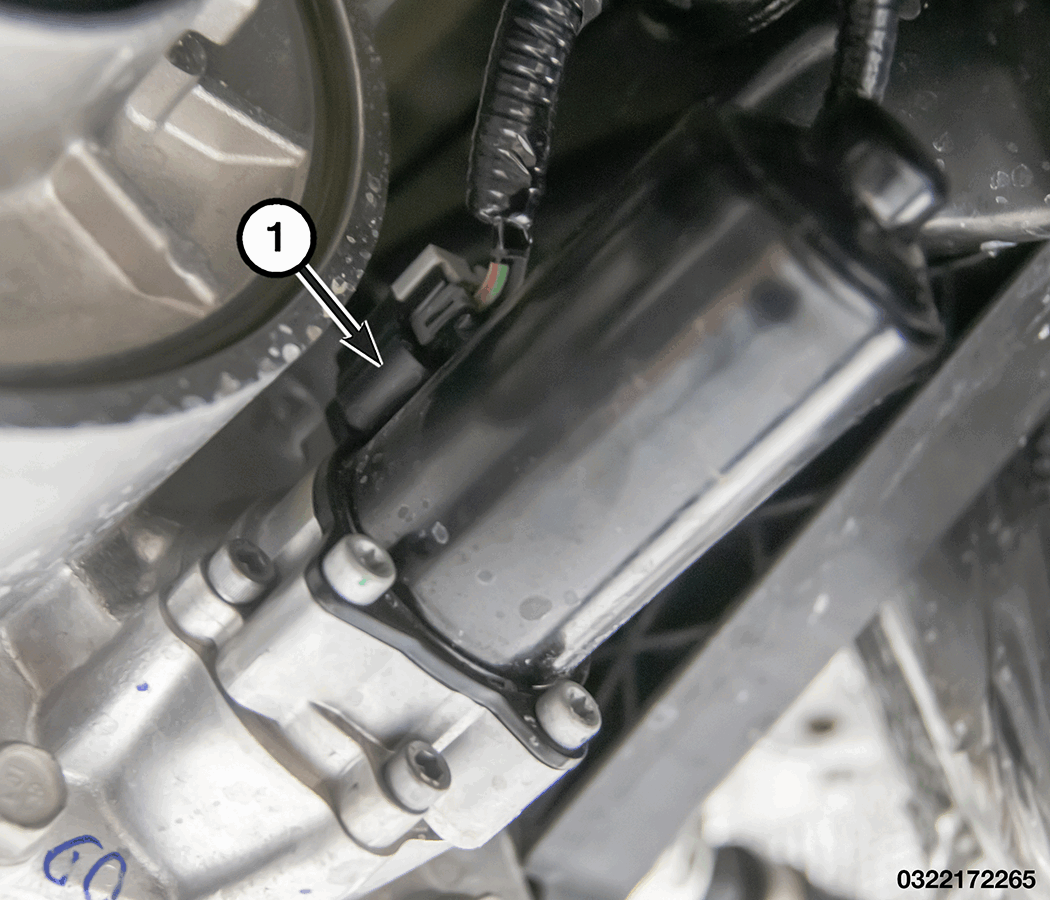
- Disconnect the pump motor wire harness connector (1).
- Position a drain pan under the RDM.
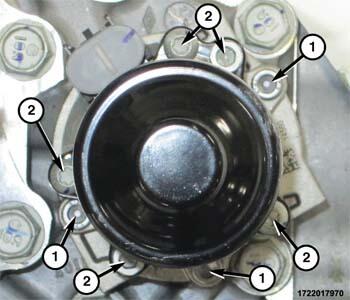
- Do not remove the fasteners securing the motor to the pump (2).
Remove the three pump motor bolts (1).
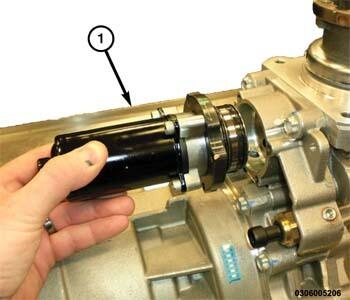
- Remove the pump motor assembly (1) from the RDM.CAUTION:
Do not use motor housing as a lever or handle when removing pump and motor assembly, damage to the pump or motor may result.
INSTALLATION
NOTE:
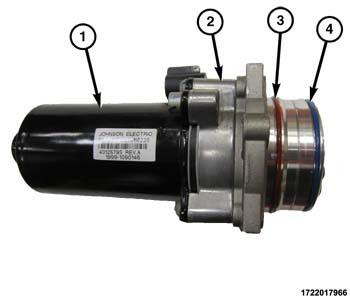
The pump motor assembly O-rings must be replaced. The O-rings are of different size and must not be interchanged. the red O-ring (3) goes on first and is nearest the pump flange, followed by the blue O-ring (4) that sits nearest the outboard edge.
- Install NEW
pump motor O-rings.
- Install the pump motor assembly (1) onto the RDM.
- Install the three pump motor bolts (1) and uniformly finger tighten until the pump motor assembly is fully seated to housing. Tighten to the proper torque specifications. Refer to TECHNICAL SPECIFICATIONS .
- Connect the pump motor wire harness connector (2).
- Remove the support and lower the vehicle.