Removal And Installation: Installation
WARNING:
To avoid serious or fatal injury, during service lift the ball socket end retaining clip only far enough to release the socket from the ball stud. Excessive prying or removal of the clip may result in improper clip spring tension. Improper clip tension may result in the support cylinder separating from the ball stud causing sudden, unexpected loss of liftgate support.
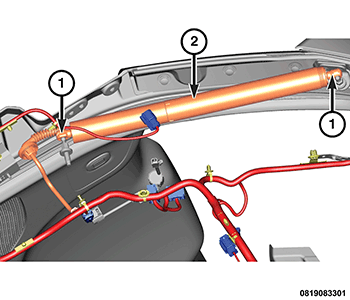
- Check to be certain that the ball studs (1) on the liftgate trough and the liftgate are both in good condition and properly tightened. Tighten the ball studs to the proper. Refer to TECHNICAL SPECIFICATIONS .
- Position the ball socket on the upper end of the power liftgate Power Drive Unit (PDU) (2) to the ball stud on the right liftgate opening trough.
- Using hand pressure, press the ball socket onto the ball stud until the retainer clip snaps into place.
- Repeat Step 2 and Step 3 for the ball socket on the lower end of the PDU at the ball stud on the liftgate.
- Inspect to be certain that the retaining clip on each of the PDU ball socket ends are fully seated.
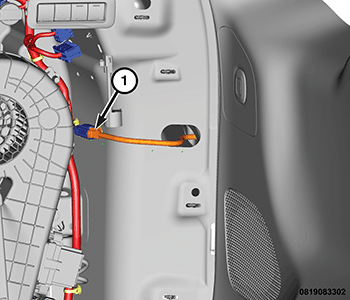
- Connect the PDU pigtail wire connector (1) to the body wire harness connector on the inside of the trim panel.
- Install the trim onto the inside of the left quarter trim panel. Refer to PANEL, QUARTER TRIM, REMOVAL AND INSTALLATION .
- Remove the service support prop from the liftgate.
- Connect the negative cable to the battery. If equipped with an Intelligent Battery Sensor (IBS), reconnect the IBS connector.
- Perform the power liftgate calibration procedure. Refer to POWER LIFTGATE CALIBRATION .