Transfer Gear Inner Bearing Removal
WARNING:
Always wear safety glasses when cleaning, disassembling and assembling the transmission/transaxle. Contents of the transmission/transaxle can become projectiles (e.g., springs, snap-rings, as well as metal and other debris). Failure to wear safety glasses may result in severe personal injury.
Before disassembling the transmission, remove oily grime and loose dirt. Place the transmission on a clean work surface with ample fluid drainage or absorbency.
- Remove the bellhousing. Refer to BELLHOUSING, REMOVAL AND INSTALLATION .
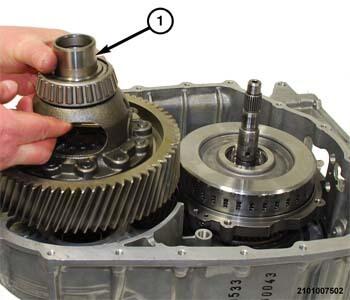
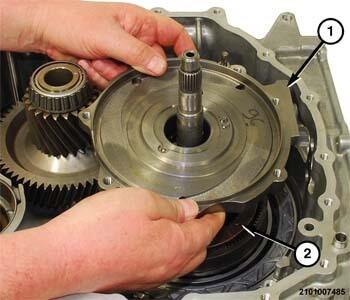
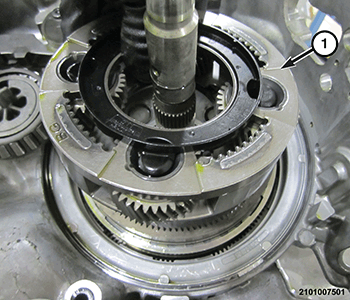
- Remove the differential assembly (1) from the transmission housing.
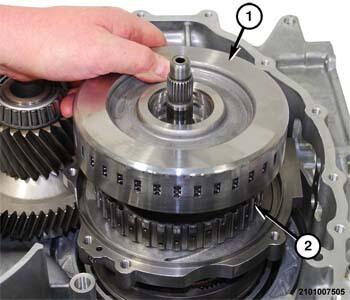
- Separate the E-clutch drum (1) from the E-clutch hub (2).
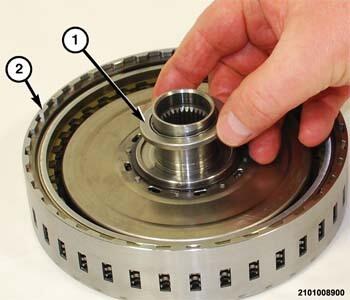
- Separate the thrust bearing (1) from the E-clutch (2) hub.
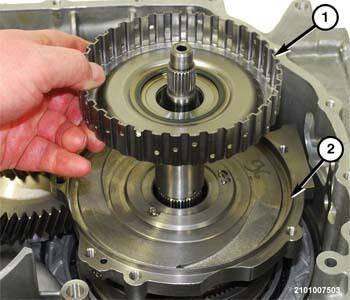
- Separate the E-clutch hub (1) from the output gear support (2).
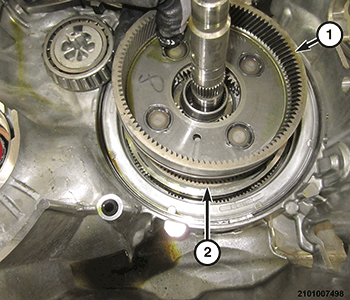
- Separate the output gear support (1) from the gear 4 planetary pinion carrier (2).
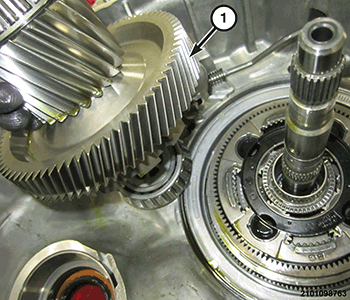
- Remove the transfer gear (1) from the transmission housing.
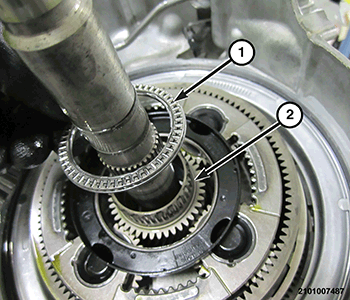
- Separate the roller type thrust bearing (1) from the sun gear 3 and 4 and Dog Clutch-F (2).
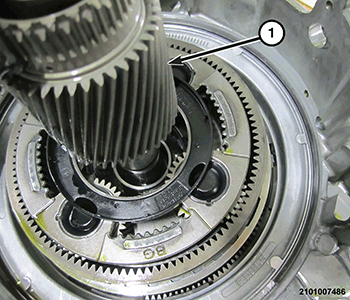
- Separate the sun gear 3 and 4 and Dog Clutch-F (1) from the gear 4 planetary pinion carrier.
- Separate the gear 4 planetary pinion carrier (1) from the annulus gear 4.
- Separate the annulus gear 4 (1) from the annulus gear 3 (2).
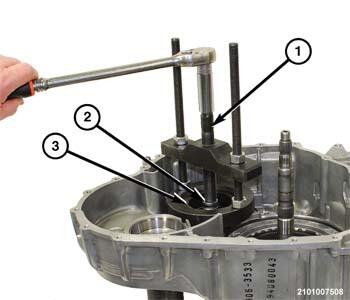
- Using the (special tool #C-293-PA, Puller, Press) (1), Adapter Blocks (special tool #9738, Blocks, Adapter) (3) and a suitable socket as a plug (2), remove the transfer gear bearing cone from the transmission housing.