Removal And Installation: Installation
Hoisting and jack lift points provided in this service information are for a complete vehicle. When the transaxle is removed, the center of gravity will shift to the rear of the vehicle, possibly creating an unstable condition. Place safety stands under the rear frame rails behind the rear axle to stabilize the vehicle. Personal injury may result if safety stands are not used.
If installing a new transmission, remove the shipping cap from the vent.
- Inspect the flexplate for damage. Install a new flexplate if necessary. Refer to FLEXPLATE, REMOVAL AND INSTALLATION .
- Lightly grease the torque converter hub pocket in the end of the crankshaft.NOTE:
The close tolerance torque converter bolt hole is oval shaped, and will aid in aligning the flexplate to the torque converter if the torque converter bolt is installed in this location first.
- Rotate the flexplate so the close tolerance bolt hole is at the six o'clock position.
- While guiding the transmission past obstacles, jack the transmission upward until the engine and the transmission are in line.
- Push the bell housing against the engine block until the guide pins engage.CAUTION:
Ensure that the transmission bell housing and the engine block are flush before installing the bolts. Never utilize the mounting bolts to draw the transmission to the engine.
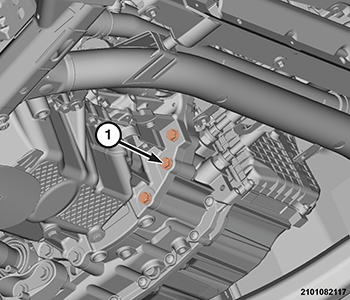
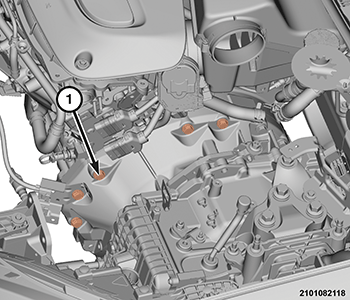
- Install the engine to transmission bolts (1).
- Install the engine to transmission bolts (1).
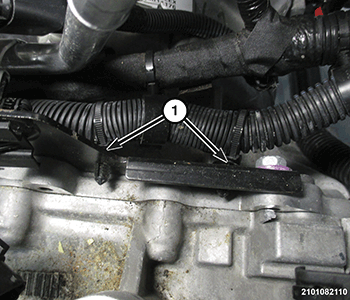
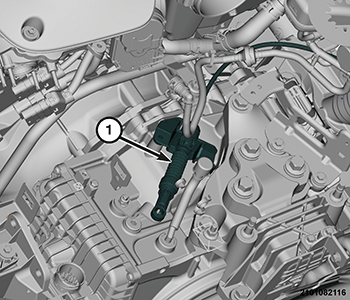
- Install the wiring harness push pin (1) to the bracket.
- Tighten all previously installed engine to transmission bolts to the proper specification. Refer to TECHNICAL SPECIFICATIONS .
- If equipped, install the Power Transfer Unit. Refer to REMOVAL AND INSTALLATION .
- Install the front crossmember. Refer to CROSSMEMBER, FRONT SUSPENSION, REMOVAL AND INSTALLATION .
- Remove the transmission jack from under the vehicle.CAUTION:
It is essential that correct length bolts be used to attach the converter to the driveplate. Failure to follow this caution may result in transmission damage.
NOTE:There are three pairs of bolts 120° apart attaching the flexplate to the torque converter.
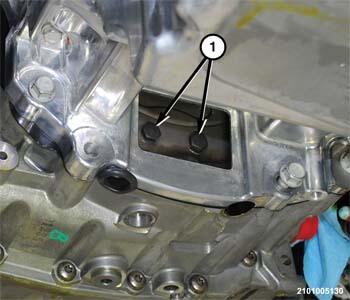
- Install the torque converter bolts (1). Do not torque at this time. Rotate the crankshaft to bring each set of torque converter bolts into view through the access door.
- Tighten all the torque converter bolts (1) to the proper torque specifications. Refer to TECHNICAL SPECIFICATIONS .
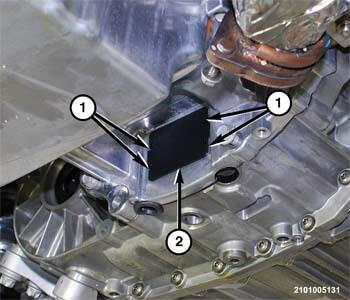
- Install the torque converter access door (2).
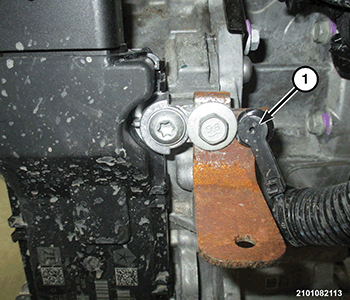
- Install the transmission mount adaptor bolts (1) and tighten to the proper torque specifications. Refer to TECHNICAL SPECIFICATIONS .
- Remove the Driveline Support Fixture (special tool #8534C, Fixture, Driveline Support) (1) and chain (2).
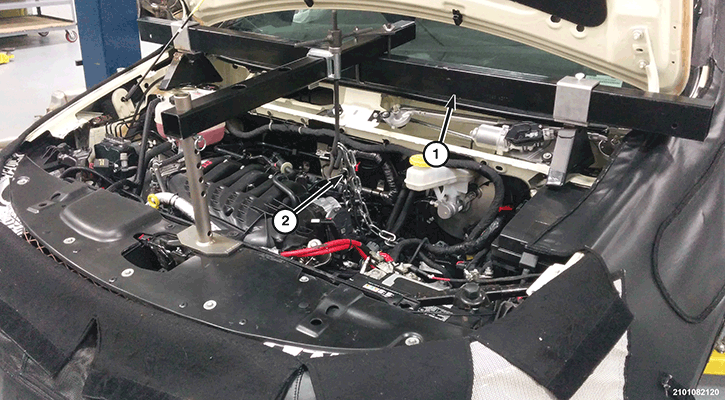
- Install the cowl panel cover. Refer to COVER, COWL PANEL, REMOVAL AND INSTALLATION
.
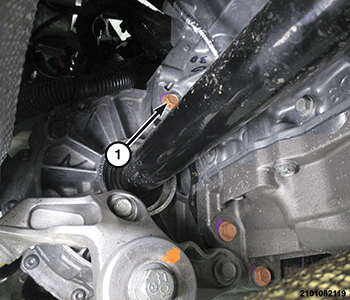
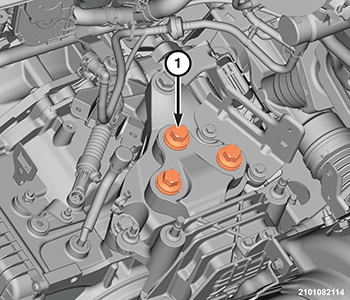
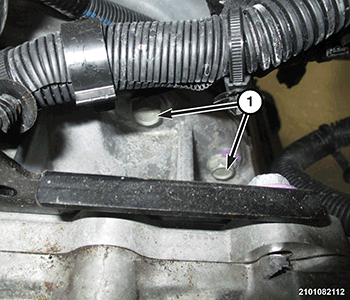
- Install the right upper transmission to engine bolts (1) and tighten to the proper torque specifications. Refer to TECHNICAL SPECIFICATIONS .
- Install the starter bolts and the transmission to engine bolts (1) and tighten to the proper torque specifications. Refer to TECHNICAL SPECIFICATIONS .
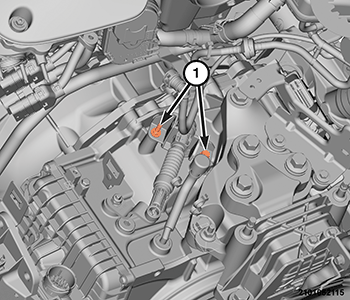
- Install the wiring harness push pins (1) into the bracket.
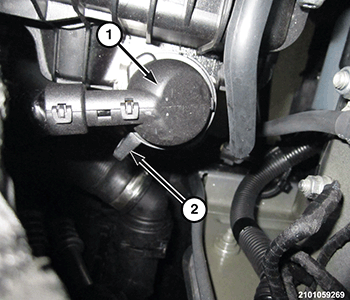
- Connect the transmission wire harness connector (1) and rotate the locking lever (2) clockwise.
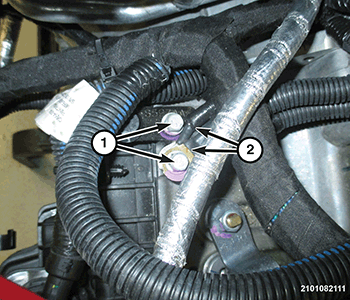
- Position the cooling hose in place, install the nuts (1) and tighten to the proper torque specifications. Refer to TECHNICAL SPECIFICATIONS
.
- Position the Manual Park Release (MPR) cable (1) and bracket in position on the transmission.
- Install the MPR cable bracket bolts (1) and tighten to the proper torque specifications. Refer to TECHNICAL SPECIFICATIONS .
- Install the wire harness connectors (2) and the wire harness bolts (1) and tighten to the proper torque specifications. Refer to TECHNICAL SPECIFICATIONS .
- Install the Left Hand (LH) and Right Hand (RH) half shafts. Refer to REMOVAL AND INSTALLATION
or REMOVAL AND INSTALLATION
.
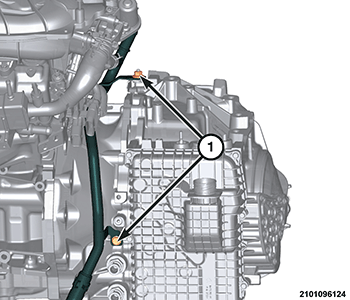
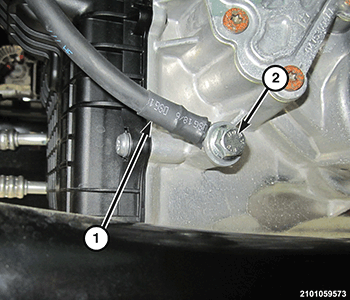
- Position the ground cable (1) in place on the transmission, install the ground cable bolt (2) and tighten the ground cable bolt (2) to the proper specification. Refer to TECHNICAL SPECIFICATIONS .
- Connect the transmission cooler lines to the transmission. Refer to TUBES AND HOSES, TRANSMISSION OIL COOLER, STANDARD PROCEDURE .
- Fill the transmission to the proper transmission fluid level with the specified fluid. Refer to CAPACITIES AND RECOMMENDED FLUIDS, SPECIFICATIONS .
- Install the tire and wheel assemblies. Refer to REMOVAL AND INSTALLATION .
- Remove the support and lower the vehicle.
- Install the battery tray. Refer to TRAY, BATTERY, REMOVAL AND INSTALLATION .
- Install the battery. Refer to BATTERY, REMOVAL AND INSTALLATION .
- Install the engine cover. Refer to COVER, ENGINE, REMOVAL AND INSTALLATION .
- If transmission is replaced, program the Vehicle Identification Number (VIN) into the Transmission Control Module (TCM) with the scan tool.NOTE:
Only perform the Valve Body Solenoid Learn procedure if the valve body and/or the TCM was replaced during a repair. Do not perform this procedure if the repair did not require the valve body and/or TCM to be replaced. Do not perform this procedure if the transmission is being replaced.
- If transmission is replaced or internal repairs were made, perform Transmission Verification Test-948TE. Refer to TRANSMISSION VERIFICATION TEST - 948TE 9HP48 .