Removal And Installation: Installation
Be certain to adjust the refrigerant oil level when servicing the A/C refrigerant system. Failure to properly adjust the refrigerant oil level will prevent the A/C system from operating as designed and can cause serious A/C compressor damage.
When replacing multiple A/C system components, refer to the Refrigerant Oil Capacities chart to determine how much oil should be added to the refrigerant system. Refer to OIL, REFRIGERANT, STANDARD PROCEDURE .
Replacement of the refrigerant line O-ring seals is required anytime an underbody refrigerant line is disconnected. Failure to replace the rubber O-ring seals may result in a refrigerant system leak.
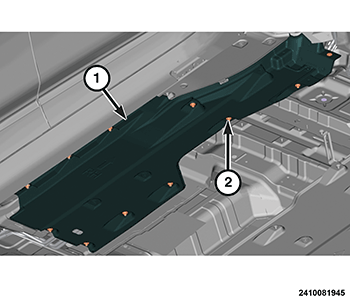
Gas vehicle shown in illustration, PHEV similar.
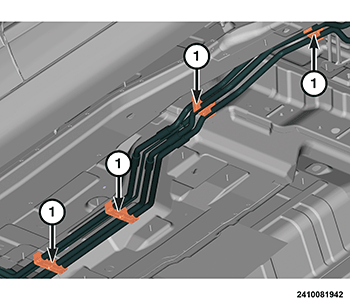
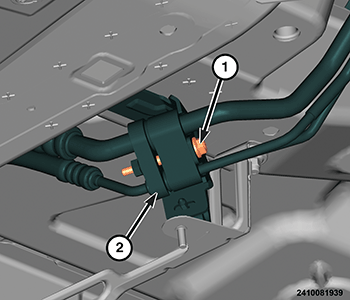
- Position the underbody lines underneath the vehicle body and install the four underbody lines holding clips (1).
- Connect the front heater hoses to the underbody heater lines and install the hose clamps securely.
- Position the underbody shield (1) onto the vehicle. Install and tighten the eleven underbody shield to floor pan nuts (2).
- Remove the tape or plugs from all the opened refrigerant line fittings and the rear expansion valve ports.
- Lubricate NEW
rubber O-ring seals with clean refrigerant oil and install them onto all the underbody refrigerant line fittings. Use only the specified O-rings as they are made of a special material for the R-1234yf refrigerant system. Use only refrigerant oil of the type recommended for the A/C compressor in the vehicle.
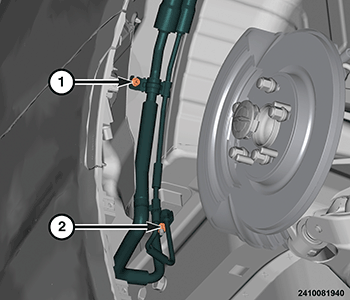
- Connect the front A/C suction line and liquid line to the underbody refrigerant lines (2). Tighten the bolt to the proper. Refer to TECHNICAL SPECIFICATIONS .
- Lubricate NEW rubber O-ring seals with clean refrigerant oil and install them onto the underbody refrigerant extension line fittings. Use only the specified O-rings as they are made of a special material for the R-1234yf refrigerant system. Use only refrigerant oil of the type recommended for the A/C compressor in the vehicle.
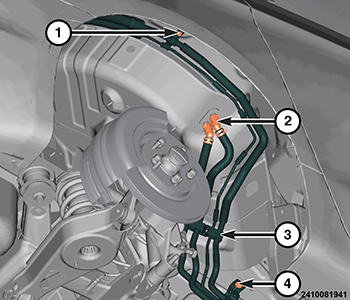
- Connect the underbody refrigerant lines and the sealing plate to the rear expansion valve.
- Install and tighten the underbody refrigerant lines to rear expansion valve nut (2) to the proper. Refer to TECHNICAL SPECIFICATIONS .
- Lubricate NEW
rubber O-ring seals with clean engine coolant and install them onto the rear heater core tube fittings. Use only the specified O-rings as they are made of a special material designed for use with engine coolant. Use only engine coolant of the type recommended for the engine in the vehicle.CAUTION:
DO NOT apply excessive force on underbody heater lines or rear heater hose quick connect fittings when connecting the connections. Excessive force may damage or deform the fittings and or lines, causing an engine coolant leak.
- Connect the quick connect fittings (2) for the underbody heater lines to the rear heater core tubes and engage the inserts (2). Make sure the inserts are fully engaged to the rear heater core tube fittings.
- Install the exhaust muffler and pipe. Refer to MUFFLER, EXHAUST, REMOVAL AND INSTALLATION .
- Install the right rear wheelhouse splash shield. Refer to SHIELD, SPLASH, REAR WHEELHOUSE, REMOVAL AND INSTALLATION .
- Remove the support and lower the vehicle.
- Fill the engine cooling system. Refer to STANDARD PROCEDURE .
- Charge the refrigerant system. Refer to PLUMBING, FRONT, STANDARD PROCEDURE .