Removal And Installation
REMOVAL
- Disconnect and isolate the negative battery cable. If equipped with an Intelligent Battery Sensor (IBS), disconnect the IBS connector first before disconnecting the negative battery cable.
- Recover the refrigerant from the refrigerant system. Refer to PLUMBING, FRONT, STANDARD PROCEDURE .
- Remove the engine belly pan. Refer to BELLY PAN, ENGINE, REMOVAL AND INSTALLATION
.
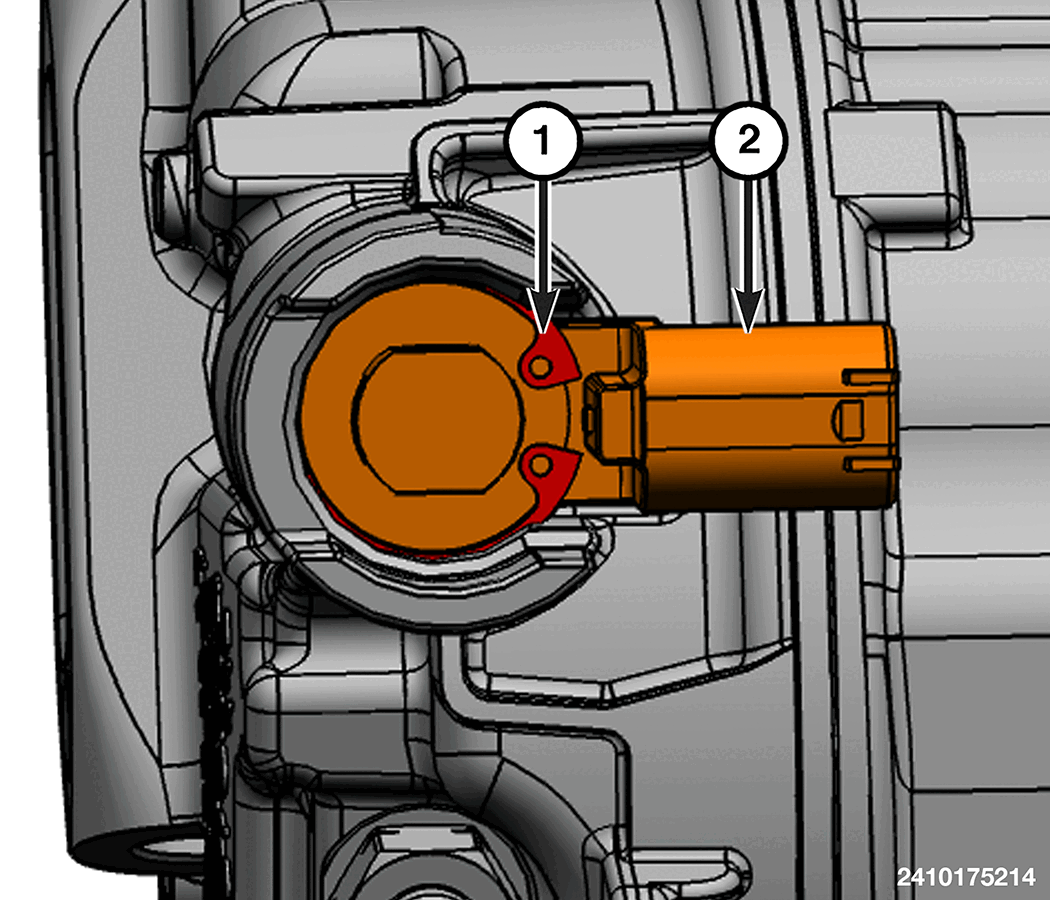
- Disconnect the wire harness connector from the high pressure relief valve (2).
- Remove the snap ring (1) securing the high pressure relief valve (2) to the A/C compressor and DISCARD the snap ring.
- Remove the high pressure relief valve (2) from the A/C compressor.
INSTALLATION
- Install the high pressure relief valve to the A/C compressor.
- Install the NEW snap ring securing the high pressure relief valve to the A/C compressor.
- Connect the wire harness connector to the high pressure relief valve.
- Install the engine belly pan. Refer to BELLY PAN, ENGINE, REMOVAL AND INSTALLATION .
- Evacuate the refrigerant system. Refer to PLUMBING, FRONT, STANDARD PROCEDURE .
- Charge the refrigerant system. Refer to PLUMBING, FRONT, STANDARD PROCEDURE .
- Connect the negative battery cable. If equipped with an Intelligent Battery Sensor (IBS), connect the IBS connector.