Removal And Installation: Removal
Review the warnings and cautions for this system before performing the procedure. Failure to follow these instructions may result in serious or fatal injury.
To prevent any contaminates from entering the rear heating-A/C system, make sure that the area around the underbody line connections is clean of any dirt or foreign residue prior to disconnecting the lines.
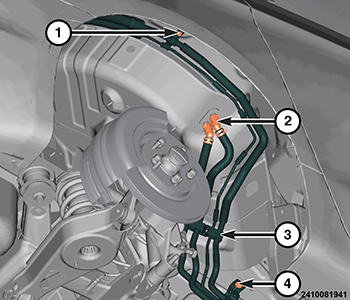
Gas vehicle shown in illustration, PHEV similar.
- Recover the refrigerant from the refrigerant system. Refer to PLUMBING, FRONT, STANDARD PROCEDURE .
- Drain the engine cooling system. Refer to STANDARD PROCEDURE .
- Raise and support the vehicle. Refer to HOISTING, STANDARD PROCEDURE .
- Remove the right rear wheelhouse splash shield. Refer to SHIELD, SPLASH, REAR WHEELHOUSE, REMOVAL AND INSTALLATION .
- Remove the exhaust muffler and pipe. Refer to MUFFLER, EXHAUST, REMOVAL AND INSTALLATION
.CAUTION:
DO NOT apply excessive force on underbody heater lines or rear heater hose quick connect fittings when disconnecting the connections. Excessive force may damage or deform the fittings and or lines, causing an engine coolant leak.
- Disconnect the underbody heater lines from the rear heater core tubes (2) by releasing the insert in each rear quick connect fitting and carefully pulling downward on the fittings while using a slight twisting motion.
- Remove the underbody lines mounting bracket nuts (1, 4).
- Release the underbody line holding clip (3) from the stud.
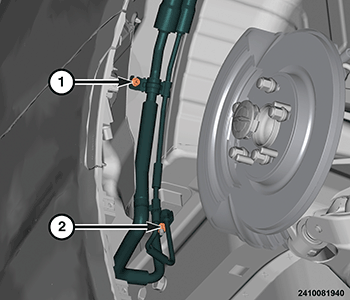
- Remove the underbody refrigerant lines to rear expansion valve nut (2).
- Remove the underbody refrigerant lines to wheelhouse nut (1).
- Disconnect the underbody refrigerant lines from the rear expansion valve and remove and discard
the O-ring seals.
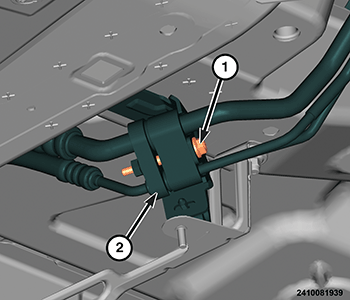
- Remove the underbody lines to front A/C liquid and suction lines bolt (1).
- Disconnect the front A/C liquid and suction lines from the underbody refrigerant lines and remove and discard
the O-ring seals.NOTE:
Replacement of the front heater hoses will be required if the hose ends are cut for removal.
- Release the spring type hose clamps and disconnect the front heater hoses from the underbody heater lines.NOTE:
Lower the heater tubes to drain any extra coolant from the lines.
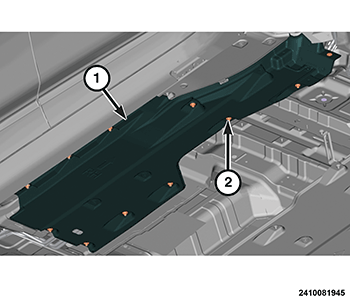
- Remove the eleven underbody shield to floor pan nuts (2) and shield (1) to gain access to the underbody lines.
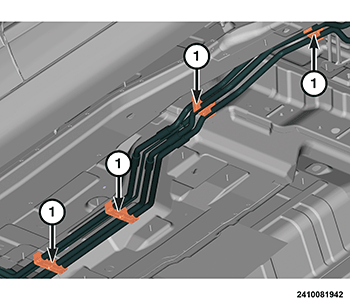
- Release the four underbody lines holding clips (1).
- Rotate and tilt the underbody lines as necessary and remove the lines from the vehicle.
- Install plugs in, or tape over all the opened refrigerant line fittings and the rear expansion valve ports.