Removal And Installation: Installation
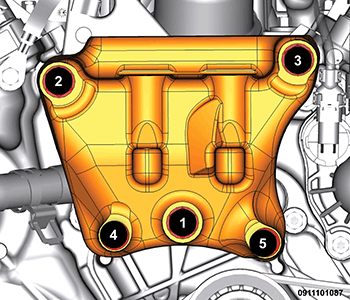
- If removed, install the right engine mount bracket and tighten the bolts using the sequence shown to:
- Tighten the M10 bolts (1-3) to 40 N.m (30 ft. lbs.) + 90°.
- Tighten the M8 bolts to (4, 5) to 20 N.m (15 ft. lbs.) + 90°.
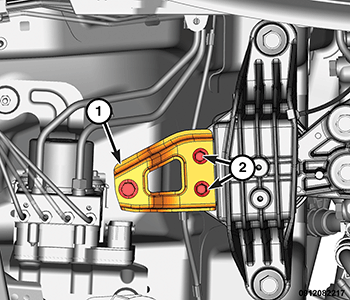
- Position the engine mount isolator and hand tighten the retaining bolts (1, 2).
- Tighten the right engine mount isolator to frame rail bolts (1) to the proper torque specification. Refer to TECHNICAL SPECIFICATIONS .
- Tighten the four right engine mount to engine bolts (2) to the proper torque specification. Refer to TECHNICAL SPECIFICATIONS .
- Install the right engine mount brace and tighten the brace to body bolt (2) and the brace to engine mount bolts (2) to the proper torque specification. Refer to TECHNICAL SPECIFICATIONS .
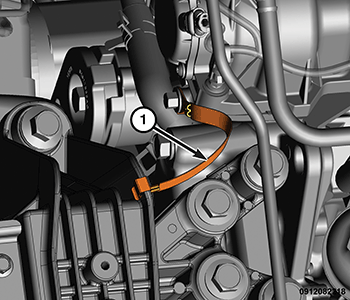
- Install the ground strap (1) to the engine mount.
- Remove the floor jack.
- Raise and support the vehicle. Refer to HOISTING, STANDARD PROCEDURE .
- Install the belly pan. Refer to BELLY PAN, ENGINE, REMOVAL AND INSTALLATION or BELLY PAN, FRONT, REMOVAL AND INSTALLATION .
- Remove support and lower the vehicle.
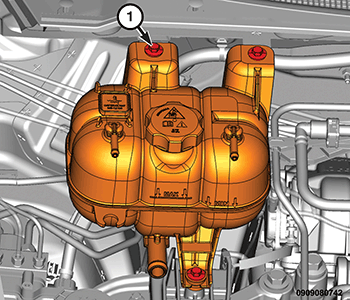
- Install the pressurized coolant bottle. Tighten the bolts (1) to the proper torque specification. Refer to TECHNICAL SPECIFICATIONS .
- Install the engine cover. Refer to COVER, ENGINE, REMOVAL AND INSTALLATION .