Liftgate Glass Installation
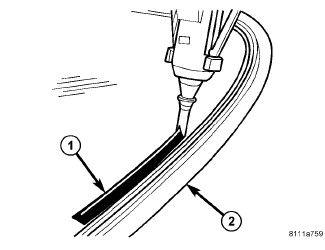
| 1 - ADHESIVE BEAD |
| 2 - GLASS SEAL |
- Apply bead of adhesive (1) with a triangular nozzle directly to the backlite seal starting at bottom in center of the backlite.CAUTION:
Always apply bead of adhesive to the backlite. Always install the backlite within 5 minutes after applying adhesive.
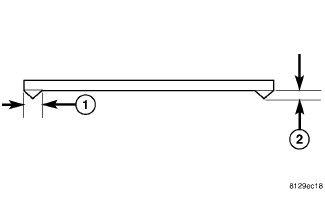
1 - ADHESIVE WIDTH 9.5 mm (0.375 in) 2 - ADHESIVE HEIGHT 12.7 mm (0.50 in) - Bead dimensions should be approximately 9.5 mm wide (1) by 12.7 mm in height (2).
- Allow end of adhesive bead (1) to run out parallel to the start of the bead (2) and smooth ends flush.
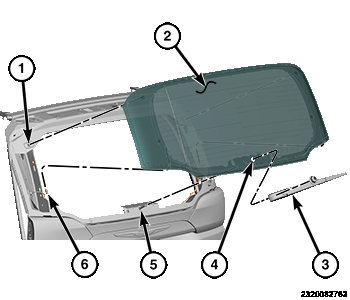
- Position the liftgate glass over the wiper shaft (5) and onto the liftgate.
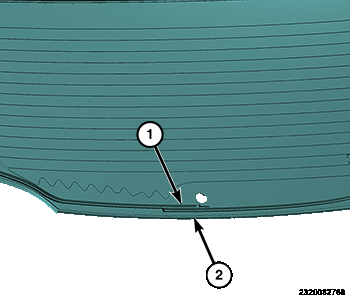
- Position glass in center of liftgate opening and resting on the guide pins (1).
- Use the tape as a guide to aid installation of the glass into the center of the cutout.
- Carefully lay down the glass and press on.CAUTION:
It is no longer possible to move the backlite after installation. The backlite should never be pressed into place by more than one person, because the backlite can break if pressed simultaneously on both sides.
CAUTION:Roll down the left and right front door glass and open the rear glass slider (if available) before installing backlite to avoid pressurizing the passenger compartment if a door is slammed before urethane is cured. Water leaks can result.
- Connect the liftgate glass wire harness connectors (6), if equipped.
- Install the rear wiper arm, if equipped. Refer to ARM, WIPER, REMOVAL AND INSTALLATION .
- Install the liftgate trim panels. Refer to PANEL, TRIM, REMOVAL AND INSTALLATION .
- Install the spoiler. Refer to SPOILER, DECKLID, REMOVAL AND INSTALLATION .