Removal And Installation: Installation
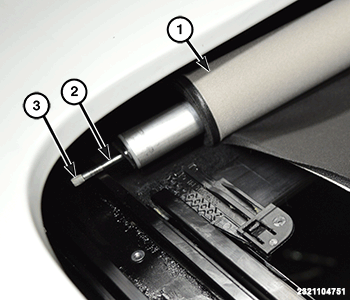
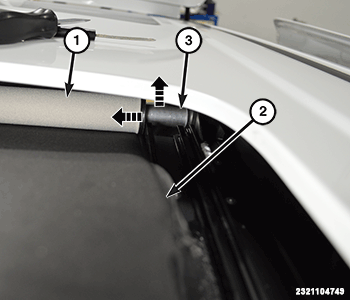
- Locate the flattened end of the steel rod (3) on the right hand side of the sunshade and insert it into the slot in the bracket.
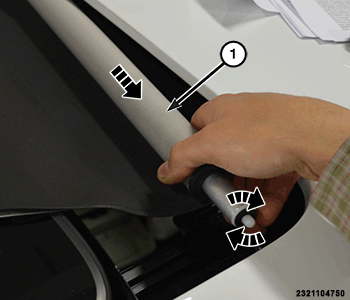
- With the sunshade (1) held firmly, push the sunshade inward to release the sunshade spring lock.
- If the steel pin is pushed in before it engages in the bracket, the sunshade has to be re-wound. Refer to SUNSHADE, SUNROOF, STANDARD PROCEDURE .
- Push the left side of the sunshade (3) down until the white pivot pin snaps into the pivot bracket.
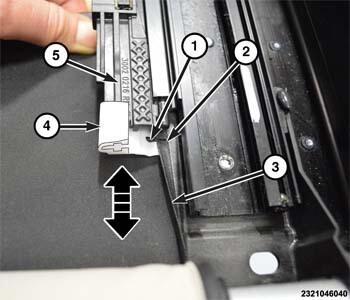
- Insert the white clip (4) with the slot (1) located at the sew line (2). Do this on both sides of the sunshade.
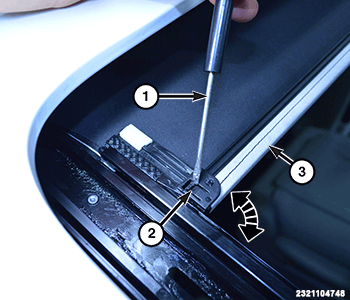
- Extend the front sunshade beam forward and work the fabric (3) under the guide.
- Slide the sunshade and white clips forward onto the guide (5). Do this on both sides of the sunshade.
- Rotate the front sunshade beam (3) onto the retainer until the tab (2) snaps into place.
- Position the rear glass and loosely install the fasteners.
- Tighten the rear glass fasteners to the proper specification. Refer to TECHNICAL SPECIFICATIONS .
- Install the front glass panel. Refer to GLASS, SUNROOF, FRONT, REMOVAL AND INSTALLATION .
- Adjust the glass panes. Refer to GLASS, SUNROOF, REAR, ADJUSTMENTS .