Removal And Installation: Installation
NOTE:
In the event the headliner is damaged or creased during installation, it will need to be replaced with a new headliner.
Use clean gloves or make sure your hands are clean before removing the headliner.
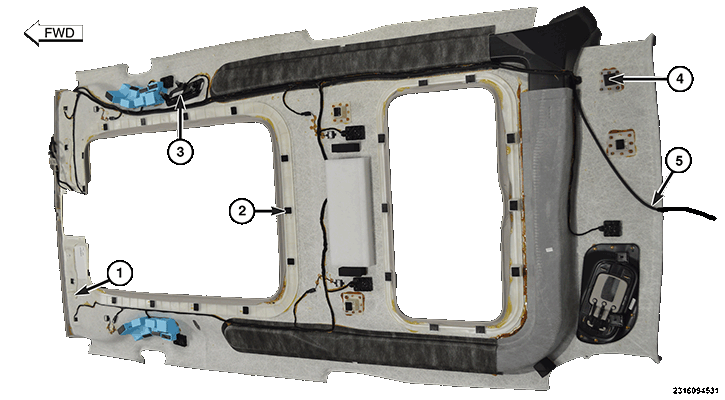
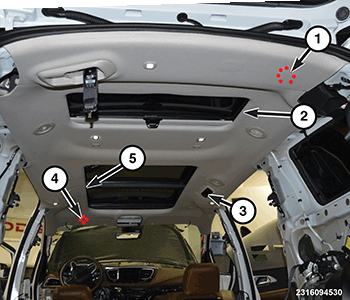
- Headliner shown in illustration lowered for reference. (1) is a locating pin at the front. (2) shows multiple hook and loop fasteners. (3) is the heater control bracket that engages into the roof panel. (4) is the locating pin/push fastener at the rear. (5) is the rear window washer hose.
- With the help of an assistant, position the headliner into the vehicle and connect the rear window washer hose.
- Raise the headliner engaging the front locating pin (4) and the rear locating pin (1).NOTE:
If the vehicle is equipped with a sunroof, there is a safety tether on the right side that needs to be attached to the sunroof frame.
- Engage the heater control bracket (3) into the roof panel, then the hook and loop fasteners around the sunroof openings (2 and 5).
- Engage the remainder hook and loop fasteners.
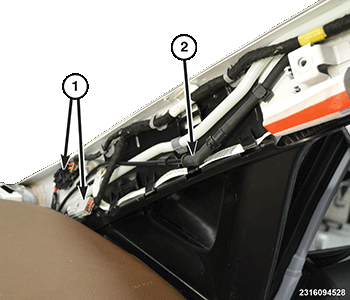
- Connect the wire harness connectors (1) and route the wire harness to the passenger side A-pillar.
- Connect the rear washer hose (2) and route the hose to the passenger side A-pillar.
- Install the rear auxiliary duct.
- Install the passenger side rear quarter trim panel. Refer to PANEL, QUARTER TRIM, REMOVAL AND INSTALLATION .
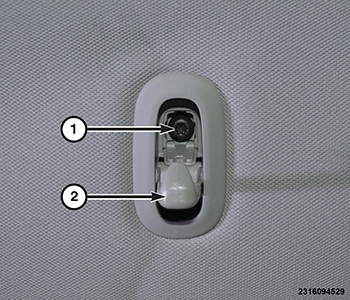
- Install the coat hook (2), screw (1) and the screw cover.
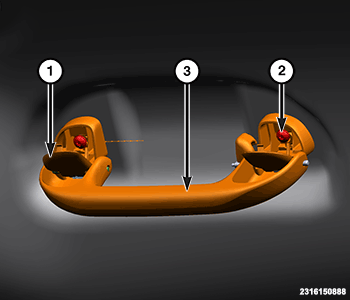
- If equipped with grab handles, Position grab handle (3) in headliner, install the two screws (2) and tighten securely. Install screw covers (1).
- If equipped, install the rear interior camera. Refer to CAMERA, REAR INTERIOR, REMOVAL AND INSTALLATION .
- Install the overhead console. Refer to CONSOLE, OVERHEAD, FRONT, REMOVAL AND INSTALLATION .
- Install the visor supports. Refer to SUPPORT, VISOR, REMOVAL AND INSTALLATION .
- Install the visors. Refer to VISOR, REMOVAL AND INSTALLATION .
- Install the D-pillar trim panels and the D-pillar trim extensions. Refer to PANEL, D-PILLAR TRIM, REMOVAL AND INSTALLATION .
- Install the C-pillar trim panels and the C-pillar trim extensions. Refer to PANEL, C-PILLAR TRIM, REMOVAL AND INSTALLATION .
- Install the upper B-pillar trim panels. Refer to PANEL, B-PILLAR TRIM, UPPER, REMOVAL AND INSTALLATION .
- Install the A-pillar trim panels. Refer to PANEL, A-PILLAR TRIM, REMOVAL AND INSTALLATION .
- Connect the negative battery cable. If equipped with an Intelligent Battery Sensor (IBS), connect the IBS connector.