Removal And Installation: Installation
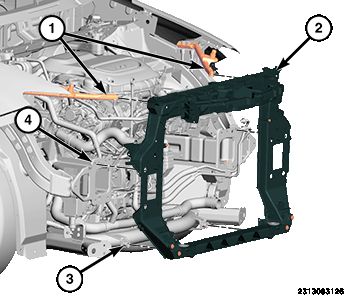
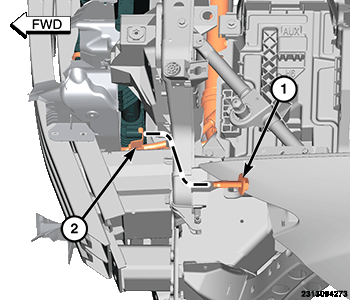
- Position the radiator crossmember (2) onto the upper brackets (1), the front frame rails (4) and the front suspension crossmember (3).
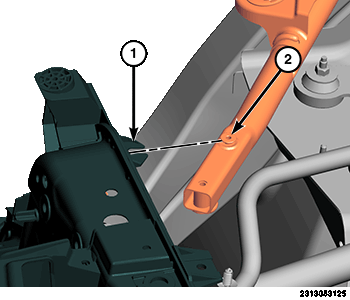
- Engage the upper brackets (1) to the mounting bracket studs (2).
- Install the upper mounting bracket bolts and tighten to the proper torque specifications. Refer to TECHNICAL SPECIFICATIONS .
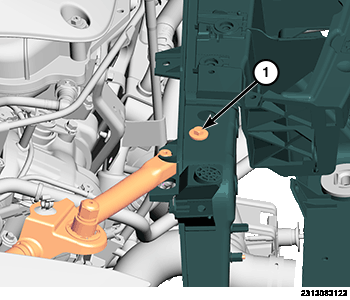
- Install the two lower bolts (1) attaching the crossmember to the front suspension crossmember and tighten to the proper torque specifications. Refer to TECHNICAL SPECIFICATIONS .
- Install the cooling module assembly (1).
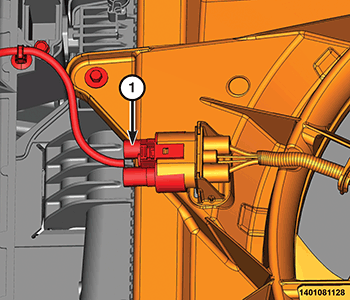
- Connect the cooling fan wire harness connector (1).
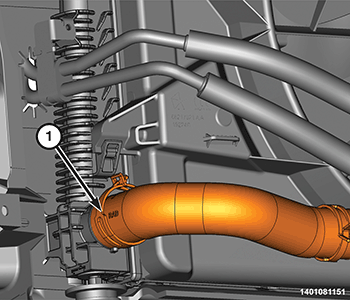
- Install the right side upper radiator hose.
- Install the left side lower radiator hoses (1).
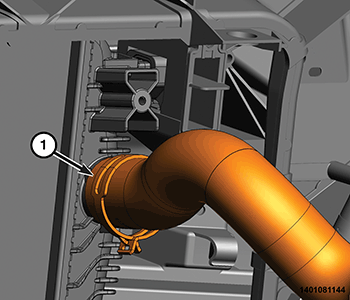
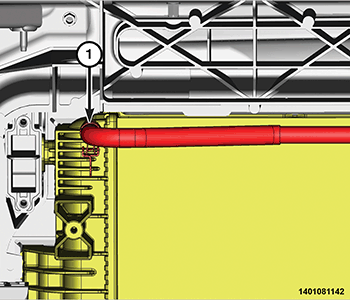
- Install the radiator vent hose (1) onto the radiator.
- Connect the transmission oil cooler lines. Refer to TRANSMISSION, STANDARD PROCEDURE .
- Install the transmission oil cooler support bracket (2) bolt (1) and tighten to the proper torque specifications. Refer to TECHNICAL SPECIFICATIONS
.
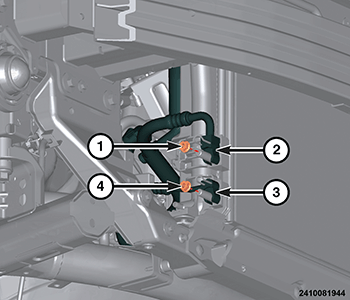
- Using new O-rings and gaskets, connect the A/C discharge line and liquid line (2, 3) to the condenser tapping block.
- Install both A/C discharge and liquid line nuts (1, 4). Tighten the nuts to the proper specification. Refer to TECHNICAL SPECIFICATIONS .
- Install the headlamp assemblies. Refer to UNIT, FRONT LAMP, REMOVAL AND INSTALLATION .
- Install the front bumper. Refer to REINFORCEMENT, BUMPER, FRONT, REMOVAL AND INSTALLATION .
- Connect the negative battery cable.
- Evacuate the refrigerant system. Refer to PLUMBING, FRONT, STANDARD PROCEDURE .
- If the A/C condenser is being replaced, add 30 milliliters (1 fluid ounce) of refrigerant oil to the refrigerant system. When replacing multiple A/C system components, review the Refrigerant Oil Capacities chart to determine how much oil should be added to the refrigerant system. Refer to OIL, REFRIGERANT, STANDARD PROCEDURE . Use only refrigerant oil of the type recommended for the A/C compressor in the vehicle.
- Charge the refrigerant system. Refer to PLUMBING, FRONT, STANDARD PROCEDURE .
- Fill the cooling system. Refer to STANDARD PROCEDURE .