Removal And Installation: Installation
- If the humidity sensor bracket (1) is damaged and cannot be reused, install a NEW windshield. Refer to WINDSHIELD, REMOVAL AND INSTALLATION .
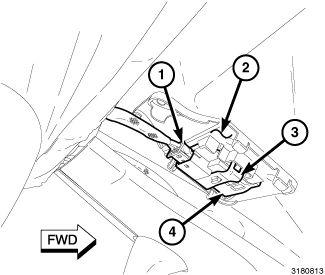
- Connect the wire harness connector (1) to the humidity sensor (4).CAUTION:
Use care when installing the humidity sensor. The humidity sensor bracket cannot be serviced separately from the windshield. If the sensor bracket becomes damaged, the windshield will need to be replaced.
- Position the humidity sensor to the sensor bracket (2) and engage the metal retaining clip (3) to the bracket. Make sure both sides of the retaining clip are fully engaged to the bracket.CAUTION:
Use care when installing the humidity sensor cover. The humidity sensor bracket cannot be serviced separately from the windshield. If the sensor bracket becomes damaged, the windshield will need to be replaced.
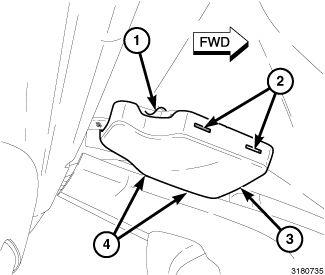
- Carefully install the humidity sensor cover (3) to the sensor bracket (1). Make sure the four retaining tabs (2 and 4) are fully engaged to the bracket.
- Connect the negative battery cable. If equipped with an Intelligent Battery Sensor (IBS), connect the IBS connector.