Removal And Installation: AWD: Installation
NOTE:
Torque all fasteners with the vehicle on the ground at ride height.
- Position the knuckle to the vehicle.
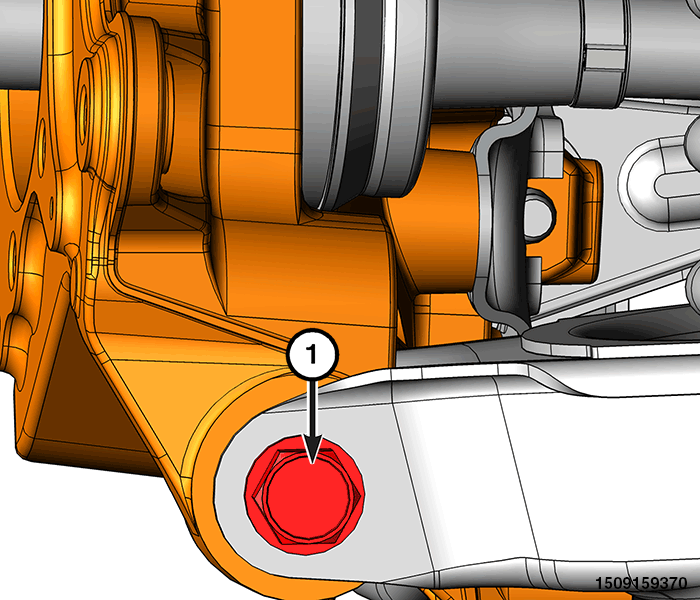
- Install the spring link to knuckle fastener (4). Do not tighten at this time.
- Place a suitable support under the spring link.
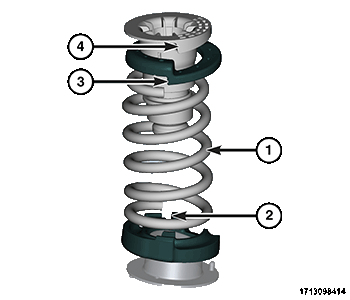
- Install the spring (1), jounce bumper (4), and upper isolator (3) to the spring link by aligning the end of the spring with the notch in the lower isolator (2).
- Connect the shock absorber to the knuckle. Refer to SHOCK ABSORBER, SUSPENSION, REMOVAL AND INSTALLATION .
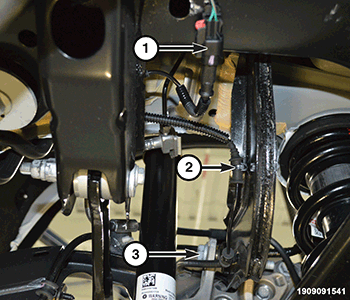
- Install the camber link to knuckle fastener (3). Do not tighten at this time.
- Install the three trailing arm to knuckle fasteners (3) and tighten to the proper torque specifications. Refer to TECHNICAL SPECIFICATIONS .
- Install the shock absorber. Refer to SHOCK ABSORBER, SUSPENSION, REMOVAL AND INSTALLATION .
- Install the toe link. Refer to LINK, TOE, REMOVAL AND INSTALLATION .
- Remove the jack from under the spring link.
- Connect the stabilizer bar link to the knuckle. Refer to LINK, STABILIZER BAR, REMOVAL AND INSTALLATION .
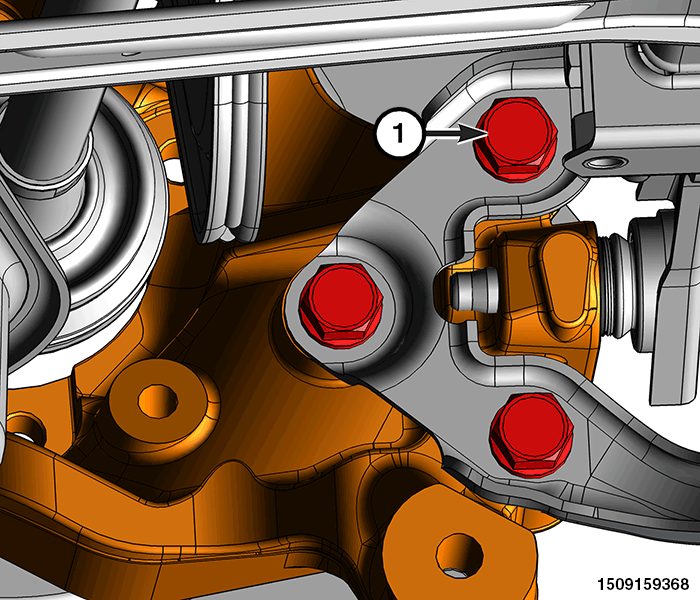
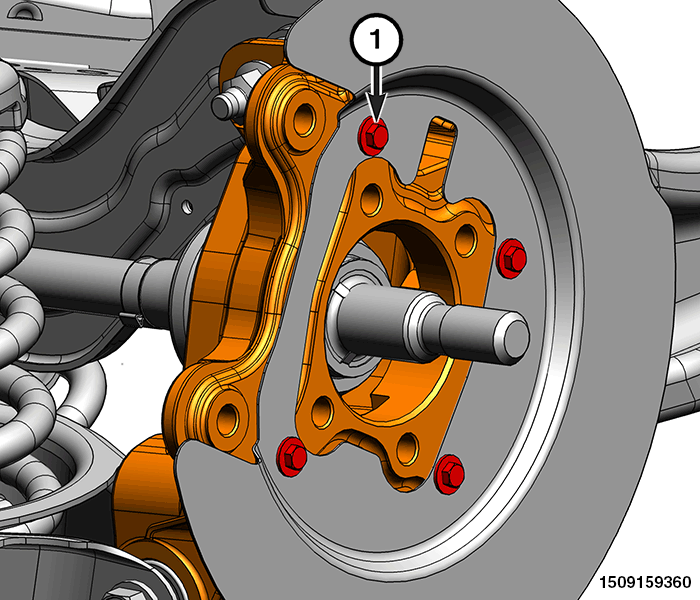
- Install the four splash shield to knuckle mounting fasteners (1) and tighten to the proper torque specifications. Refer to TORQUE SPECIFICATIONS .
- Install the hub and bearing assembly. Refer to HUB AND BEARING, REMOVAL AND INSTALLATION .
- Place the vehicle on an alignment rack. Raise vehicle as necessary to access the fasteners.
- Tighten the spring link to knuckle mounting fastener to the proper torque specification. Refer to TECHNICAL SPECIFICATIONS .
- Tighten the camber link to knuckle mounting fastener to the proper torque specification. Refer to TECHNICAL SPECIFICATIONS .
- Tighten the trailing arm to knuckle mounting fasteners to the proper torque specification. Refer to TECHNICAL SPECIFICATIONS .
- Perform a four wheel alignment. Refer to WHEEL ALIGNMENT, STANDARD PROCEDURE .