With HVAC Housing: Installation
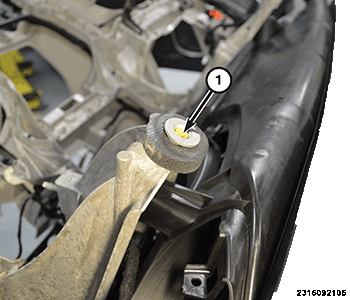
- Verify that the two bushings (1) are fully screwed in and rotate freely.NOTE:
Inspect the bushings and replace if necessary.
- Position the instrument panel (I/P) into the vehicle, making sure the Heating Ventilation and Air Conditioning (HVAC) is positioned to the front dash properly.NOTE:
Make sure that all wiring harnesses are routed properly and are not pinched when installing the instrument panel.
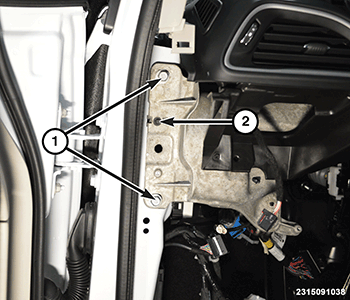
- Install the instrument panel carrier bolts (1) on both sides of the vehicle and tighten to the proper torque specifications. Refer to TECHNICAL SPECIFICATIONS .
- Install the instrument panel dash bolts (1) on both sides of the vehicle and tighten to the proper torque specifications. Refer to TECHNICAL SPECIFICATIONS .
- Connect the wire harness connectors (2) at the A-pillars, on both side of the vehicle.
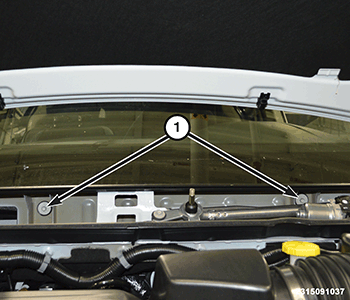
- Install the instrument panel cowl bolts (1), under the cowl cover panel and tighten to the proper torque specifications. Refer to TECHNICAL SPECIFICATIONS .
- Install the floor duct extension (2) and the push fasteners (1).
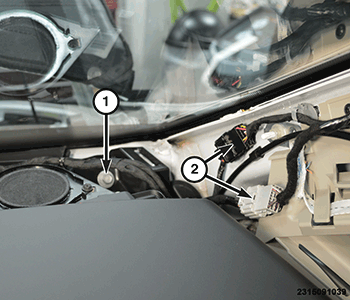
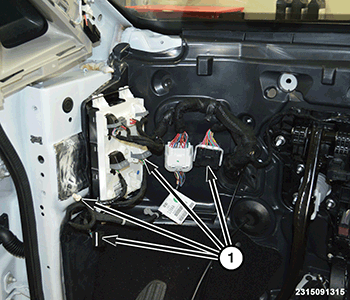
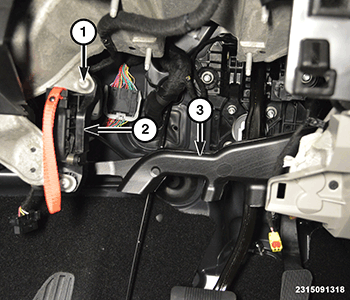
- Under the left side of the I/P connect the wire harness connectors (1).NOTE:
This is shown in illustration with the I/P removed for better clarity.
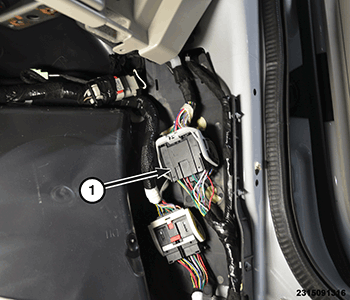
- Under the right side of the I/P connect the wire harness connector (1). If equipped with rear entertainment, connect the USB connectors in this location also.
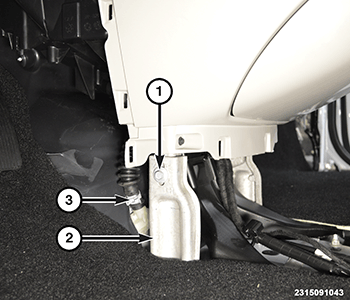
- Connect the HVAC drain hose (3).
- Install the I/P support bracket (2) and tighten securely.
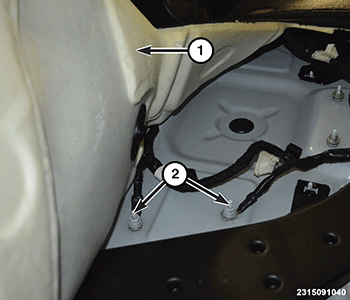
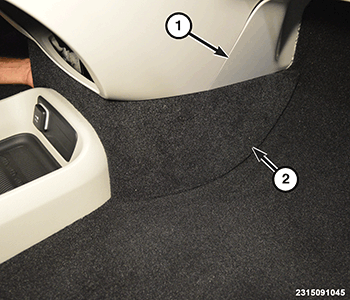
- Pull the passenger side floor carpet (1) back, then route grounding wires and install the nuts (2). Clip the wire harness to the body.
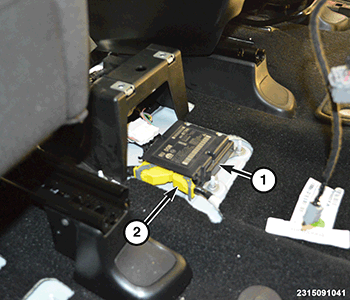
- Connect the wire harness connector (2) to the air bag module (1).
- Install the manual park release lever (2) the two bolts (1). Tighten the bolts securely.
- Install the drivers side floor heat duct (3) and the push fasteners.
- Install the drivers knee airbag. Refer to AIR BAG, KNEE BLOCKER, REMOVAL AND INSTALLATION .
- Install the steering column. Refer to COLUMN, REMOVAL AND INSTALLATION
.
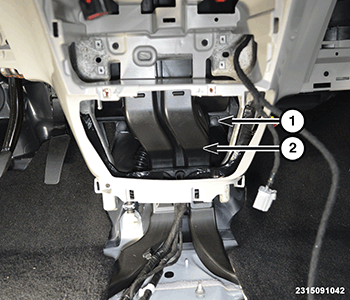
- Install the I/P trim panels (1) and (2).
- Install both A-pillar trim panels. Refer to PANEL, A-PILLAR TRIM, REMOVAL AND INSTALLATION .
- Install the defroster grill. Refer to GRILLE, DEFROSTER, REMOVAL AND INSTALLATION .
- Install the instrument panel bin. Refer to BIN, INSTRUMENT PANEL, REMOVAL AND INSTALLATION .
- Install the floor console. Refer to CONSOLE, FLOOR, REMOVAL AND INSTALLATION .
- Install the cowl cover panel. Refer to COVER, COWL PANEL, REMOVAL AND INSTALLATION .
- Working under the hood, connect the two heater core hoses to the dash.
- Fill the cooling system. Refer to STANDARD PROCEDURE .
- Install the A/C expansion valve. Refer to VALVE, A/C EXPANSION, REMOVAL AND INSTALLATION or VALVE, A/C EXPANSION, REMOVAL AND INSTALLATION .