Removal And Installation: Installation

NOTE:
Typical piston shown in illustration.
- If required, fit new rings to the piston. Refer to RING(S), PISTON, STANDARD PROCEDURE .CAUTION:
To avoid damage to the piston rings, they must be installed in the following order:
- Oil ring expander (5)
- Oil ring lower side rail (4)
- Oil ring upper side rail (3)
- No. 2 (intermediate) piston ring (2)
- No. 1 (upper) piston ring (1)
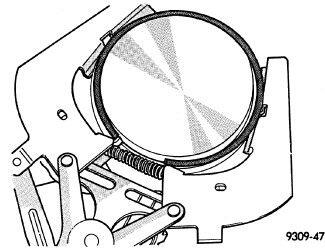
NOTE:Typical piston shown in illustration. Do not use a piston ring expander to install the oil ring side rails.
- Install the oil ring expander (1).
- Install the oil ring lower side rail by placing one end between the piston ring groove and the oil ring expander. Hold this end firmly and press down the portion to be installed until the side rail is in position.
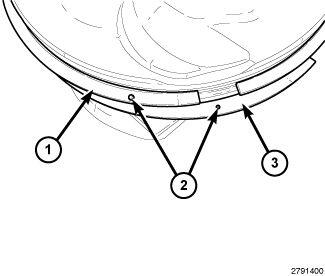
- Install the oil ring upper side rail in the same manner as the lower side rail.NOTE:
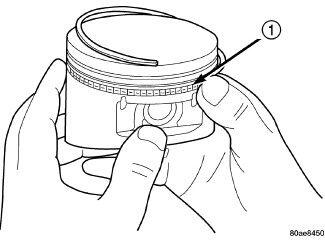
The No. 1 (upper) piston ring (1) and No. 2 (intermediate) piston ring (3) have a different cross section. Install the rings with manufacturers I.D. mark (dot) (2) facing up, towards the top of the piston.
NOTE:Typical piston shown in illustration.
- Install the No. 2 (intermediate) piston ring using a ring expander tool.
- Install the No. 1 (upper) piston ring using a ring expander tool.
- Rotate the rings around the piston, the rings must rotate in the grooves with out binding.
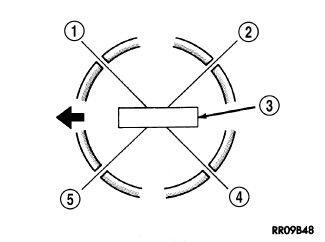
- Position the piston ring end gaps as follows:
- Oil ring expander gap (5)
- Oil ring lower side rail end gap (4)
- Oil ring upper side rail end gap (1)
- No. 2 (intermediate) ring end gap (5)
- No. 1 (upper) ring end gap (2)
- Install the piston and connecting rod(s). Refer to ROD, PISTON AND CONNECTING, REMOVAL AND INSTALLATION .