Removal And Installation: Downstream: Installation
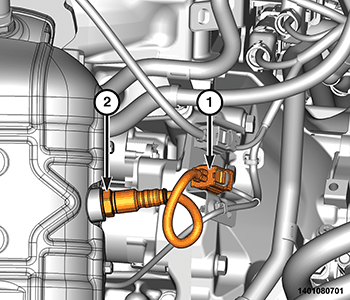
LEFT SIDE
- If reinstalling the original oxygen sensor, coat the sensor threads with an anti-seize compound such as Loctite 771- 64 or equivalent. New sensors have compound on the threads and do not require an additional coating. Do Not add any additional anti-seize compound to the threads of a new oxygen sensor.
- Install the left side oxygen sensor (2) and tighten to the proper torque specifications. Refer to FUEL INJECTION, GAS, TECHNICAL SPECIFICATIONS .
- Connect the left side oxygen sensor wire harness connector (1).
- Install the belly pan. Refer to BELLY PAN, ENGINE, REMOVAL AND INSTALLATION or BELLY PAN, FRONT, REMOVAL AND INSTALLATION .
- Remove the support and lower the vehicle.
- Connect the negative battery cable.
RIGHT SIDE
- If reinstalling the original oxygen sensor, coat the sensor threads with an anti-seize compound such as Loctite 771- 64 or equivalent. New sensors have compound on the threads and do not require an additional coating. Do Not add any additional anti-seize compound to the threads of a new oxygen sensor.
Remove the belly pan. Refer to BELLY PAN, ENGINE, REMOVAL AND INSTALLATION or BELLY PAN, FRONT, REMOVAL AND INSTALLATION .
- Install the right side oxygen sensor (2) and tighten to the proper torque specifications. Refer to FUEL INJECTION, GAS, TECHNICAL SPECIFICATIONS .
- Connect the right side oxygen sensor wire harness connector (1).
- Install the belly pan. Refer to BELLY PAN, ENGINE, REMOVAL AND INSTALLATION or BELLY PAN, FRONT, REMOVAL AND INSTALLATION .
- Remove the support and lower the vehicle.
- Connect the negative battery cable.
