With Intermediate Shaft: Removal
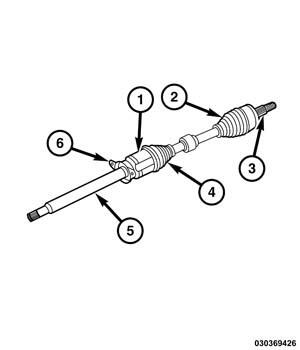
Never Handle The Halfshaft Assembly By The Inner Or Outer Boots (2 And 4). This Can Cause Damage To The Boot, Which Will Allow Contaminants To Enter The Constant Velocity (Cv) Joint.
The Inner Tripod Joint (1) Is Designed With A Retention Feature That Prevents The Tripod Rollers From Coming Out Of The Inner Joint Housing Up To A Specific Load. If This Feature Is Overcome And The Rollers Are Pulled Past The Retention Feature The Joint Will Lock Up And No Longer Function Properly. The Entire Halfshaft Assembly (3) Must Be Replaced If This Occurs.
- Raise And Support The Vehicle. Refer To Hoisting, Standard Procedure .
- Remove The Tire And Wheel Assembly. Refer To Removal And Installation
.
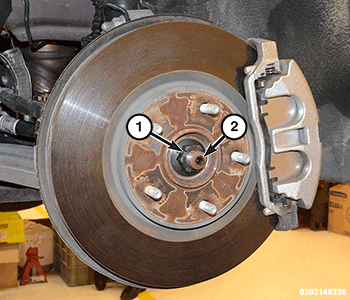
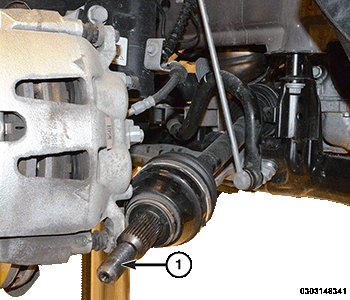
- While A Helper Applies The Brakes To Keep The Hub From Rotating, Remove And Discard
The Hub Nut (1) From The Halfshaft (2).NOTE:
The Hub Nut Is Not Reusable.
- If Equipped, Remove The Engine Belly Pan. Refer To Belly Pan, Engine, Removal And Installation
.
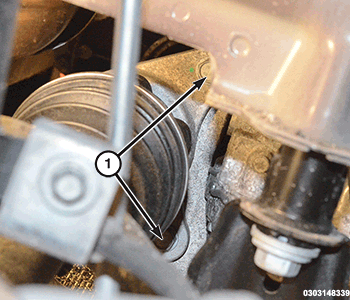
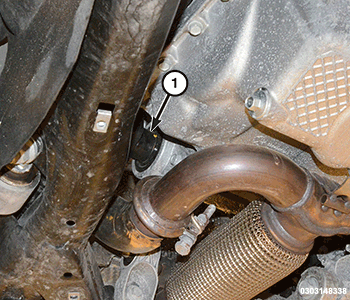
- Remove The Intermediate Shaft Bracket To The Engine Block Bolts (1).NOTE:
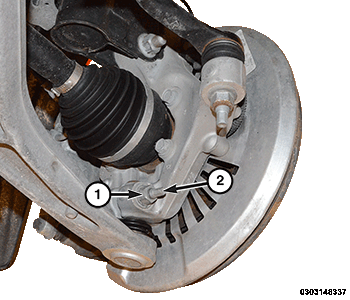
Use Care When Separating The Ball Joint Stud From The Knuckle So The Ball Joint Boot Is Not Damaged Or Torn During Removal.
- Remove And Discard
The Lower Ball Joint Pinch Bolt (2) And Nut (1).NOTE:
The Halfshaft May Stick In The Hub Bearing During Removal. A Dead-Blow Or Plastic Hammer Can Be Used To Tap The Halfshaft Inward And Out Of The Hub Bearing.
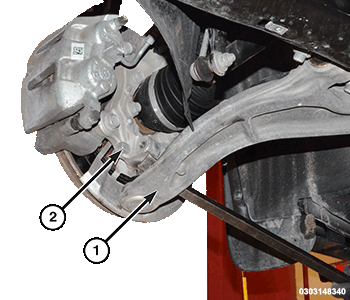
NOTE:After Separating The Control Arm From The Knuckle, Use Care Not To Allow The Control Arm To Rebound Rapidly And Tear The Ball Joint Dust Boot.
- Pry Down On The Control Arm (1) Until The Ball Joint Stud Is Clear Of The Knuckle (2). Position The Knuckle Assembly To The Side Until It Is Clear Of The Ball Joint Stud. Slowly Release The Control Arm.
- Swing The Steering Knuckle Outward And Off The Halfshaft End (1).
- Place A Drain Pan Under The Transmission To Catch Any Fluid That May Spill From The Transmission When The Halfshaft (1) Is Removed.
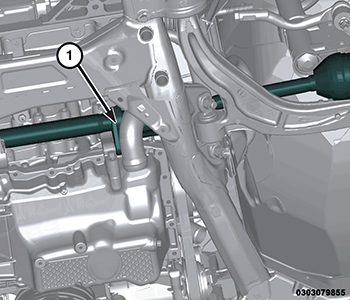
- Remove The Halfshaft From The Vehicle By Carefully Prying The Intermediate Bearing Bracket (1) From The Intermediate Bracket While Supporting The Halfshaft.