Transfer Gear Inner Bearing Race: Removal
WARNING:
Always wear safety glasses when cleaning, disassembling and assembling the transmission/transaxle. Contents of the transmission/transaxle can become projectiles (e.g., springs, snap-rings, as well as metal and other debris). Failure to wear safety glasses may result in severe personal injury.
Before disassembling the transmission, remove oily grime and loose dirt. Place the transmission on a clean work surface with ample fluid drainage or absorbency.
- Remove the transmission from the vehicle. Refer to REMOVAL AND INSTALLATION .
- Remove the bellhousing. Refer to BELLHOUSING, REMOVAL AND INSTALLATION .
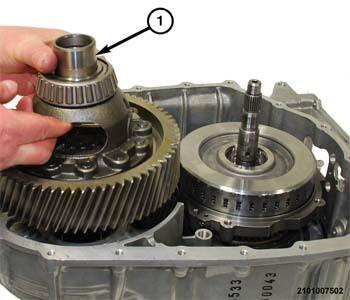
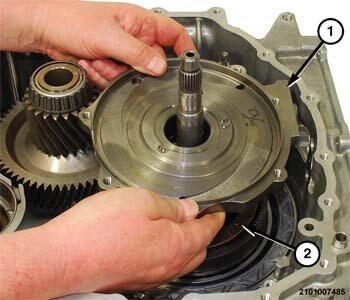
- Remove the differential assembly (1) from the transmission housing.
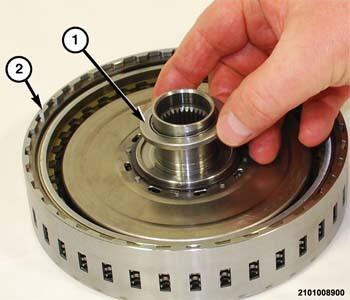
- Separate the E-clutch drum (1) from the E-clutch assembly (2).
- Separate the thrust bearing (1) from the E-clutch (2) assembly.
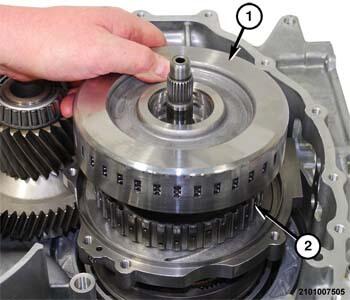
- Separate the E-clutch assembly (1) from the output gear support (2).
- Separate the output gear support (1) from the pinion gear carrier 4 (2).
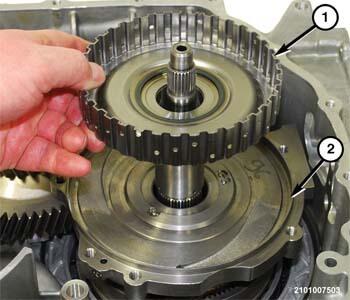
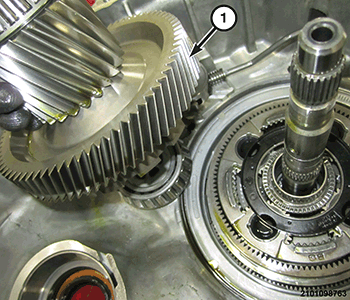
- Remove the transfer gear (1) from the transmission housing.
- Clean the transfer gear with solvent and blow it dry with regulated 344 kPa (50 psi) shop air.
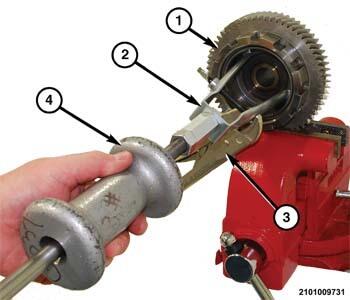
- Clamp the transfer gear (1) in a suitable bench vise with protective jaws.NOTE:
It may be necessary to clamp vise grips (3) on the seal remover (2) to keep the expander screw in place.
- Using tool (special tool #C-637, Slide Hammer, Universal) (4) and (special tool #7794-A, Remover, Seal) (2) with the jaws expanded out under the inner edge on the bearing race.
- Knock outward with the slide hammer (4) until the bearing race comes out of the transfer gear (1).