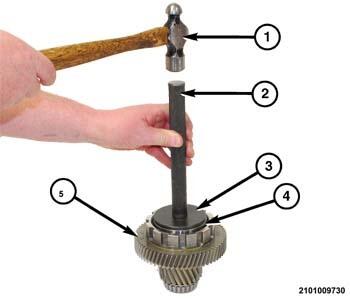
Transfer Gear Inner Bearing Race: Installation
- Using a clean lint free cloth, wipe the transfer gear bore clean. Inspect the bore for burrs or other damage. Use crocus cloth the dress down burrs.
- Place the transfer gear on the stable, clean work surface.
- Place the NEW bearing race (4) in the transfer gear bore.
- Using a suitable hammer (1) and tool (special tool #9588, Installer, Bearing Cup) (3) with (special tool #C-4171, Driver Handle, Universal) (2), drive the bearing race into the transfer gear until it is fully seated against the bottom surface.
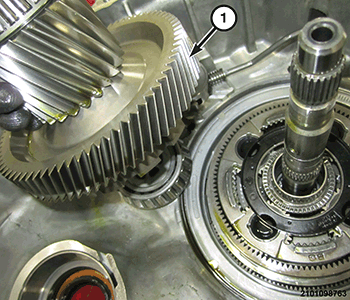
- Install the transfer gear (1) into the transmission housing.
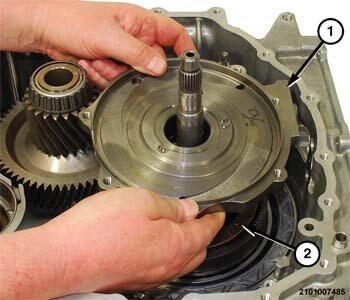
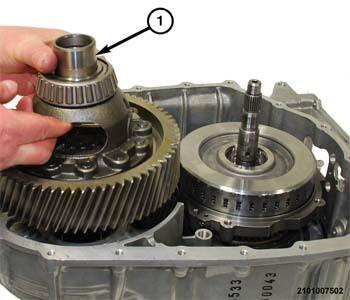
- Install the output gear support (1) into the pinion gear carrier 4 (2).
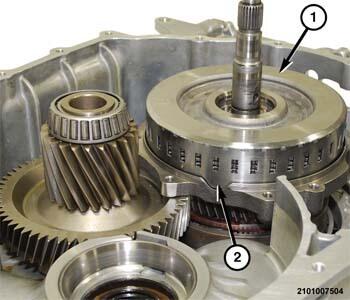
- Install the E-clutch assembly and shaft (1) in the output gear support (2).
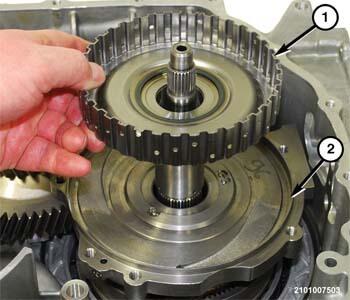
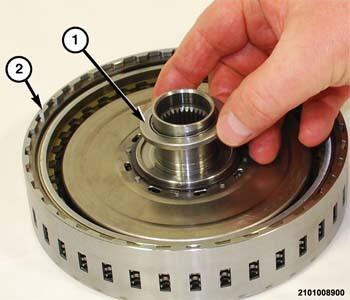
- Install the thrust bearing (1) on the E-clutch (2) assembly.NOTE:
Before installing the E-clutch, use a suitable screwdriver to align the grooves in the friction discs.
- Wriggle the E-clutch (1) until all of the friction discs are fully engaged on the E-clutch assembly and shaft.NOTE:
When the E-clutch (1) is fully seated the gap (2) will be very small between the E-clutch retainer and the output gear support.
NOTE:If a new differential (1) or transmission housing are being used, measurements must be preformed to determine correct thickness for the bearing preload shims. If the bearings and races are replaced the factory installed preload shims do not require replacement. Refer to STANDARD PROCEDURES .
- If necessary, replace the bearings and races on the differential (1).
- Install the differential assembly (1) into the transmission housing.
- Install the bellhousing. Refer to BELLHOUSING, REMOVAL AND INSTALLATION .
- Install the transmission in the vehicle. Refer to REMOVAL AND INSTALLATION .
- Road test the vehicle to verify the repair.