Removal And Installation: Removal
Hoisting and jack lift points provided in this information are for a complete vehicle. When the transaxle is removed, the center of gravity will shift to the rear of the vehicle, possibly creating an unstable condition. Place safety stands under the rear frame rails behind the rear axle to stabilize the vehicle. Personal injury may result if safety stands are not used.
- Remove the engine cover. Refer to COVER, ENGINE, REMOVAL AND INSTALLATION .
- Remove the battery tray. Refer to TRAY, BATTERY, REMOVAL AND INSTALLATION
.
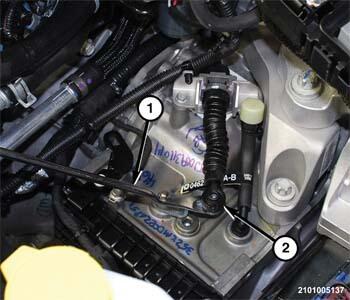
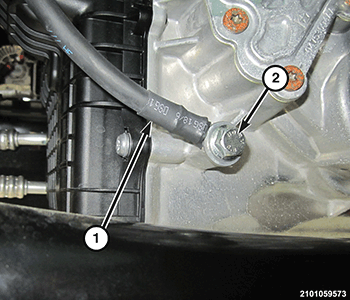
- Using a suitable prying tool (1), separate the Manual Park Release (MPR) cable end (2) from the MPR lever on the transmission.
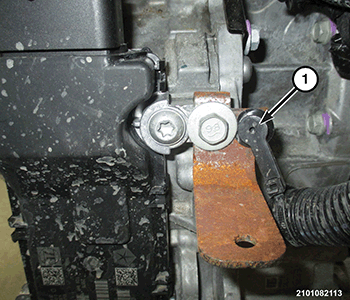
- Remove the bolts (1) from the MPR cable bracket.
- Position the MPR cable (1) and bracket aside.
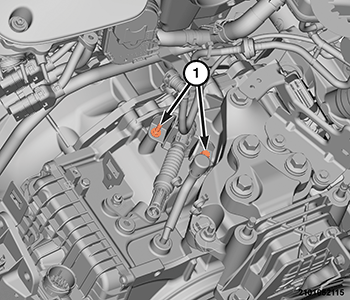
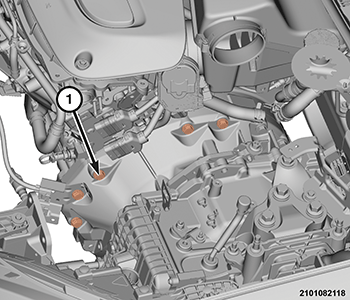
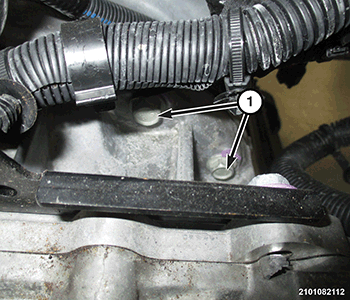
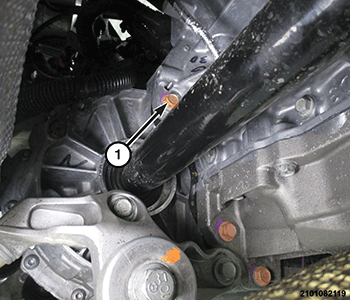
- Remove the nuts (1) securing the cooling hose to the transmission.
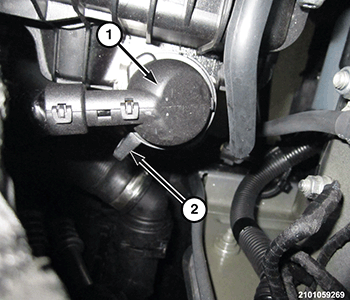
- Disconnect the transmission wire harness connector (1) from the transmission by rotating the lock lever (2) counterclockwise.
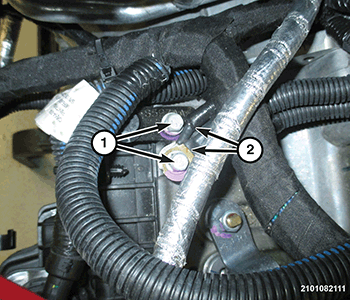
- Remove the bolts (1) from the wire harness (2) and position aside.
- Remove the Left Hand (LH) and Right Hand (RH) half shafts. Refer to REMOVAL AND INSTALLATION
.
- Remove the ground cable bolt (2) and position the ground cable (1) aside.
- Remove the cowl panel cover. Refer to COVER, COWL PANEL, REMOVAL AND INSTALLATION
.
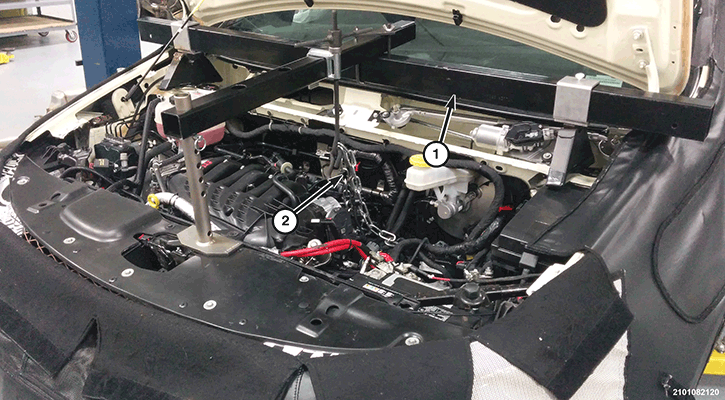
- Install the Driveline Support Fixture (special tool #8534C, Fixture, Driveline Support) (1) and chain (2).
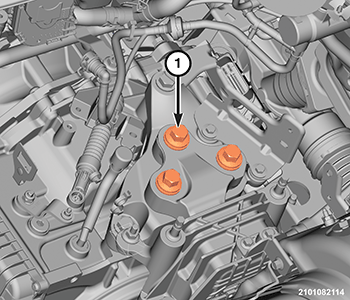
- Remove the transmission mount adaptor bolts (1).
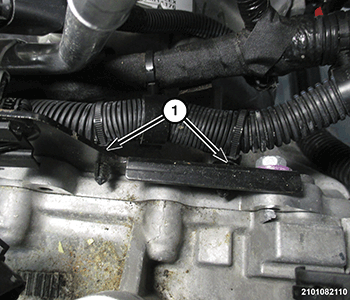
- Remove the wiring harness push pins (1) from the bracket.
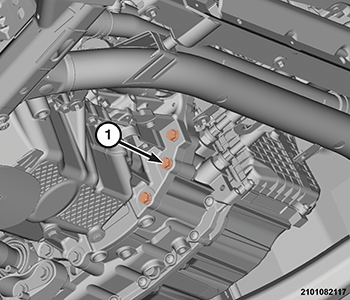
- Remove the starter bolts and the transmission to engine bolts (1).
- Remove the transmission to engine bolts (1).
- Raise and support the vehicle. Refer to HOISTING, STANDARD PROCEDURE .
- If equipped, remove the Power Transfer Unit. Refer to REMOVAL AND INSTALLATION .
- Remove the front crossmember. Refer to CROSSMEMBER, FRONT SUSPENSION, REMOVAL AND INSTALLATION .
- Separate the cooler lines from the transmission. Refer to TUBES AND HOSES, TRANSMISSION OIL COOLER, STANDARD PROCEDURE
.
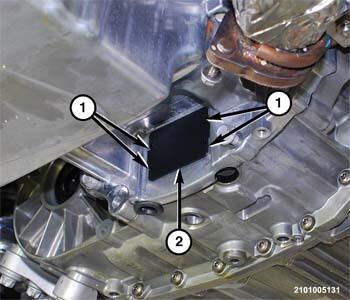
- Remove the torque converter bolt access cover (2).NOTE:
There are three pairs of bolts 120° apart attaching the flexplate to the torque converter.
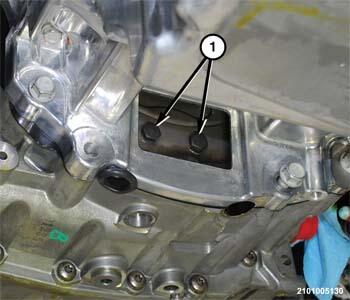
- Through the access door opening, remove the torque converter bolts (1). Rotate the crankshaft to bring each set of bolts into view through the access door.
- Remove the wiring harness push pin (1) from the bracket.
- Position a suitable transmission jack under the transmission and secure the transmission to the lift plate of the transmission jack.
- Remove the engine to transmission bolts (1).
- Remove the engine to transmission bolts (1).CAUTION:
The transmission and torque converter must be removed as an assembly to avoid component damage. The converter driveplate, oil pump, or oil seal can be damaged if the converter is left attached to the driveplate during removal. Be sure to remove the transmission and converter as an assembly.
- Using a suitable prying tool, pry the bell housing away from the engine block.
- Remove the transmission from the vehicle.